Universal Tabletop Spool Holder
thingiverse
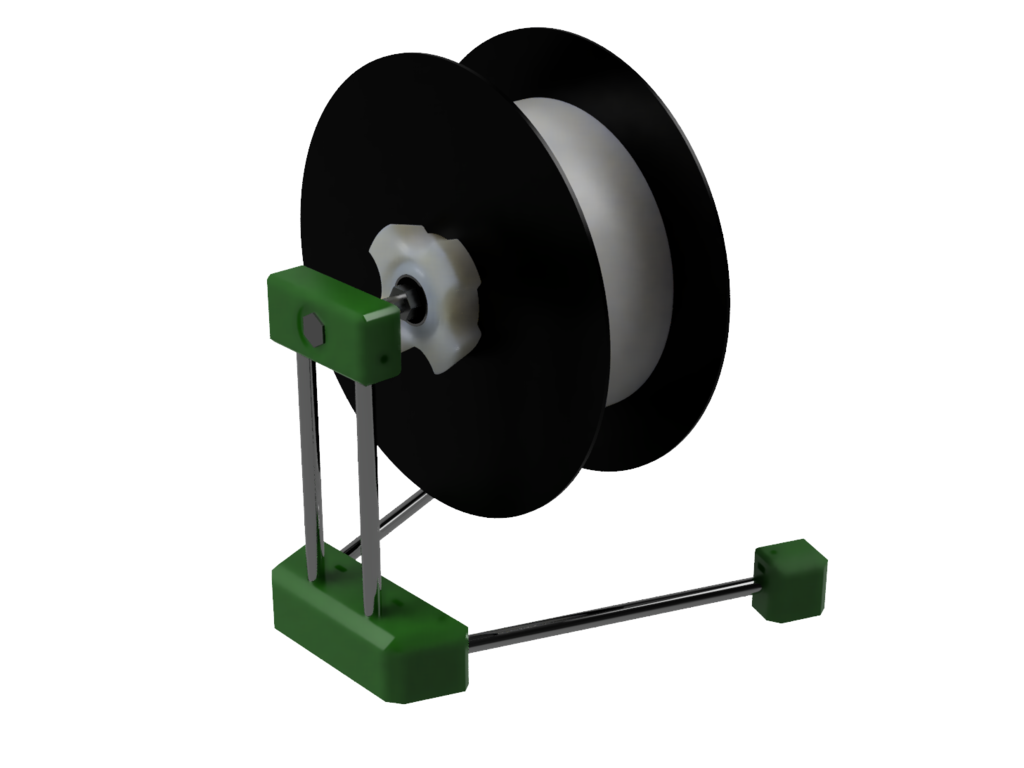
This design is based on the following model: https://www.thingiverse.com/thing:1241566 **Materials:** PETG or PETG+PLA; optional FLEX(TPU) for the feet **Supports:** Not required **Print settings:** 30% infill; 0.25 layer height; Printed on Original Prusa Mini **Hardware:** 1. 1x M8x160mm hex bolt (spool axis inner bolt) 2. 5x M8 hex nuts (1x for spool axis fastening, 4x аs horizontal move limiters of printed spool bolt/nut; 2x nuts tightened up against each other in different directions) 3. 2x 8mm x 160mm metal rod/pipe (for vertical spool holder arm) 4. 2x 8mm x 200mm metal rod/pipe (for spool holder legs) 5. (optional) 2x 608 bearings (for printed bolt/nut) 6. (optional) 2x M4x25 or longer (for reinforcement of metal rods fastening) 7. (optional) 6x M4x12 or longer (for reinforcement of metal rods fastening) 8. (optional) 8x M4 nuts (optional, for reinforcement of metal rods fastening) **Printing/Assembly:** 1. Print "Spool_Axis_Bolt" and "Spool_Axis_Nut" parts. The material is not so important here, PLA or PETG will be fine. - Alternatively, if you want to use bigger spools, other variants of spool axis bolt/nut can be used from the original model https://www.thingiverse.com/thing:1241566 . Take a note that in case of bigger spool axis bolt you need longer spool axis M8 bolt too. 2. (Optional) Push in two 608 bearings to the "Spool_Axis_Bolt" part 3. Print "Top_Joint", "Stand_Base" and 2x "Leg" parts. Recommended material is PETG. This part will withstand a lot of force from the weight of the filament spool. 4. Use 200mm metal rods to connect "Stand_Base" and two "Leg" parts. If available, use M4 bolts and nuts to fasten rods to the parts. NOTE: Rods will fit tightly with the stock clearances, a little bit of gentle hammering may be required 5. (Optional) Print 4x "Foot" parts with flexible filament (100% infill) and glue them to the outlined areas of "Stand_Base" and "Leg" parts. (CA glue should be fine) 6. Connect "Stand_Base" and "Top_Joint" parts with the two 160mm rods. If available, use M4 bolts and nuts to fasten rods to the parts. (longer bolts needed to fasten rods to the "Stand_Base" part). NOTE: Rods will fit tightly with the stock clearances, a little bit of gentle hammering may be required 7. Fit M8x160mm bolt to the "Top_Joint" part and fasten it from the other side with M8 Nut 8. Use 2 nuts to create first limiter on the M8 spool axis bolt 9. Fit "Spool_Axis_Bolt" part on the M8 spool axis bolt 10. Use 2 nuts to create second limiter on the M8 spool axis bolt, so that "Spool_Axis_Bolt" part will be fixed on the axis. Using M8 nut limiters you can adjust how easy will spool rotate 11. You are done, put your spool on the "Spool_Axis_Bolt" and fasten it with "Spool_Axis_Nut" part
With this file you will be able to print Universal Tabletop Spool Holder with your 3D printer. Click on the button and save the file on your computer to work, edit or customize your design. You can also find more 3D designs for printers on Universal Tabletop Spool Holder.