Complete upgrade set for Tamiya Super Clod Buster
prusaprinters
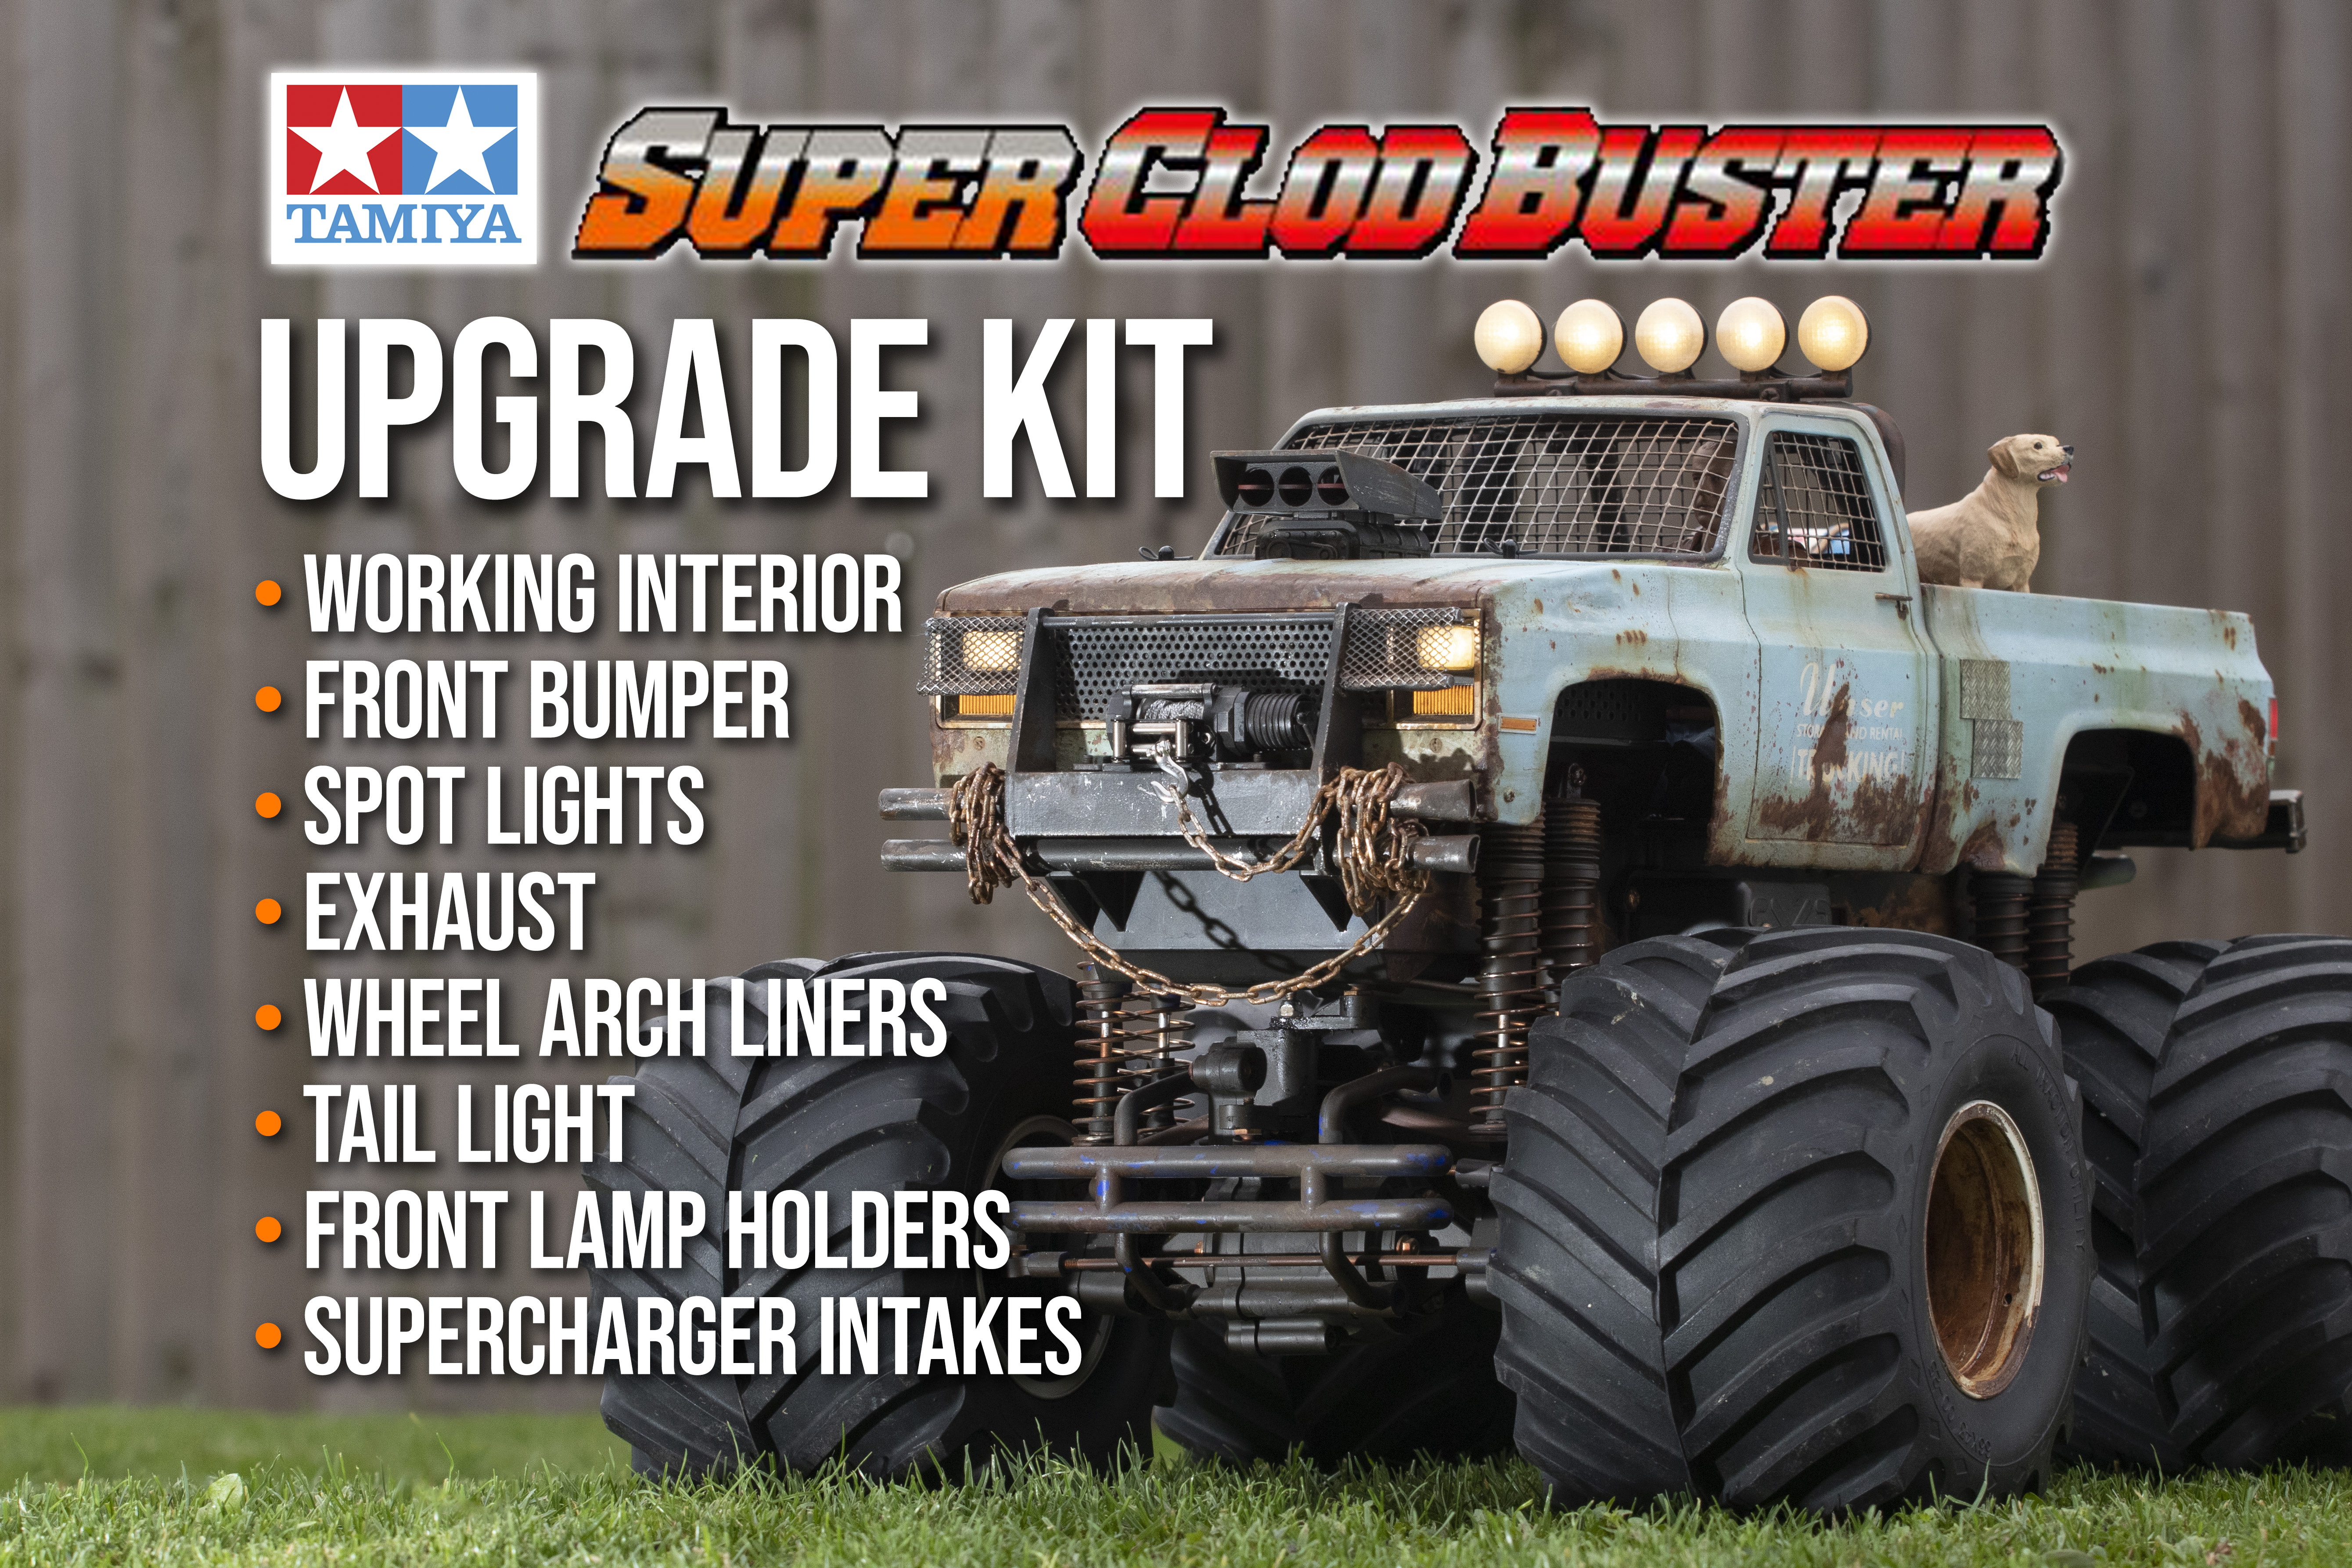
<p>After getting a Tamiya Clod Buster for my birthday, I wanted to make something more unique as it looked a bit toyish, so started coming up with ideas of things I could design and print. </p><p>I've learned loads while designing these, and really enjoying being able to create unique parts, exactly as I want them; now I've ended up with a complete upgrade set, I really hope other people can get some fun out of them.</p><p>All the parts glue together easily, or screw direct to the original parts, using spare screws that come with the kit. </p><figure class="media"><oembed url="https://youtu.be/aut3IMEtn18"></oembed></figure><p> </p><p><strong>Here are all the parts you can make from this set:</strong></p><ul><li>Interior with seat, dash (based loosely on 1985 Ford F150), new floorpan and instruments artwork (the standard Clod Buster has no interior at all).</li><li>Front bumper that mounts directly in place of original with space for a winch</li><li>Clear auxiliary spot lamp covers</li><li>Clips for front LEDs</li><li>Rear tail lights with space for LEDs</li><li>Rear panel for exhausts</li><li>Wheel arch liners</li><li>Supercharger intake</li></ul><p><strong>Build notes:</strong></p><ul><li>The floor pan has lugs for cables if you want them, and screws directly in place of the original.</li><li>The seat glues to the floor pan, using the groove to align the back of the seat for the perfect position.</li><li>The dash screws to the floor pan using spare screws from the Tamiya kit.</li><li>I've included the PDF of the artwork I did for the instruments. Two 5mm LEDs push into the back to light it up, but I'd suggest some tape along the top of the inside of this area to stop the LEDs illuminating the top of the dash. The instruments artwork is intended to stick onto a clear-printed part.</li><li>The servo I used for the steering is this one: <a href="https://www.componentshop.co.uk/9g-micro-servo-48v-6-0v.html">https://www.componentshop.co.uk/9g-micro-servo-48v-6-0v.html</a> I've not put screw holes in the dash so you can choose your own mounting points.</li><li>The bumper prints in two halves and glues together, the 8mm brass tube and 2.5mm brass rod keeping it all nipped up tight. I used the brass from Albion Alloys. There's only one file here, but just copy it and flip it on your printer's bed to get both halves (I hadn't learned to flip a duplicate of a body in Fusion 360 at this point!)</li><li>The exhaust panel also uses the 8mm brass tube.</li><li>The wheel arch liners have options with holes, in case you have a sound unit fitted.</li><li>The butterflies for the supercharger intake clip and glue behind the cover piece. Drill or cut out the original where the sticker usually goes, then glue this in place.</li><li>To fit the rear taillights, cut out inside the lip on either side of the body, then pop these in from the inside and glue them. They're set up to print clear, then a solid colour to stop the taillight LED from illuminating the indicator section, then clear again.</li><li>The spot light covers have a fill pattern set to create the look of a lamp lens.</li></ul><p>I did the rust effect by mixing iron powder with Vallejo matt varnish, then painting it on. Once it's dry, paint it with vinegar (I use a solution of salt and vinegar), pop the part in a sealed plastic bag, then after 24 hours it's rusty!</p><p>I really hope you like these prints – please do post any pics if you can, and let me know if you have any questions.</p>
With this file you will be able to print Complete upgrade set for Tamiya Super Clod Buster with your 3D printer. Click on the button and save the file on your computer to work, edit or customize your design. You can also find more 3D designs for printers on Complete upgrade set for Tamiya Super Clod Buster.