Concert Ukulele
thingiverse
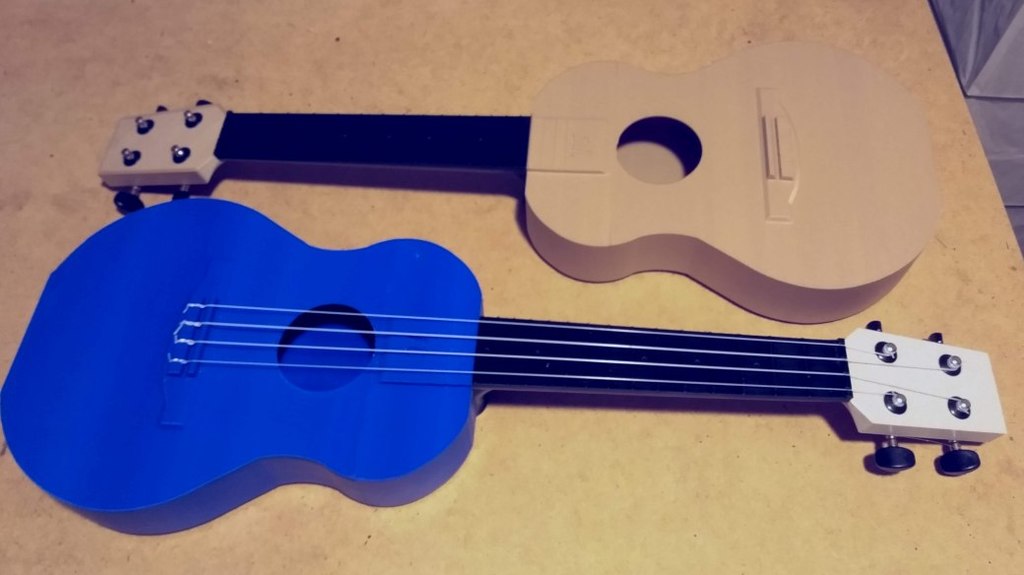
### 31st December 2021 modification to v4 I've added a v4 BodyBot as I found that v3 was slowly distorting across the bridge over time. v4 uses cross-bracing (similar to acoustic guitars) rather than the naive linear bracing I used with v3. The other parts are unchanged, so I've left them as v3, i.e. download v4_BodyBot and v3 of everything else for one ready to print ukulele! ### Some quick notes added after a week of playing this: 1. The intonation is nearly perfect, so I'm happy with this revision as an instrument! I play this every day, and really enjoy it. Again, the action is soft and low, and it's not the best sustain, but good for beginners and a bit beyond. Or of course just saying "3D printed ukulele" 2. The wood-filled PLA gives a warmer but quieter sound than pure PLA, so if you want a bright louder sound, use pure PLA rather than wood-filled. 3. I noticed some very slight layer separation at the edges of the fret board, perhaps due to the orientation in X/Y when printing (Z droop on Ender 3) This doesn't affect playing or intonation, but I'm thinking of making another version with the fretboard printed separately and flat. If you're interested, let me know, and that might give me some motivation. 4. The tuning heads I used are: https://smile.amazon.co.uk/gp/product/B07L9XWQPG but any ukulele tuning heads should work. 5. I've said "Tail" instead of "Head" universally throughout this. I've played guitar for over 30 years and still get this one wrong. I'm leaving this as is, in a very "a rose by any other name..." way. ### Original description 12th December 2021 This is my first real attempt at designing something in Fusion 360. I printed and played another design from Thingiverse, loved it, and thought I'd give it a go. I literally sketched out some shapes, then made some ad-hoc measurements from images from Google of other ukuleles. It should be a perfect concert ukulele size, but don't attack me if it's a bit out! I then spent a few hours in Fusion 360 designing it, then printed and tried it and revised it a couple of times. This is "v3". v2 is in one of the photos, the blue one, and the only differences are: slightly wider nut channels; slightly adjusted intonation; slightly less deep tail; much better bridge design. v3 should have near perfect intonation, the action is nice and low/light, and it's fairly well balanced too. The concert size is easy to hold and play. To print this you need a fair bit of time. Around 40-50 hours for all 4 parts. I used generic PLA for v2 and wood filled (30%) PLA for v3, with no print issues on my fairly stock Ender-3 with a glass bed. 200 degree nozzle, 60 degree bed, everything very level and very clean. It prints in four pieces with no supports and I didn't do any post-processing beyond brushing off any loose filament. I used 0.16mm layers, 4 walls and 50% infill. The 4 walls seems important, especially for the neck strength, and infill might not be so important for the neck. 50% infill for the tail is probably essential, as the screws are tapping into the infill. You may need to use a nail file to clean the nut depending on the strings you use, but only very slight filing should be necessary. The tail should be printed with the "front" down, so may need rotated. The other parts print in their normal orientation, i.e. as though the ukulele was standing on its end. The pieces are glued together in order from bottom to top, and they should align beautifully. See the photos for how the neck and tail align, but it should be obvious. Gluing the tail on can be done one of two ways. One is just to hold it tight until the glue sets. I used gel superglue, and it takes around 1-2 minutes to set. Sit still, hold it tight, and it will be perfect. The second method is to prop up the ukulele so that the end of the neck is flat, around 15 degree angle. This is easy too. Then you simply glue and adjust the position of the tail, take a step back, keep the cat clear of the scene and let it set. I'm using The Cheapest Machine Heads On Amazon, and the tail is big enough for most types. I pilot drilled to around 8mm deep using a 2mm drill bit and used #3 15mm screws, but you can also use the screws that come with the machine heads if you can pilot drill with a 1mm drill. I'm using Aquila strings, but cheap nylon ones work well too. Aquila need much, much less stretching before they'll hold in tune. Nylon ones take about a week of tuning a few times a day before they stop drifting. But nylon strings cost less than half the price, and I don't think they sound much worse. It's a great little instrument to play once it's tuned, the fret spacing on the concert is nice for medium sized hands, and I think the sound is pretty decent. On the bright side, but this is £10 of plastic, not £100 worth of mahogany, so as expected!
With this file you will be able to print Concert Ukulele with your 3D printer. Click on the button and save the file on your computer to work, edit or customize your design. You can also find more 3D designs for printers on Concert Ukulele.