Configurable Calibration Ruler - One for All
thingiverse
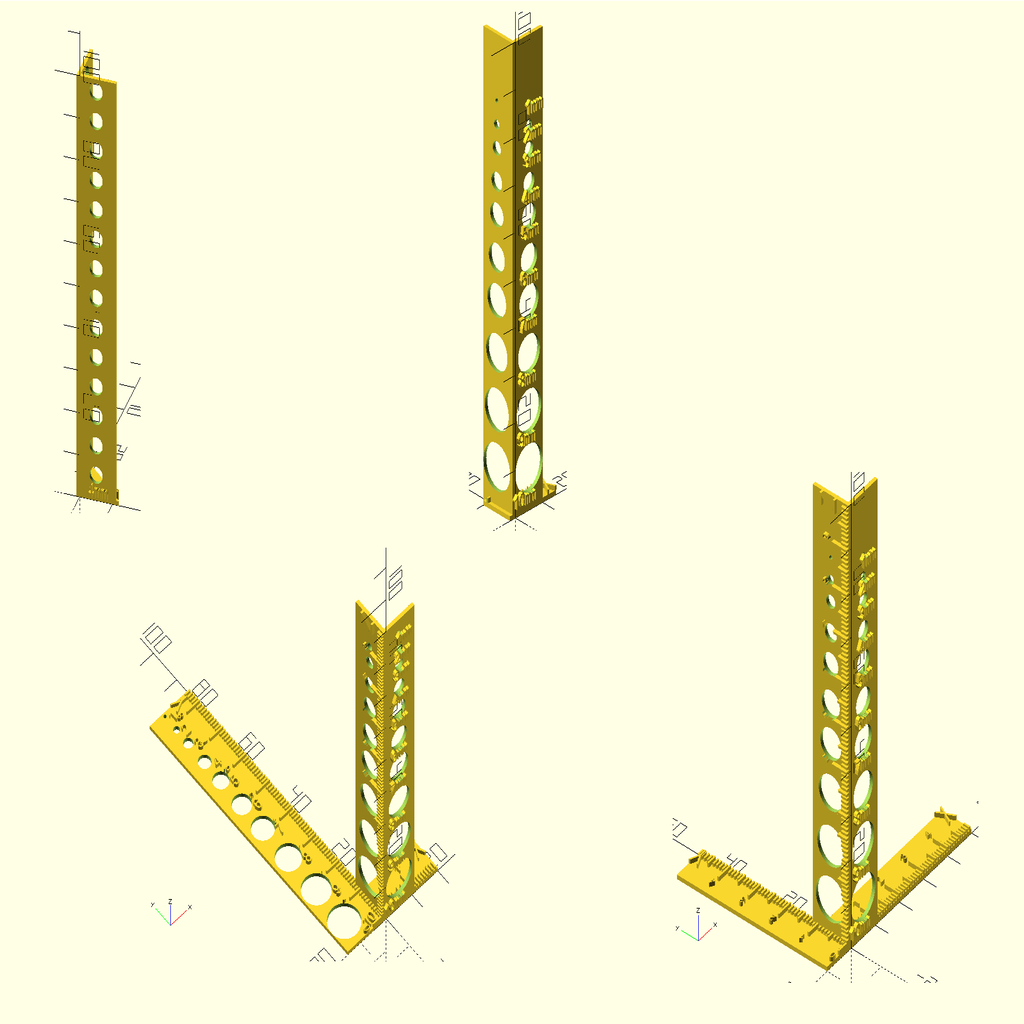
Use this configurable (parametric) calibration ruler for both ghosting and steps/mm calibration, depending on how it is configured in settings.txt. ## How to Use (Print one of the STL files if applicable and skip the remaining steps, otherwise continue.) - Open ConfigurableCalibrationRuler.scad in OpenSCAD - Edit **settings.txt** in a text editor as desired (see example(s)). - Set `enable`...`ruler` values to `true` if you want marks and numbers along the bars, or to `false` if not (the bar will still be present). - Set a bar length to 0 to remove the bar. - You can set the length, width, and thickness of bars. - Set `constant_hole_size` to `0` to get all sizes (10mm to 1mm, or to whatever will fit if your zbl [z bar length] is much below 90) or set a size. - After you change a setting then press save in your editor, OpenSCAD should update the preview automatically. - "//" begins a comment in scad format that OpenSCAD will ignore. - F6 (shortcut for Design, Render). Wait for the model to appear. - File, Export, choose a format (such as STL), and name it as desired. - Slice and 3D print the file you exported. - Measure the axis (see "How to Measure"), then set your 3D printer's steps per mm by multiplying the current steps/mm by the error correction ratio (size in settings divided by size you measured). - If there is not a precise result: Still set the steps/mm, but then print again, and set Slic3r's scaling values to the new error correction ratio. - You can calibrate the steps/mm for your extruder motor separately, without the calibration ruler: <https://3daddict.com/3d-printer-extruder-calibration-steps/> - Ghosting can have many causes. You can detect ghosting using this calibration ruler, but I do not provide steps and don't know all potential steps that are necessary to correct ghosting. - Do a web search for the term "ghosting" along with your printer's brand and model number. - One possible cause is gear backlash. See [Quick Backlash Calibration V.2](https://www.thingiverse.com/thing:2040624) by [Muele](https://www.thingiverse.com/Muele) Mar 4, 2017. ### How to Measure - Always measure to the end of the ruler (or if you want a different value than settings, measure to the near side of a line on the ruler). - When comparing the measured width (not thickness) of one of the bars on the Z axis, the expected value is the thickness of the other bar plus the width of the bar you measured. - For the X axis, measure from the near face of the Z's Y-axis bar. - The X-axis bar is now on the inside, to make measuring more accurate and make it more adaptable (always connect with model, and avoid boolean artifacts) in case of changes to the Y-axis bar's length or width. - For the Y axis, measure from the beginning of the ruler. - For the Z axis, measure from the beginning of the ruler (the bed). ## Authors and Licenses - Write.scad (and dxf font models): by [HarlanDMii](https://www.thingiverse.com/HarlanDMii). - License: See "LICENSE for Write.scad (and dxf files).md" or https://www.thingiverse.com/thing:16193 - Everything else: by [poikilos](https://www.thingiverse.com/poikilos) and [RichieC](https://www.thingiverse.com/RichieC). - License: http://creativecommons.org/licenses/by-sa/3.0/ ## Requirements - (now included) [Write.scad](https://www.thingiverse.com/thing:16193) by [HarlanDMii](https://www.thingiverse.com/HarlanDMii/about) Jan 18, 2012 - requires "openscad version 2011.12 or later"
With this file you will be able to print Configurable Calibration Ruler - One for All with your 3D printer. Click on the button and save the file on your computer to work, edit or customize your design. You can also find more 3D designs for printers on Configurable Calibration Ruler - One for All.