Control Box
thingiverse
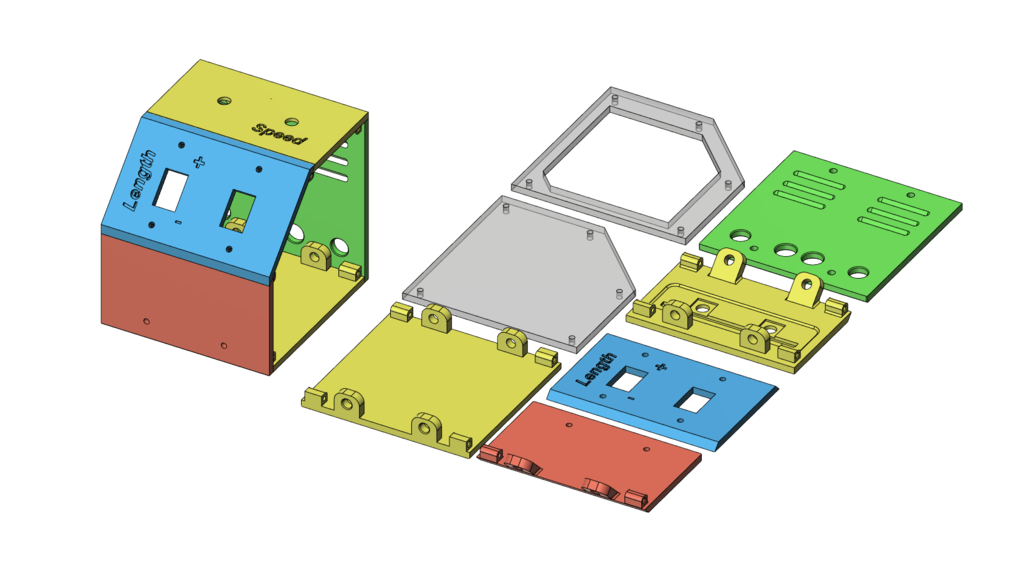
UPDATE: July, 2022: THE THINGIVERSE WEBSITE IS BROKEN and I'm moving my content elsewhere soon. 2022_06_08: I went looking for a sloped-front control box. I found some but they're very expensive so I designed my own. This one has room for two PWM controllers and two rocker switches. Panels need M4 heat set inserts and they can be fastened together with M4 x 8 or 10mm button head cap screws. Side panels can be printed or cut from thin plastic or card stock. There's a template provided to save a lot of printing time. Use two sided sticky tape to hold the template in place. I used some plastic sheet from TAP Plastics. It can be cut with a decent pair of scissors or a paper cutter. It's a good idea to center punch the hole locations before drilling them out. Use a 3.5mm drill. Holes to mount sides need to be tapped M3. Sides can be attached with M3 x 8 or 10mm button head cap screws. Print all pieces as presented and no support will be needed. I set fill at 30% and the pattern is tri-hexagon. The four large holes in the back are the right size for these connectors: https://www.amazon.com/dp/B08SJM2G52?psc=1&ref=ppx_yo2ov_dt_b_product_details 2022_06_09: I replaced cba_Top_01 with cba_Top_02. This strengthens the corners that have to be threaded M3. I also enlarged the holes just a bit so the control knob stems fit more easily. PS here's a link to a heat set insert tool that will make life easier: https://www.thingiverse.com/thing:3613621
With this file you will be able to print Control Box with your 3D printer. Click on the button and save the file on your computer to work, edit or customize your design. You can also find more 3D designs for printers on Control Box.