Cookie Monster Hitch Cover
prusaprinters
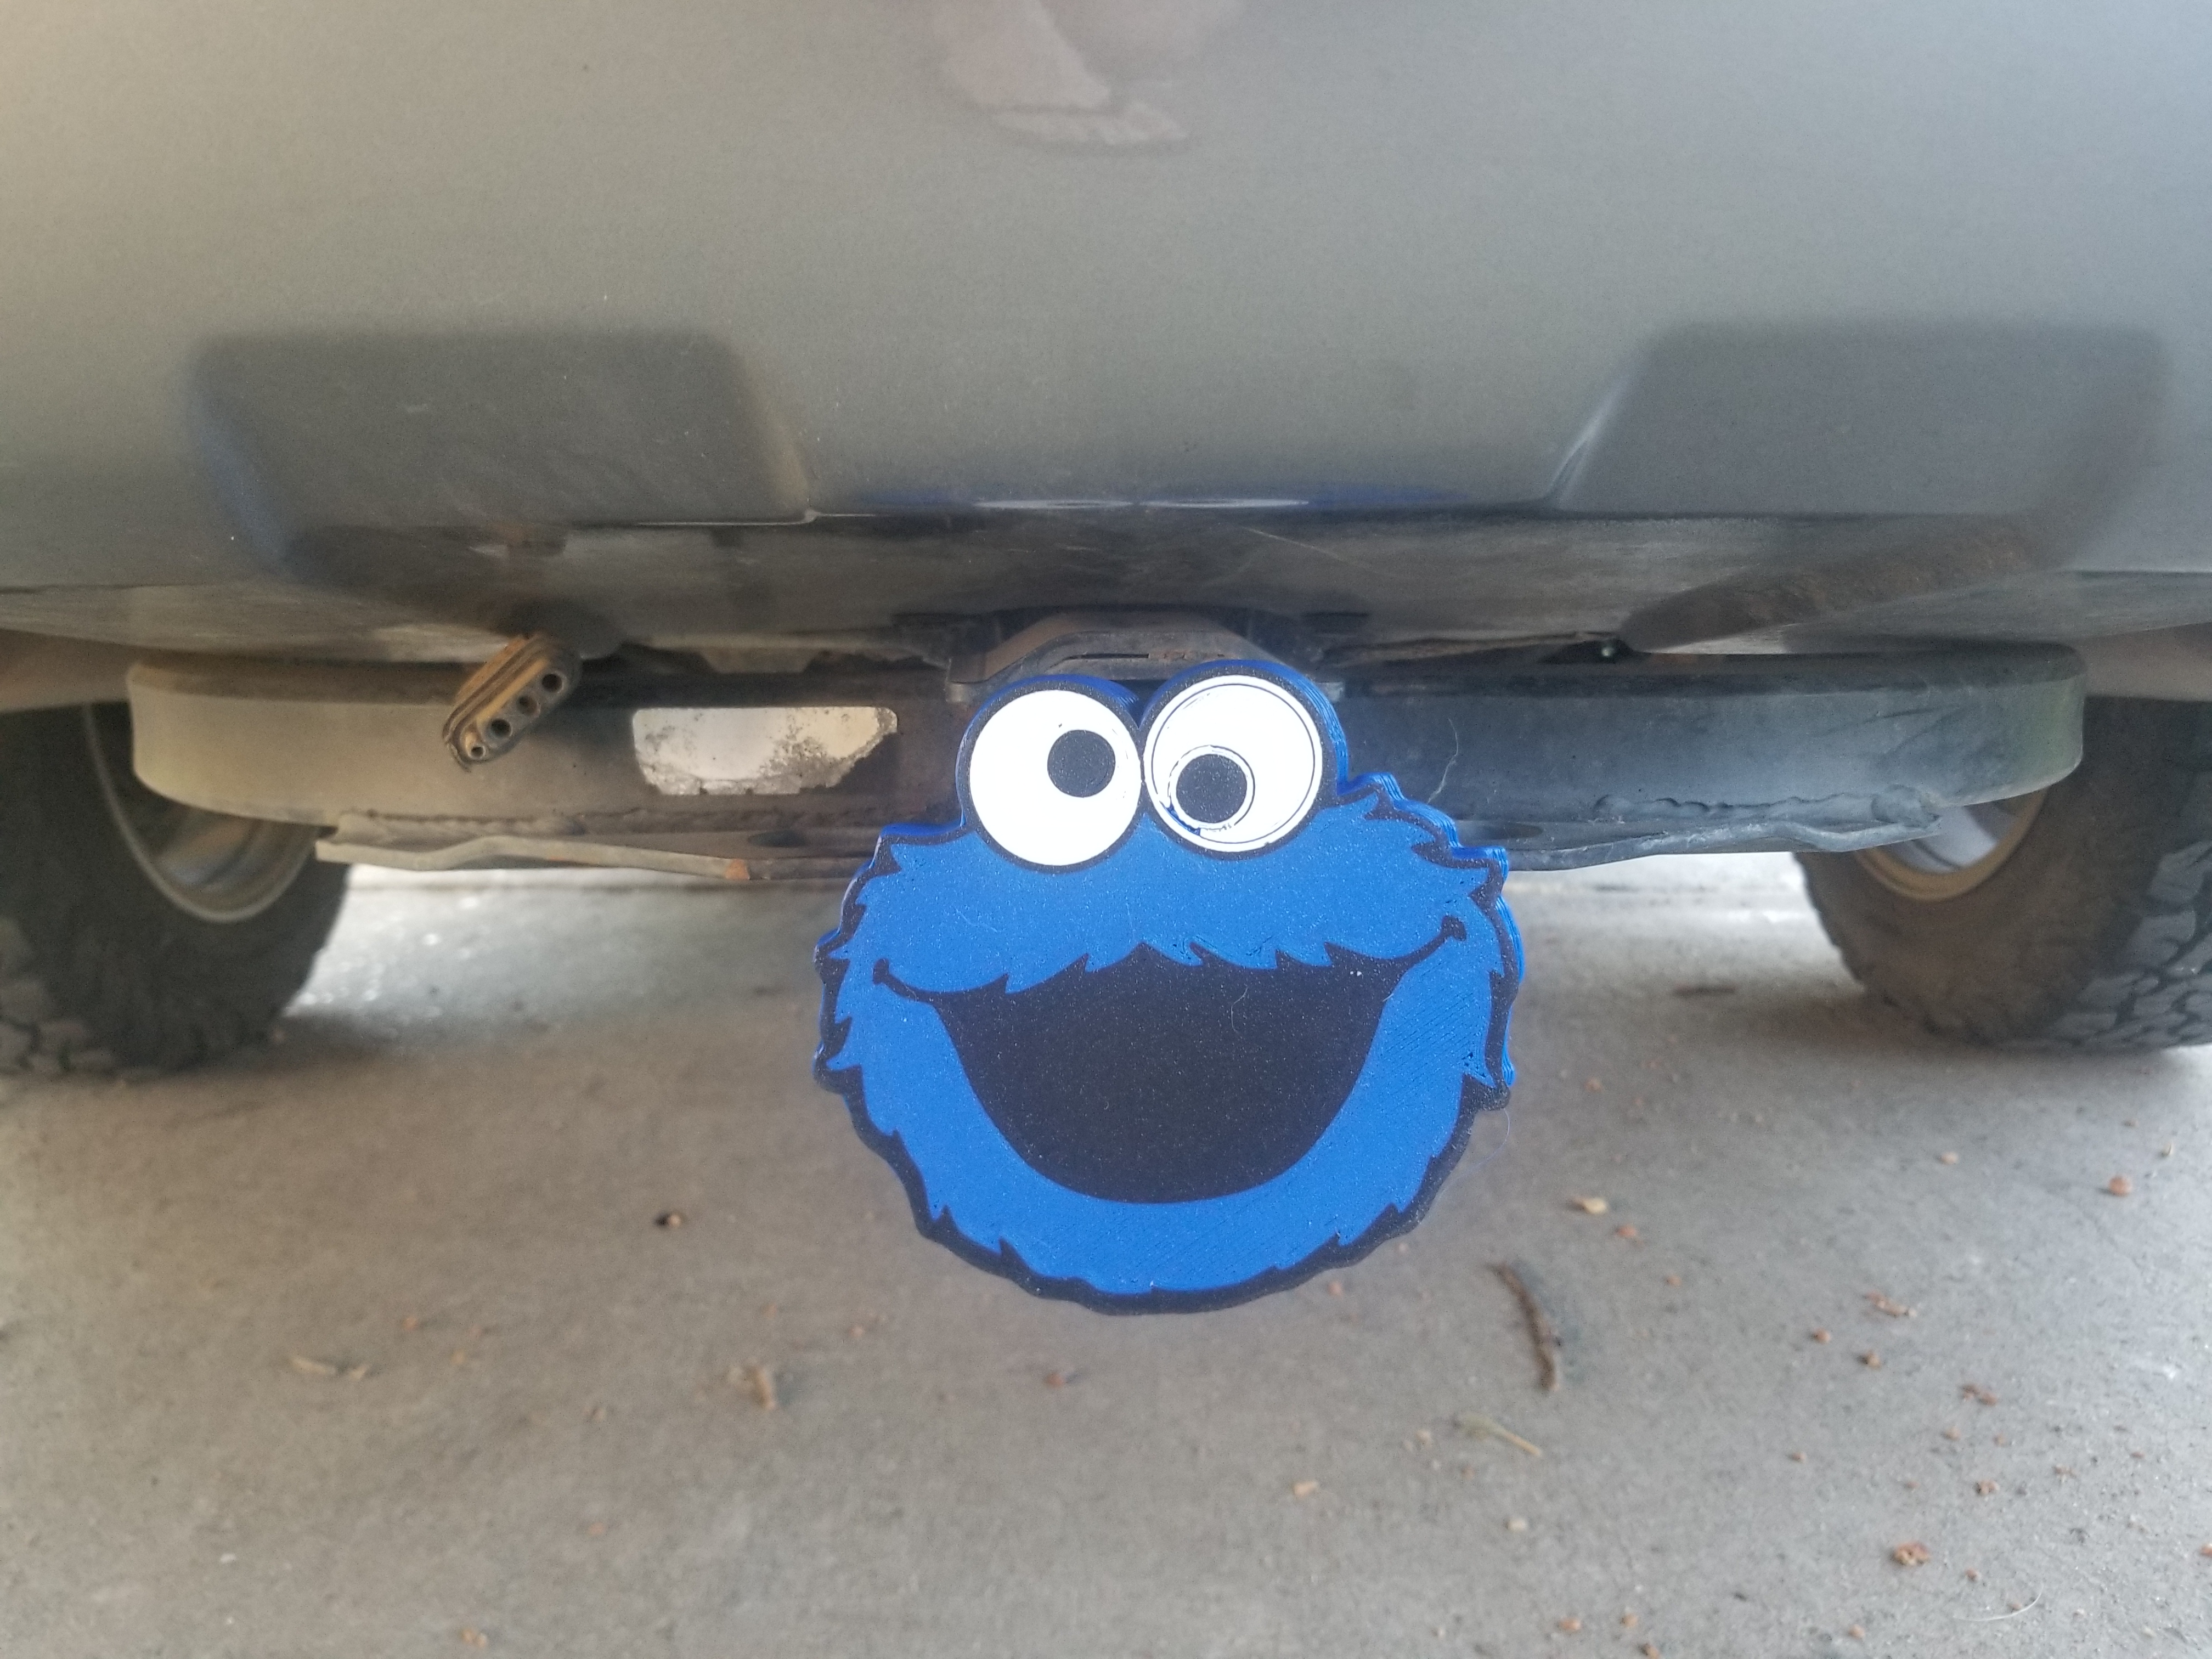
<p>Let everyone around you know your priorities! COOKIES!!! </p><p>This is a fun way to add some color to your empty trailer hitch receiver. Final dimension is about 5.5" x 5.5" at 100% scale. The part is printed using three different filaments (black, white, blue [pick your own combo for even more fun!]) to make a seamless first layer. Several models are provided to make this work:</p><ul><li>Cookie Monster Hitch Bodies fused (all individual parts combined into a single part)</li><li>Cookie Monster Hitch Bodies (separate stl files to allow for easy printing in different colors)<ul><li>Black (facial outline)</li><li>White (eyes)</li><li>Blue (fur)</li></ul></li><li>Hitch Mount attachment (combined with the face to make an easy attachment to the receiver)</li><li>Hitch mounts (receiver components for most trailer hitches)<ul><li>1.25 inch</li><li>2 inch</li></ul></li><li>Pins<ul><li>Small 75mm (fix the 1.25 inch hitch mount to the receiver)</li><li>Large 65mm (connect the face to the hitch mount)</li><li>Large 85mm (fix the 2 inch hitch mount to the receiver)</li></ul></li></ul><p><i>The “Hitch Mount Attachment” is already included in the fused model and not specifically needed for this print job. It is handy to then use on any future hitch covers you would like to create on your own! Either embed it to another part in the slicer or create a cavity in your part and glue it in. :) </i></p><p>Printing instructions:</p><p>Load the fused bodies and the three different color models into your slicer. Merge these so they all align then save this as a project. Doing so will make the following steps much easier.</p><p>If you have a multi-material printer you're all set! If you have a single extruder that manages one color at a time then read on.</p><p>Thanks to CHEP for the idea on color inlays. See his explanation here: </p><figure class="media"><oembed url="https://www.youtube.com/watch?v=0Sla-vIsvh4"></oembed></figure><p>Create the individual print files by deleting what you don't want to print. To make the inlays on the front, lower each of the color parts to be only one layer height tall, as each part is 12mm tall. For me that was lowering by 11.8mm for a 0.2mm height. Make sure that brims/skirts are off. The trick here is to enable Z-hop when retracted and that you choose a value greater than the layer height you plan to print at, I chose 0.6mm to me safe.</p><p>Once you have the four gcode files saved (Black, White, Blue, and Fused) open them in a text editor like Notepad++. Here you will edit the gcode to modify the following sections:</p><ul><li>Preprint<ul><li>Leave untouched for the first color part</li><li>For subsequent files, remove the lines that refer to homing axes and resetting extrusion</li><li>Original (ABL, material purge, etc.)</li></ul></li></ul><pre><code class="language-gcode">M140 S60 M105 M190 S60 M104 S210 M105 M109 S210 M82 ;absolute extrusion mode G28 ; home all axes G29 ; Autolevel M500 ; commit mesh to EEPROM M117 Purge extruder G92 E0 ; reset extruder G1 Z1.0 F3000 ; move z up little to prevent scratching of surface G1 X2 Y20 Z0.3 F5000.0 ; move to start-line position G1 X2 Y200.0 Z0.3 F1500.0 E15 ; draw 1st line G1 X2 Y200.0 Z0.4 F5000.0 ; move up a little G1 X2 Y20 Z0.4 F1500.0 E30 ; draw 2nd line G92 E0 ; reset extruder G1 Z1.0 F3000 ; move z up little to prevent scratching of surface G92 E0 G92 E0 G1 F3600 E-3</code></pre><ul><li> <ul><li>Modified (leaving only the temperature settings and extrusion mode). Note that it can help to leave in the material purge section.</li></ul></li></ul><pre><code class="language-gcode">M140 S60 M105 M190 S60 M104 S210 M105 M109 S210 M82 ;absolute extrusion mode</code></pre><ul><li>Layers<ul><li>If you didn't lower the color sections to have only one layer you can remove all the layers after the first. Leave the post-print code for now.</li><li>For the fused model you can either move the model up by one layer (floating) or delete the first layer in the gcode.</li></ul></li><li>Post print<ul><li>For everything but the final part, modify the gcode ending code to remove the temperature changes, motors turning off, or anything else that changes the condition.<ul><li>Original end code (this may be different for your printer/slicer) followed by modified gcode (here the print head moves up and to the front to allow for easier filament change)</li></ul></li></ul></li></ul><pre><code class="language-gcode">M140 S0 M107 G91; relative positioning G1 Z1.0 F3000 ; move z up little to prevent scratching of print G90; absolute positioning G1 X0 Y200 F1000 ; prepare for part removal M104 S0; turn off extruder M140 S0 ; turn off bed G1 X0 Y300 F1000 ; prepare for part removal M84 ; disable motors M106 S0 ; turn off fan M82 ;absolute extrusion mode M104 S0</code></pre><ul><li>Modified gcode (here the print head moves up and to the front to allow for easier filament change)</li></ul><pre><code class="language-gcode">G91; relative positioning G1 Z10.0 F3000 ; move z up little to prevent scratching of print G90; absolute positioning G1 X0 Y0 F1000 ; prepare for filament change</code></pre><p> </p><p>With those four files you're set to print! Have fun, then when you're done, have a cookie!</p>
With this file you will be able to print Cookie Monster Hitch Cover with your 3D printer. Click on the button and save the file on your computer to work, edit or customize your design. You can also find more 3D designs for printers on Cookie Monster Hitch Cover.