Cool Maker Kumi Kreator helpers
thingiverse
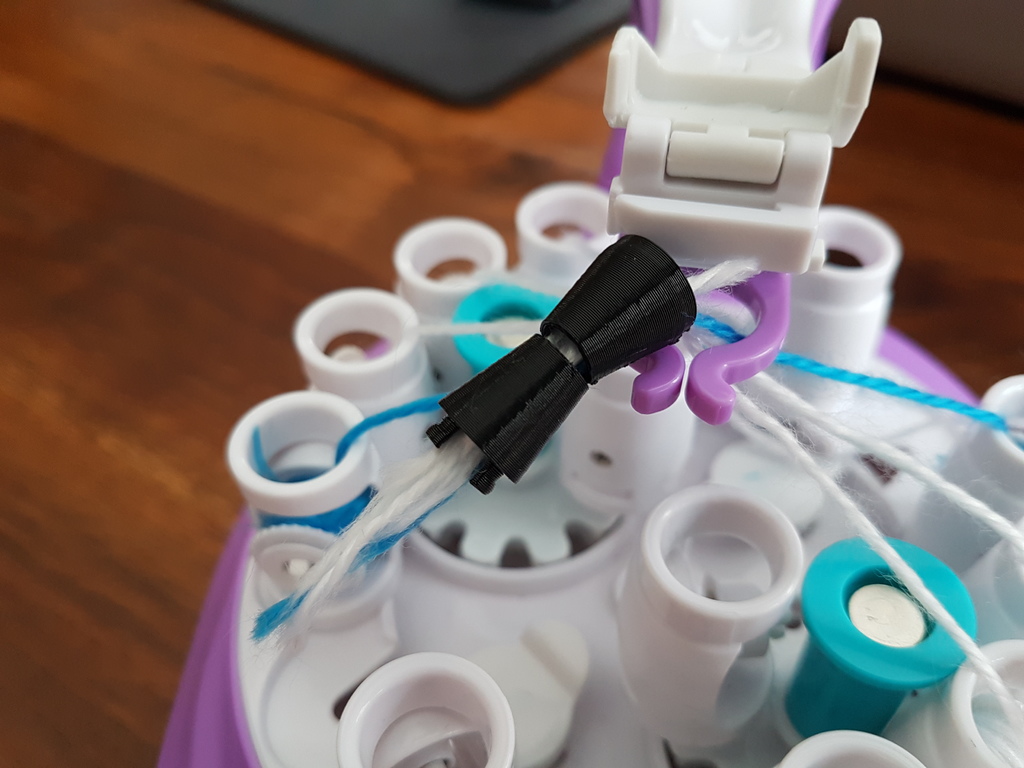
My daughter got a Cool Maker Kumi Kreator for Christmas. After a few hours she had spent all the material... So I made an adapter to wind new string on the spools and 2 sizes of clasps. The clasps must be printed verticaly for a better smoothness (see screenshot). <b>A brim is required.</b> PTEG is prefered over PLA for the clasps. <b>Do not use ABS!</b>. I don't think it's a good thing to have a direct skin contact with ABS... To secure the bracelets in the clasps I do a simple <b>loose</b> knot, wet it with white glue and smash it in the clasps. The inside of the clasps are tapered. When the glue sets the knots can't get out. The bracelets must be a little longer to compensate for the knots. You'll have to do a few tests to figure out the extra length required. I showed my daughter to insert the clasps at the beginning, this may helps a little afterwards. Make sure to insert them like in the picture (the smoother one first). The winder's stem is 7mm instead of 6.3mm (¼ inch) to accommodate the head of the screw. I used a 6-32 screw but a 3mm should do. The screw should be glued in place. The string can be winded in any direction so set the drill to tighten the nut when winding. Just tightening the nut with your fingers is enough: it's not a winch, it's just string you're spooling!
With this file you will be able to print Cool Maker Kumi Kreator helpers with your 3D printer. Click on the button and save the file on your computer to work, edit or customize your design. You can also find more 3D designs for printers on Cool Maker Kumi Kreator helpers.