Cooling Fan Bracket and Shroud for Ecksbot 3D Printer
thingiverse
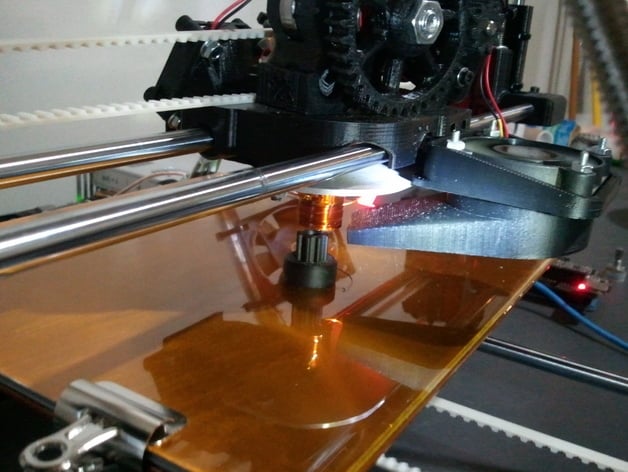
Mount a 40mm CPU cooling fan on Ecksbot to direct cool air at the part being printed, benefitting small and tall thin parts or even larger ones with pebbling edges. To do this, select the fan, print out bracket and shroud, then attach the fan to the bracket before clipping it around the right front bearing of your printer's hot end. Reattach the hot-end plate, wire the fan into the top where the existing extruder fan is wired, and mount the fan shroud in the bottom of the fan bracket, angled towards the hot end and 0.5mm above the surface. Set the fan to 50% speed before heating up the hot end and keep it on even after printing. Enable cooling option in Slic3r or use the cool plugin in Skeinforge. Run the fan at about 50% speed regardless of print size, while also increasing extruder temperature and decreasing bed temperature if needed for adhesion.
With this file you will be able to print Cooling Fan Bracket and Shroud for Ecksbot 3D Printer with your 3D printer. Click on the button and save the file on your computer to work, edit or customize your design. You can also find more 3D designs for printers on Cooling Fan Bracket and Shroud for Ecksbot 3D Printer.