Cord Management #MakerEdChallenge
thingiverse
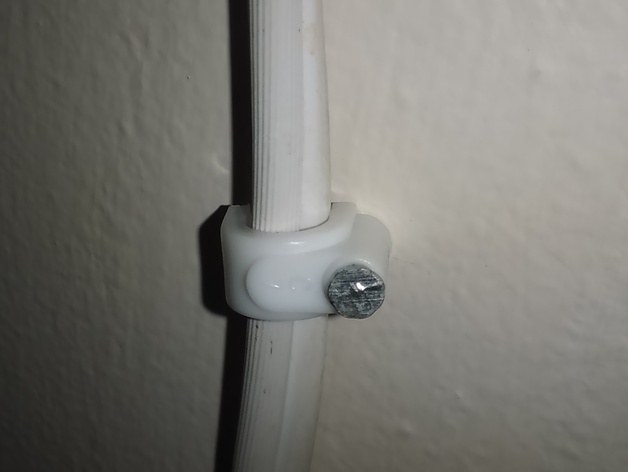
Teach your students how to model simple 3d objects and keep those pesky cords out of sight at the same time! How I Designed This The base starts as a sketched rectangle with the bottom line flipped into construction mode; then a circle is added, tangent to the bottom, also in construction mode. Next, add a non-construction arc of 180 degrees touching the construction circle and two lines connecting it to the bottom line, followed by two lines connecting those bottoms to the original rectangle's corners. Constrain the distance from the left and top freely (I drew a line from the centerpoint of the arc to the top of the arc and then from that point to the top line of the original rectangle), pad to an arbitrary width, rotate the view to the top and sketch a hole centered in the side without a tunnel. Punch that hole through, then fillet and chamfer as desired. For Clip 2, add to the original rectangle before making the "right" line a construction line, then repeat much of the process to add a second "tunnel". Remember to fully constrain your sketch! Project: Cable Management Objectives Students will learn how to 3d print useful primitive objects and keep their classroom tidy and safe from trip hazards. Audiences Elementary students with some computer knowledge should be able to do this with effort - when I was in fifth grade, I had to memorize all 50 states and their capitals, so this seems easier. Preparation Flag cords that are not properly anchored but don't require slack; check with school maintenance for preferred anchoring hardware (they might need bigger mounting holes). Accurate measurement tools will be necessary - if calipers aren't available, they can be printed from this site (flat, soft and non-conductive calipers are safest!). Steps! Give each student a set of cords to anchor and any other requirements. Students model the clip Students work with the teacher to print the clip Maintenance installs the clip Results Your students learn how to make clips and your classroom gets tidier and safer. For grading, you could do this early in the year and deduct points if any of the clips fail by the end of the year.
With this file you will be able to print Cord Management #MakerEdChallenge with your 3D printer. Click on the button and save the file on your computer to work, edit or customize your design. You can also find more 3D designs for printers on Cord Management #MakerEdChallenge.