CoreXY Cube
thingiverse
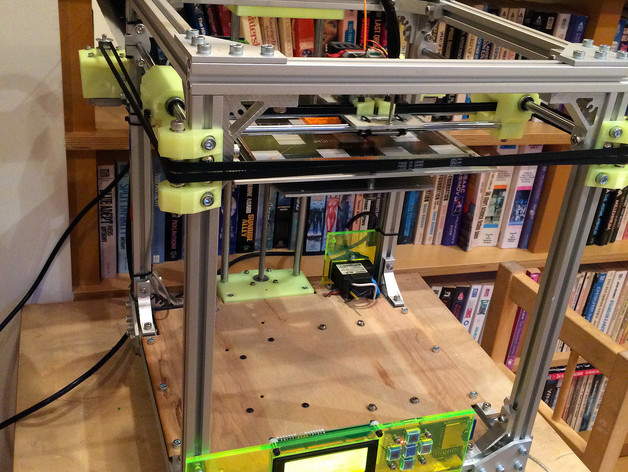
BOM updated 8-29-14 This is a reference build for the CoreXY Cube. It's a fast, scalable, high-quality printer that runs Sailfish, utilizes common Replicator Mightyboard clone electronics, and costs about $1000. There are a number of CoreXY Cube builds "in the wild" now for this basic design, at least 6 that I know of (July 2014). Here's a few:http://www.thingiverse.com/thing:252041http://www.thingiverse.com/make:69062http://www.thingiverse.com/thing:313048https://www.flickr.com/photos/d-newman/sets/72157645313526624/ I've updated many of the parts and put together a BOM. But the base design is a mix of: Ichibey's Sakura CoreCube Hbot modeling work Jetguy's lasercutter templates and electrical / extruder configuration DNewman's Sailfish programming for CoreXY gantries Credit should go to the above -- I'm just assembling all the build files for everyone's convenience. Printer size is flexible. With a 340x340x440mm (outside dimensions) Misumi frame kit, my usable build area is 212x,178y, 195z. Scaling Z just requires longer rods, Z screw, and 2020 pieces. Scaling X or Y will involve longer rods and belts, plus editing the lasercutter template for the bottom board. Not hard. The parts are available online from a mix of: Misumi Adafruit Ultimachine Robotdigg Amazon Flash Forge USA McMaster QU-BD Ponoko Digikey Mbot But you're welcome to customize or find cheaper sources. Instructions I'm sure I missed some steps/parts. Let me know if you find any gaps and I'll post pics/explanations. Look through Dan's Flickr for the best build pics:https://www.flickr.com/photos/d-newman/sets/72157645313526624/ Print motor brackets in ABS for stepper heat resistance. Or heatsink & fan them cool. PLA may not survive long prints. Print everything else in PLA or ABS. PLA is probably better, due to high stiffness and low warping on the large Z stage pieces. Use a LOT of shells on the Z carriage for stiffness. This is the "weak link" in the design and should be made as stout as possible. Lasercut one of each panel pieces from acrylic or wood. Non-conductive materials are recommended. Lasercut the large floor plate from plywood.Ponoko-friendly files are included for people without lasercutter access. Wood floor plate should work well in 5.2mm Veneer Core Birch, plastic plates in whatever color of ~5mm acrylic you prefer. The X carriage is intended to be 5.2mm (0.2") thick, but may be printed in ABS if desired or cut from other sizes/materials. No guarantees of proper fit/function if other thicknesses are used! Specifically it will change the belt alignment and nozzle blower duct fit. Sketchup files are included for a 3mm aluminum carriage. Edit source files (or just deal with misalignment) if other thicknesses are desired. The X Endstop can be made from a standard FF endstop board. Cut/desolder the existing limit switch and wire an extension line to the X carriage limit switch. Then plug in as usual. Or you can come up with something different, but watch out for electrical noise in the endstop wiring if run parallel to stepper wiring. The 44mm X ends go with the lasercut carriage. But you can use the 70mm version with a standard Replicator or clone carriage. The HBP thermistor board takes some creative soldering. See schematic in the pictures on this Thing page. The thermistor is used as the pull-up leg in a voltage divider circuit with a precision 4700 ohm resistor as the pull-down. Sense goes between the thermistor and pull-up. Refer to http://www.thingiverse.com/thing:16061 and http://www.thingiverse.com/thing:16058 for full schematics. Extruder is up to your preference. You'll need a thin (mk7 style) one to go with the QU-BD cooling bar. I ordered a metal one off eBay, but this one works fine:http://www.thingiverse.com/thing:15718 If you want a nozzle blower, you may or may not have to do some Mightyboard soldering. If your board does not include it, the proper FET to control the blower fan is included in the BOM. However this is a delicate bit of SMD work and should not be attempted unless you're competent at soldering. Then there are two additional printable parts included -- a fan mount post (which replaces one of the carriage belt clips) and a nozzle duct. These STLs were exported in the "in-use" position and should be rotated 90 degrees to their flat side prior to printing. I recommend ABS for for heat resistance, but it seems to work fine in PLA.
With this file you will be able to print CoreXY Cube with your 3D printer. Click on the button and save the file on your computer to work, edit or customize your design. You can also find more 3D designs for printers on CoreXY Cube.