CoreXY Laser Engraver
prusaprinters
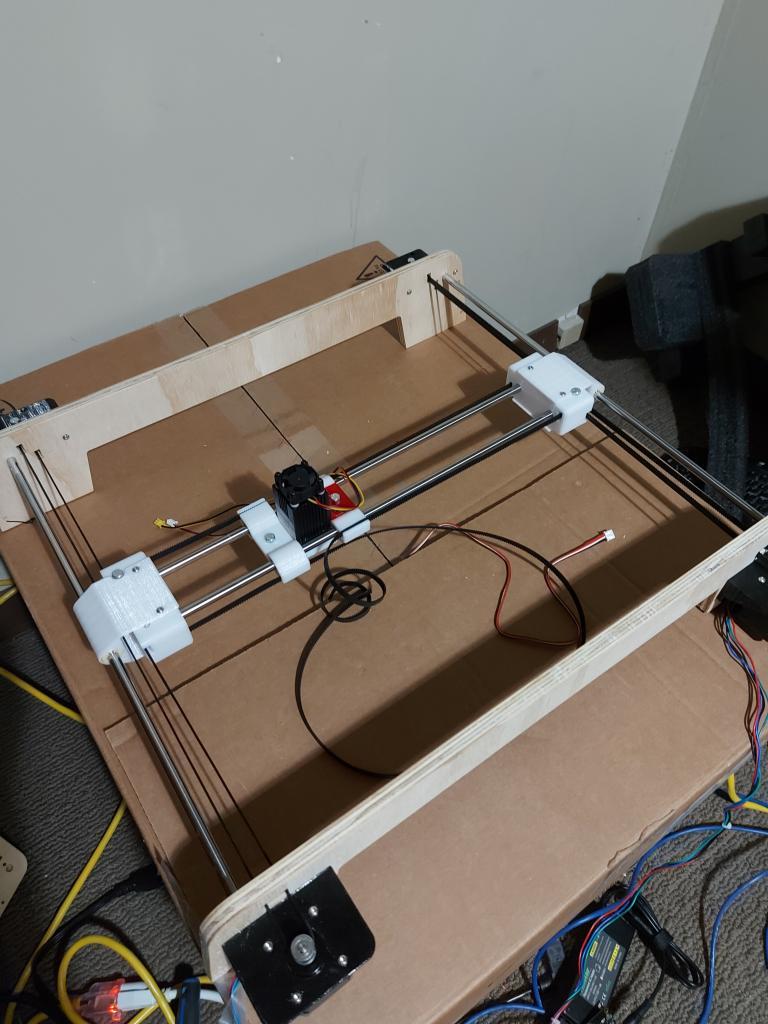
<p>My take on a CoreXY laser engraver.</p> <p>This is still in progress. I haven't got endstops figured out yet but I've got it working for now.</p> <p>Note that the LM8UU bearings are pretty much press-fit as I printed them. I used a clamp to press them into the printed parts, and I don't think they're coming out any time soon without breaking the plastic.</p> <p>BOM (As I remember)</p> <ul> <li>2x 400mm length 8mm smooth rods</li> <li>2x 450mm length 8mm smooth rods (Or about 90mm longer than your Y axis)</li> <li>8x LM8UU linear bearings</li> <li>18x 3mm screws, 8mm length</li> <li>4x 1" #6-32 screws + nylock nuts for same</li> <li>10x 5mm screws, 30mm length.</li> <li>6x 5mm nylock nuts. (The screws don't go all the way through the back corners, and thread into the plastic pieces. You can substitute 4x 40mm screws and add 4x nylock nuts if you don't mind the extra hardware shopping, but I don't think it's absolutely necessary.)</li> <li>2x NEMA 17 motors. I used ones 48mm length, which is pretty standard.</li> <li>2x 16T 6mm GT2 belt pulleys</li> <li>8x 20T 6mm GT2 idlers (I used 2 with teeth, 6 smooth. The belts need a half twist in them each, I chose to do it at the back of the machine between the corners. If you do it between the motors and the idler corners, you can use all smooth idler pulleys.</li> <li>1x laser. Mine is 33mm square, and has mounting hole locations 18mm across the width. I left a provision for centered mounting screws.</li> <li>1x control board, your choice. I used Bart Drings 2209 pen/laser controller.</li> </ul> <p>There are .DXF files for the motor frame and corner frame. I cut these from 1/2" plywood, where the 8mm holes for the rods for the Y axis rods do not go all of the way through, I cut them 8mm deep.<em>Not Included:</em> You will also need to cut 2 side pieces 1/2" (or so) thick 80mm high by 435mm (or, your Y rod length less 15mm) to brace the frame. I cut them on a tablesaw with the blade angled 10° on the long edges to match the outer slope of the legs, but a straight cut shouldn't be too bad.</p> <p>My plan is to use the protruding screw on the carriage to mount the X limit switch, and one of the screws that hold the Y slider to the X rod holder to mount thy Y limit switch. This might also have to serve as the bump stop for the X limit switch. I hope to manage this without needing to re-print any of the existing parts, but... Work in progress...</p> <p>Anyway, you need 2 each of the X Rod Holder, Y slider and Center Bearing Holder. Assemble the X rod holder first, the nuts drop in from the tracks, and the 5mm screw goes through the idler pulley to it. The Y slider will snap over the 5mm screw heads, and attach with 4 of the 3mm screws. There are screw holes in the Y slider if your bearings don't fit tightly, but this wasn't even close to a problem for me.</p> <p>The center sled assembly bearing holders go with the bearing retainers out. The laser will hold them in if they aren't a tight fit (Again, not a problem for me)</p> <p>I put the corners so that the nearer belt was at the top, but it shouldn't matter. I also twisted the belt in between the corners. There should be room for that twist in between the motor and the corner, for all smooth idlers.</p> <h3>Print Settings</h3> <p><strong>Printer:</strong></p> <p>MP3DP</p> <p class="detail-setting resolution"><strong>Resolution: </strong> <div><p>3 layers/mm</p></div> <p><strong>Infill:</strong></p> <p>30%</p> <p><strong>Filament:</strong></p> Eryone PETG <p>Transparent Red / Black</p> </p> Category: Machine Tools
With this file you will be able to print CoreXY Laser Engraver with your 3D printer. Click on the button and save the file on your computer to work, edit or customize your design. You can also find more 3D designs for printers on CoreXY Laser Engraver.