"Corsaire 40d" - Raspberry Pi 4 Case Based on Corsair 4000d Airflow
thingiverse
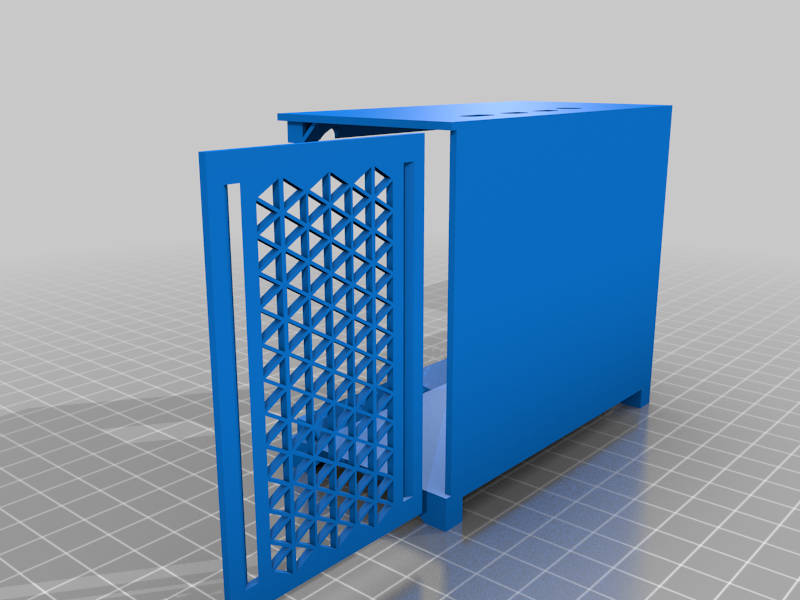
This is my mini "clone" of the Corsair 4000d Airflow desktop ATX computer tower. I made this as a miniature model for a Raspberry Pi 4. It is named the "Corsaire 40d" (name recommended to me by Reddit user dhejejwj) (I know there is an e at the end, copyright xd). This is still a work in progress!! I plan to do some updates to make it more rigid, have easier SD card access, and possibly have more internal workings available. Please be patient. Case Outer Dimensions: L: 100mm (3.94") W: 50 mm (1.94") H: 87.60 mm (3.45") The front panel needs to be glued into place, I use Gorilla Glue for my models. The pi gets mounted on 4 standoffs built into the chassis. I use the GeeekPi Low Profile Raspberry Pi RGB cooler for this, as it was intended for the design. The standard tower cooler from GeeekPi will NOT work and I cannot verify any other coolers at this time. Here is an Amazon link for the compatible cooler: https://www.amazon.com/GeeekPi-Raspberry-Low-Profile-Cooling-Heatsink/dp/B08B5XDM9F?th=1 The Pi gets secured by taking 4 of the M2.6x6+6 copper sticks including with the GeeekPi LP Cooler and screwing them into the mount of the chassis. The cooler is then mounted to the Pi using the 4 M2.5x6 screws. You do not need the 4 nuts, 4 other copper sticks, or the included acrylic bottom panel that are also included with that cooler kit, using any of these may make the cooler not fit properly. SIDE PANELS: The "40d Side Panel Solid V2" file is a 3d printed side panel that can be used in place of the acrylic one shown in the pictures, if you still want the acrylic, it is right below here. Acrylic Side Panel Cutting: I used a sheet of 0.060" frosted acrylic as a side panel, the dimensions are 78mm by 96.8mm (you may want to go 77.6 x 96.4 just to allow a little more leverage of space). There is a hole cut into each outer corner of the chassis to mount the panel onto. These holes on the chassis fit an M2.5x6 screw. Cut a hole into each corner of the acrylic with a center point that is 2.5mm from each corner, and make the hole 2.8mm in diameter so the screws don't have to fight it. These corners will be pretty fragile since its acrylic, so be careful not to over-tighten any of the screws or it will break the corners. Here is my original Reddit Post as Anovva_XVI: https://www.reddit.com/r/pcmasterrace/comments/q7r351/my_baby_pc_and_its_big_brother/ Feel free to print these and sell them, I would just like to be recognized for it if you do sell it. Also please send me a sales link and I can post it below for those without a 3d printer available. Also feel free to donate for my time continuing to work on this over time, my paypal.me is in my profile. Want this printed for you? Check out https://starvel-industries.net/ It's a 3d printing business started by a couple friends of mine, they'd love the support! MORE SALES LINKS HOPEFULLY TO COME THANK YOU FOR CHECKING IT OUT!
With this file you will be able to print "Corsaire 40d" - Raspberry Pi 4 Case Based on Corsair 4000d Airflow with your 3D printer. Click on the button and save the file on your computer to work, edit or customize your design. You can also find more 3D designs for printers on "Corsaire 40d" - Raspberry Pi 4 Case Based on Corsair 4000d Airflow.