COVID-19 Lightweight 3D Printable Face Shield
thingiverse
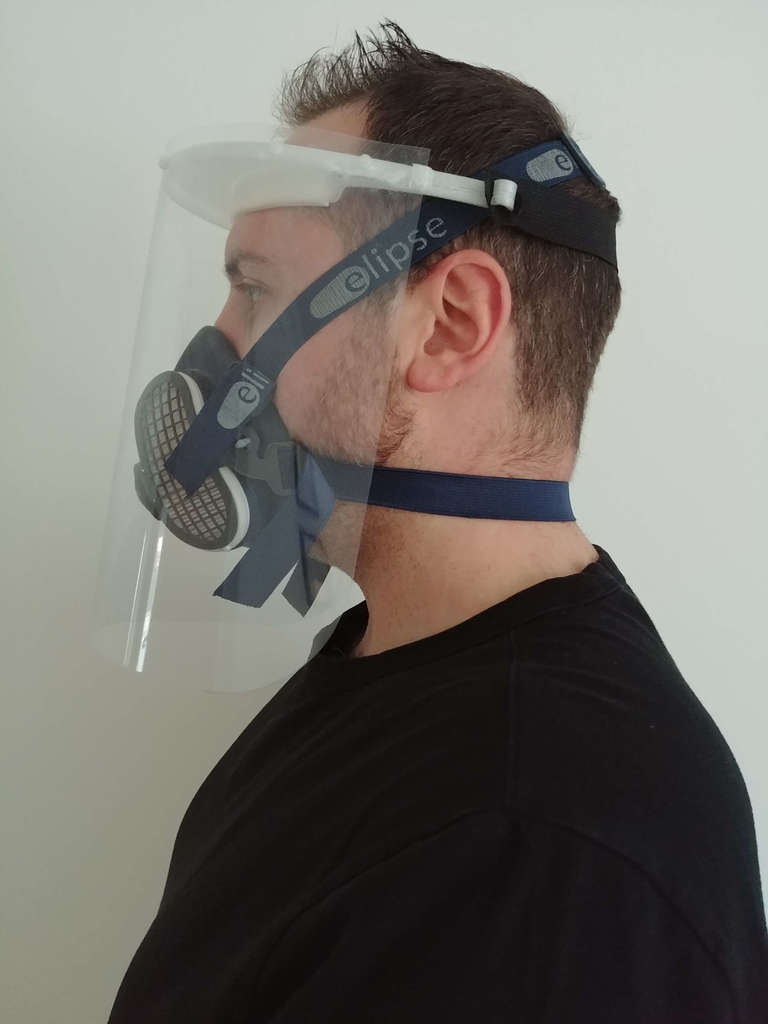
<b>WARNING: No claims are made about the accuracy and/or safety of this device. Make and/or use at your own risk.</b> <br> <br> UPDATE (10/04/2020): A 6-Pin variant has been added that offers better protection owing to the deeper visor (approx 38mm or 1 1/2" either side), which can also be made out of one piece of A3 acetate. All other aspects are the same. <br> <br> UPDATE (04/04/2020): All parts that may come into contact with the wearer's head are now greater than or equal to 10.2mm (EN 166:2001, 6.3 Headbands: 10mm minimum width). <br> <br> This simple face shield is based on the design that was created by Hong Kong Polytechnic University (PolyU) in collaboration with Queen Elizabeth Hospital and the Hong Kong Hospital Authority. There are two versions of the frame; a 4-pin version and a 6-pin version offering a deeper visor that wraps around further. Retaining arms on either side of the frame ensure that the visor stays firmly attached, and the visor provides protection all the way to the temples and beyond. The visor sits approximately 38mm (1 1/2"), away from the face, leaving enough space for a low-profile half-mask respirator, if desired. An elastic band is all that is needed for a strap, and self-adhesive foam provides comfort. <br> The shield has been designed to provide a close fit for a European head shape (intermediate cephalic index), optimized for 55-57cm head circumference (average female and male respectively, UK). By design, the maximum head circumference that can be accomodated is 60cm. 53cm is the smallest head circumference that has been tested so far, but the design may also acommodate smaller heads. <br> Both designs use under 11m of filament and take around 3 hours to print. The single-piece print fits on a 200mm x 200mm print bed (actual size approx. 184mm x 177mm). Comfort is provided via draught excluder foam, which is readily available online and is very cheap. The visor is made from a single piece of A3 acetate, although the frame itself can hold thicker material if you would rather use something different, such as PET. The design is flat so it should be relatively straightforward to CNC or laser cut, with only the pins needing to be either modified or post-processed. <br> <br> <em>Required Hardware</em> <br> A3 clear acetate sheet, 240 - 300 micron. <br> Self-adhesive foam, 5mm thick <br> Elastic band (elastic cord, woven elastic and rubber strip would also work well) <br> 2-hole punch (4-hole punch easier for 4-pin variant) <br> Hole template: A4 paper for 4-pin, A3 paper for 6-pin <br> 3d printed frame <br> Scissors, tape measure and pencil. Additionally scalpel, steel rule and cutting board <br> <br> <em>Build Guidance (This is how I did it, there may be a better way)</em> <br> <ul> <li>Measure and cut the self-adhesive foam. 190mm is sufficient to cover the brow, 320mm will wrap around the frame to give a snug fit for small heads. I found 190mm of foam sufficient with the wide design. My head is 55cm. </li> <li>Sit the 3d printed frame on a clean, flat surface such as a cutting board or table. Peel the backing off the foam and stick it to the interior curved edge. Use the flat surface to help line up the foam with the frame. Omit this step if you have a big head, rinse and repeat if you've got a small head. One layer of foam worked fine for me.</li> <li>To make a template for the 4-pin visor: Fold the piece of A4 paper in half length-ways to find the centre and draw a line on the crease to make it visible. Measure and draw a line 80mm in each direction from the centre. Line the length of the A4 paper along the width of the A3 acetate, with the lines on the outer edge. The static should hold the paper in place. You need to punch twice, lining the centre of the punch with each outer line. You now have your 4 holes.</li> </li>To make a template for the 6-pin visor: Fold the piece of A3 paper in half length-ways to find the centre and draw a line on the crease to make it visible. Measure and draw a line 80mm in each direction from the centre. Draw another line 120mm in each direction from the centre. You need to punch four times, lining up the centre of the punch with the four lines you measured.</li> <li>6-Pin Visor: Trim 23mm from each side so the total width is now 374mm.<li> <li>You now need to trim the visor to length. I personally found 250mm to be adequate. Measure 250mm down from the side with the holes. Use a pair of scissors, or a scalpel to cut it to size. It may also be a good idea to put a radius on the bottom corners to prevent them snagging on things. I used a CD as a template (r = 60mm). </li> <li>Attach the visor to the frame. The hollow part of the frame should not be visible from the outside. start by placing the edge of the acetate into one of the retaining arms. Now work around the frame from one side to the other, pushing the pins into the holes one at a time. I found it easier to slot the edge of the acetate into the other retaining arm before locating the final pin. </li> <li>Add the strap to the back. </li> <ul> <br>
With this file you will be able to print COVID-19 Lightweight 3D Printable Face Shield with your 3D printer. Click on the button and save the file on your computer to work, edit or customize your design. You can also find more 3D designs for printers on COVID-19 Lightweight 3D Printable Face Shield .