CR-10 Dial Indicator Mount for X-Axis Rail
thingiverse
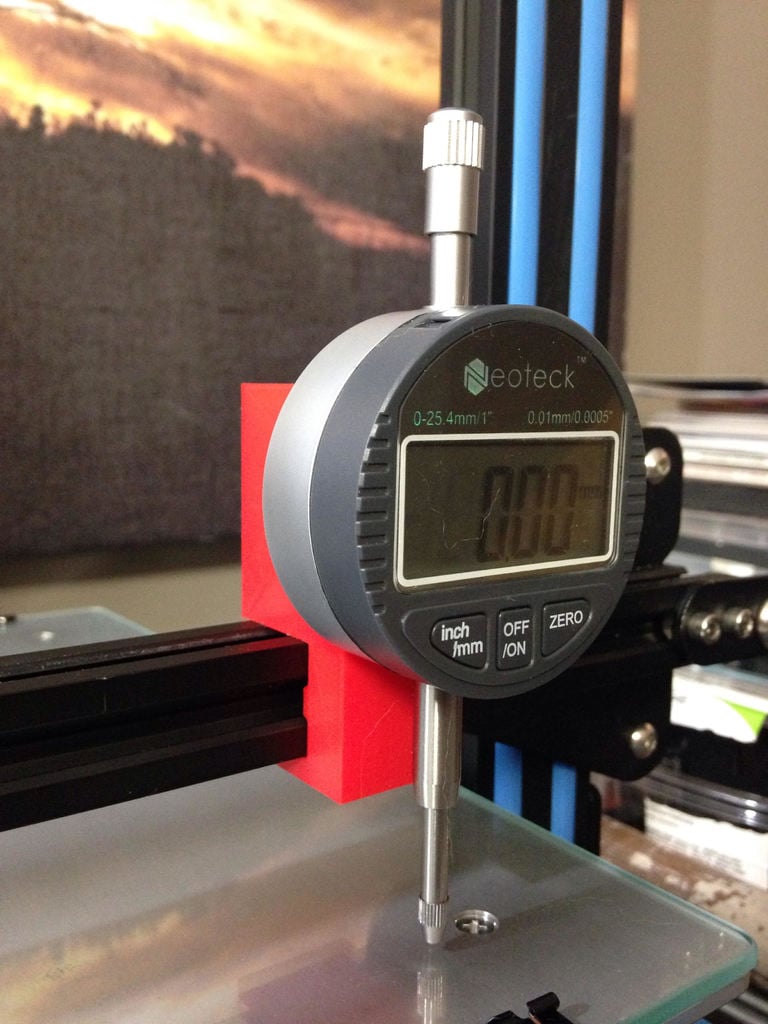
This is a straightforward Dial Indicator Mount that fits snugly over the x-axis extrusion. Enables effortless bed leveling from an auto-home position without requiring any g-code setup routines. 1. Auto-home the print head, then shut down the machine. 2. Level the first corner of the bed. 3. Slide the dial indicator mount over the x-axis rail and place it directly above the leveled area. (Be cautious not to pinch the lower x-axis belt when sliding the indicator mount over the rail.) 4. Set the zero point on the indicator in the leveled area. 5. Move the indicator mount and print bed together to level the other three corners. 6. Slide the mount off the rail, and you're now ready to start printing.
With this file you will be able to print CR-10 Dial Indicator Mount for X-Axis Rail with your 3D printer. Click on the button and save the file on your computer to work, edit or customize your design. You can also find more 3D designs for printers on CR-10 Dial Indicator Mount for X-Axis Rail.