CR-10 E3D V6 Fully Automatic Autobed level endstop mod
thingiverse
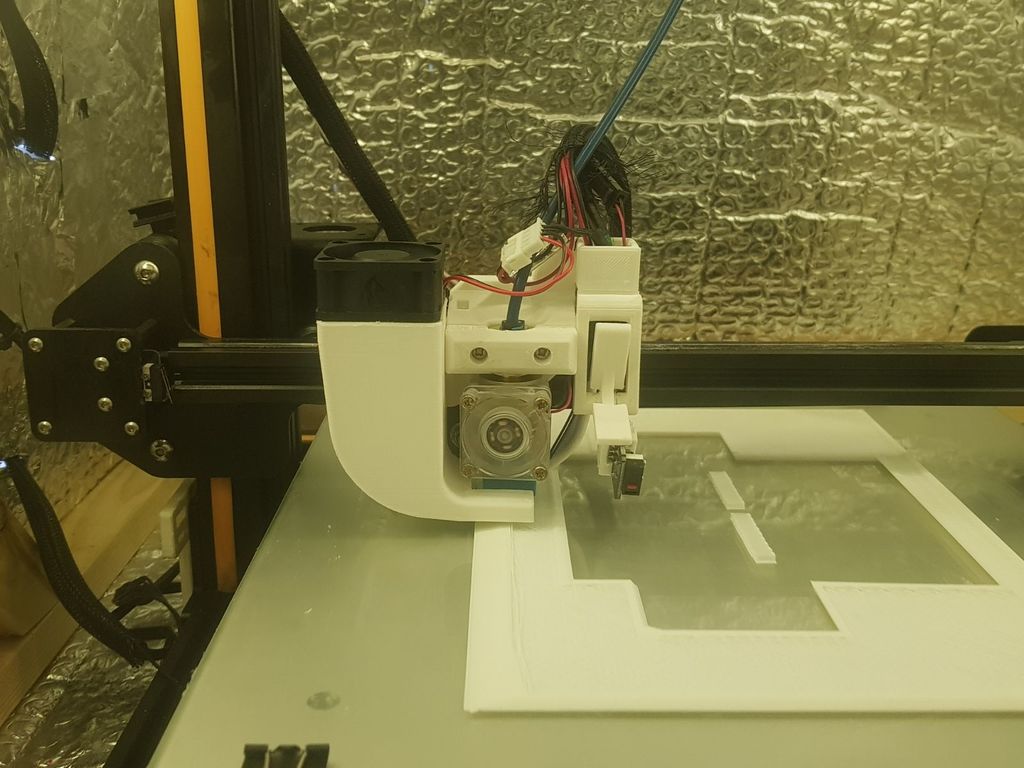
https://www.youtube.com/watch?v=y6RrDK5I6T0&t=17s https://www.youtube.com/watch?v=h5_RlnYOo0I https://www.youtube.com/watch?v=07JQWORC5Hk&t=78s I developed this mod because for some reason I found the capacitive sensor start off great for Auto bed levelling but seem to deteriorate over time for unknown reasons. The detection drifts would get more and more significant. I tried multiple different sensors and testing conditions. So I came to the conclusion I wanted a physical probe. This is how this mod was born. It uses the stock Z-endstop sensor you just need to extend the wires so it can move with the X carriage. I also didn't like moving it up and down manually so I developed the lifting mechanism to raise at end of bed levelling and to lower after print is complete. Please insert the following start and finishing G-code to your slicer. (PLEASE NOTE: I run all start and end G-code scripts direct from my Octoprint. SO these codes may not work for you as is, please look through it and change what you need to get it working.) START CODE M190 S95 ; I have my octoprint handle my heat up of bed to 95c (I only pring ABS) M109 S230 ; I have my octoprint handle my heat up of nozzle to 230c (I only pring ABS) M92 E415 ; I have a bondtech so I need to adjust my E-steps ((REMOVE IF YOU ARE STOCK)) G28 ;Home G29 ; Bed level G1 Z100 F700 G1 X315 F1000 G1 Z-2 F500 G92 E0 G1 F200 E80 ;pushes filament into the heater block and primes it. G92 E0 G1 Z1 G1 Y270 F5000 JOB FINISHED and or CANCELLED G28 X0 Y0 G1 Y300 F3000 G1 Z20 F500 G1 X315 F1000 G1 Z100 F800 M84 M106 S0 ; turn off cooling fan M104 S0 ; turn off extruder M140 S0 ; turn off bed G92 E1 G1 E-40 F500 ;retracts filament (effectively doing a hot pull so less filament is left in the heater block during heat ups to lessen burning clogs) M84 For the mod to work you must change your firmware to enable autobed levelling and to increase the additional X axis movement to 315 instead of 300. The purge bucket works about 80% of the time it just saves the printer having to draw lines of purge material. You will also need to know how to set the Z height offset of your probe vs the height of your specific nozzle. I HOLD NO RESPONSIBILITIES IF YOU USE THIS MOD AND BREAK YOUR PRINTER / YOUR EQUIPMENT / YOURSELF / YOUR FAMILY / YOUR HOUSE. TOTALLY YOUR OWN RESPONSIBILITY. To help you along here is the MARLIN files to flash the firmware. https://drive.google.com/drive/folders/1o48aMIfPh2HTFBpTwazNd4TIGl5y1VHX?usp=sharing All files are there if you just want to edit or reconfigure, There's also a tutorial for the Z offset. (read PDF) download into it's own folder to make things easier. if you just want to flash it just use file named. Marlin.ino.with_bootloader.sanguino.hex I HOLD NO RESPONSIBILITIES IF YOU USE THIS MOD AND BREAK YOUR PRINTER / YOUR EQUIPMENT / YOURSELF / YOUR FAMILY / YOUR HOUSE. TOTALLY YOUR OWN RESPONSIBILITY. Anyway after all that hope you have fun :) FINAL NOTE: IF YOU PRINT ALL THE FULL Y AXIS LENGTH YOUR CARRIAGE WILL CRASH INTO YOUR PRINT AT THE END OF THE PRINT. PLEASE ALLOW SPACE FOR CARRIAGE TO PASS IT!!! I HOLD NO RESPONSIBILITIES IF YOU USE THIS MOD AND BREAK YOUR PRINTER / YOUR EQUIPMENT / YOURSELF / YOUR FAMILY / YOUR HOUSE. TOTALLY YOUR OWN RESPONSIBILITY.
With this file you will be able to print CR-10 E3D V6 Fully Automatic Autobed level endstop mod with your 3D printer. Click on the button and save the file on your computer to work, edit or customize your design. You can also find more 3D designs for printers on CR-10 E3D V6 Fully Automatic Autobed level endstop mod.