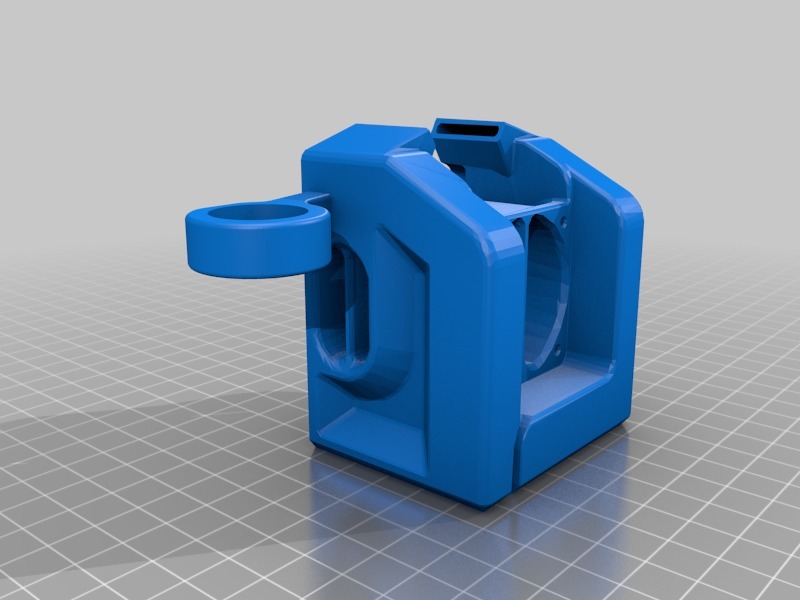
CR-10 / Ender Hotend stock fan shroud with ezabl mount
thingiverse
I recommend for any hotend parts you use abs of petg. I printed with petg at a .08mm layer hight. i did use support but it is important the if you use support to make sure that you can manualy remove any internal support form inside the fan shroud. please ensure you place manual supports around the EZABL mount. i have created a file for the 18mm EZABL kit offered by th3d studios however at the time of posting it is untested. i did manage to print the EZABL mini and it is currently working. Inatall: Remove the fans form the hotend shroud and save the stock hotent shroud as a back up. place the new shroud over the hotend and slide the ear over the corner of the x carriage. then place the bottom screw on the left front side leaving just slightly loose. Then you will install the 2nd screw form the stock shroud in form the back side of the x carriage once started thighten both screwn . you can then mound your fan hotend fan using m3x25 button screws. To mount you EZABL SENSOR i recommend you first preheat and level your bed. then with a sheet of card stock between your bed and hotend insert you EZABL sensor with a 2 or 3 mm Allen wrench below it as a spacer. you can then carefully tighten the nuts with lock washers between the nut and the EZABL mount. after this move your hotend up about half a milimeter use a persision common screwdriver to adjust the potentiometer until the light turns on and stays on but will go off if you move it up another half millimeter or less. once the EZABL Mount is installed you will need to update your firmware. PLEASE NOTE YOU DO THIS AT YOUR OWN RISK. I AM NOT RESPONSIBLE FOR ANY ISSUES CAUSED BY FLASHING YOUR FIRMWARE AND WILL NOT ADVISE YOU ON HOW TO DO SO. Within the th3d firmware you will need to set the offset for your sensor to custom and go to the configuration.h tab about 80% of the way down there is a section for custom probe settigns the settings neet to read as displayed below #if ENABLED(CUSTOM_PROBE) #define EZABL_ENABLE /** * Z Probe to nozzle (X,Y) offset, relative to (0, 0). * X and Y offsets must be integers. * * In the following example the X and Y offsets are both positive: * #define X_PROBE_OFFSET_FROM_EXTRUDER 10 * #define Y_PROBE_OFFSET_FROM_EXTRUDER 10 * * +-- BACK ---+ * | | * L | (+) P | R <-- probe (10,10) * E | | I * F | (-) N (+) | G <-- nozzle (0,0) * T | | H * | (-) | T * | | * O-- FRONT --+ * (0,0) */ #define X_PROBE_OFFSET_FROM_EXTRUDER 47 // X offset: -left +right [of the nozzle] #define Y_PROBE_OFFSET_FROM_EXTRUDER -3 // Y offset: -front +behind [the nozzle] #endif The final step after updating the firmware will be to zet your z offset. to set this preheat the bed and hotend then home all axis. you will then move the probe -47 on the x and +3 on the y. you can then move the nozzle down to meat the bed .01mm at a time over a peice of paper until the paper stops moving. the value listed as the current z position needs to be placed in the z offset form the contorl menu, under motion. please note the some fine tuning may need to be done to achieve a perfect first layer height this can be dons by babystepping the z height in the tune menu. With abl i recommend to allow a little extra height on the first layer as there can be some inconsistencies. For example i print with a layer height of 0.08 mm but i set my first layer height to 0.2 mm.
With this file you will be able to print CR-10 / Ender Hotend stock fan shroud with ezabl mount with your 3D printer. Click on the button and save the file on your computer to work, edit or customize your design. You can also find more 3D designs for printers on CR-10 / Ender Hotend stock fan shroud with ezabl mount.