CR-10 MINI Bed Connector Strain Relief with Corner Clips
thingiverse
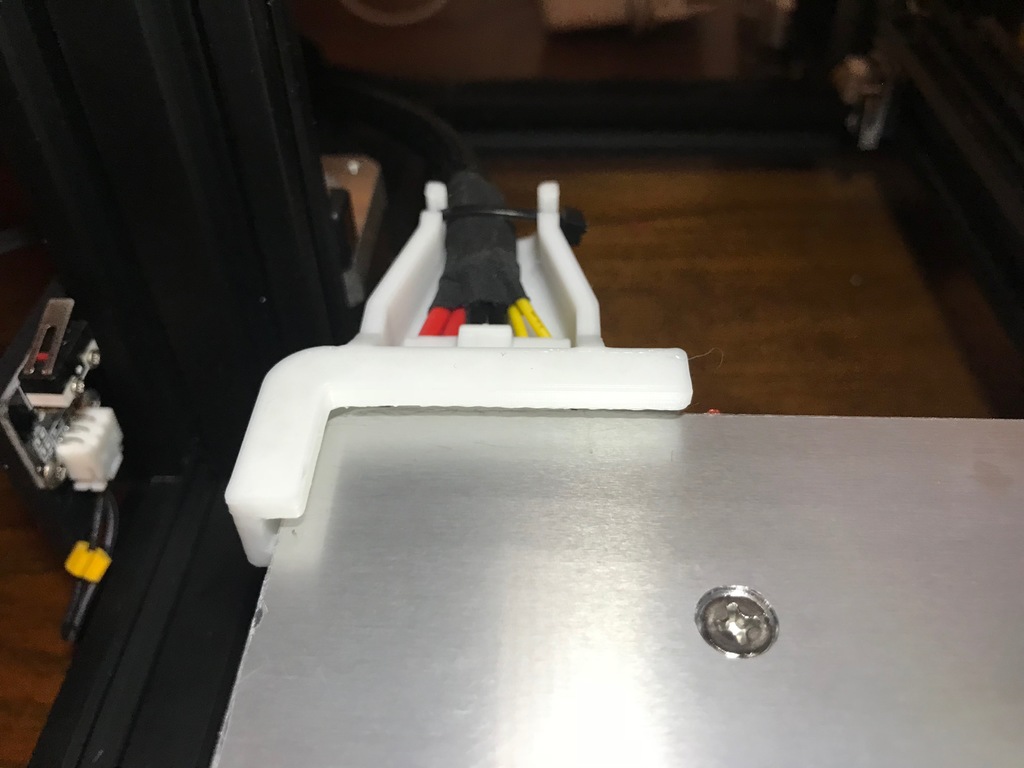
This grouping of parts can be used to retain and align the stock CR-10 Mini glass bed while also providing strain relief to the connector for the heat bed. Binder clips or another retention method will still need to be used at the front of the print bed. Print: (1) Strain Relief Corner Clip (1) Right-Rear Corner Clip (2) Spring Spacers To install: Slide wiring harness connector through strain relief part and connect to header on heat bed. Slide strain relief back down harness and over connector and header. Retain wiring at end of part with zip tie wrapped through notches. Spring spacers may be placed between spring and heat bed, or spring and Y-axis sled, with spring in counter-bore. The non-strain relief clip should be placed at right rear of bed, but could also be placed at left front. Some tolerance allowance is included in the parts for fore/aft and lateral positioning. Some sanding may be required if your heat bed and glass are thicker than that of the printer I measured. YMMV.
With this file you will be able to print CR-10 MINI Bed Connector Strain Relief with Corner Clips with your 3D printer. Click on the button and save the file on your computer to work, edit or customize your design. You can also find more 3D designs for printers on CR-10 MINI Bed Connector Strain Relief with Corner Clips.