CR-10 Raspberry Pi Integration
thingiverse
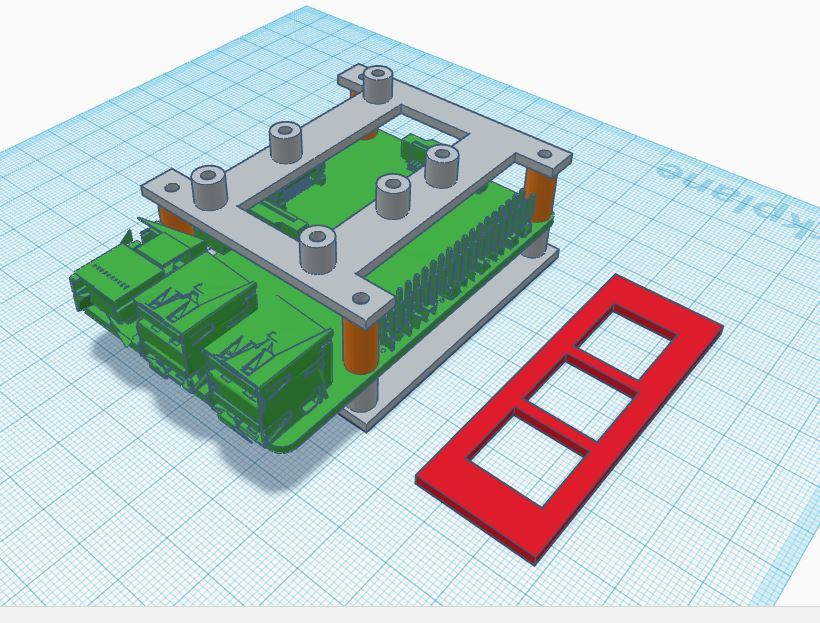
I integrated a raspberry pi inside of the CR-10 electronics case. Instructions * Cut a 54mm x 20mm hole 11mm from the top and 40mm from the back of the case. * Epoxy pi mount in place. It's should be 20mm from the side wall where the hole is cut and about 38mm from the back inner wall. Tip: attach the pi to the mount, and then epoxy the mount, this will make sure everything is properly aligned and the additional weight will help to hold the mount in place while the epoxy dries. * Epoxy the IO cover to the outside of the case. The top of the cover should be 9mm from the top of the case and 32mm from the back of the case. Tip: It is easier to position this with the pi in place. In addition to the raspberry pi mount there is a mount for a single channel relay and a LM2596 DC-DC adapter with spacers to mount it above the raspberry pi. The pi is powered from the 12V power supply using the LM2596 and using the relay to toggle power to the CR-10 main board. The rear exhaust fan was, replaced with a quieter fan, and rewired to be powered on independently of the main board so that it runs as long as the power supply is switched on. The front fan still powers on with the main board. Note: If you just want to integrate the raspberry pi and power it with independently the power supply cable can be put through the existing cable grommet. Note: The raspberry pi is placed directly over the cable tie mount. The mount will still be usable after installation the wires will just have to be run under the pi. Links to parts used. LM2596: https://www.amazon.com/RioRand-LM2596-Converter-1-23V-30V-1Pcs-LM2596/dp/B008BHAOQO Single channel relay: https://www.amazon.com/Tolako-Arduino-Indicator-Channel-Official/dp/B00VRUAHLE Rear fan replacement https://www.amazon.com/Noctua-Cooling-Blades-Bearing-NF-A4x10/dp/B009NQLT0M As for screws: I used the screws that held the old thicker exhaust fan to mount everything as they were the perfect length. To mount the new fan I used some M3x12mm screws that I had around.
With this file you will be able to print CR-10 Raspberry Pi Integration with your 3D printer. Click on the button and save the file on your computer to work, edit or customize your design. You can also find more 3D designs for printers on CR-10 Raspberry Pi Integration.