CR-10 S4 Frame Braces
thingiverse
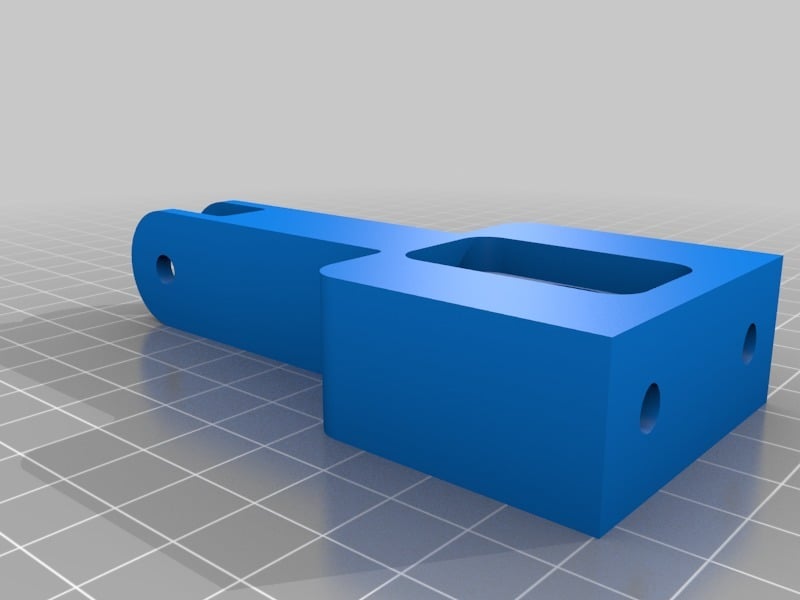
I'm Bracing for the Creality CR-10 S4 and installing it at the back of the printer since I preferred to place it there rather than in front of the printer. Some inspiration comes from https://www.thingiverse.com/thing:2731263 by junaling, Thanks!. This was also an upgrade to synchronize the dual z-axis lead screws, which was done using 2 new lead screws 600mm long TR8x4 (better resolution for the z-axis) and 2 anti-backlash nuts that come with the screws https://www.aliexpress.com/item/New-Arrival-T8-100-200-300-400-600mm-8mm-Lead-Screw-with-Nut-Kit/32832245184.html. I reused the flanged upper ball bearings and the original lid for the bearings, and used two 30-tooth GT-2 timing pulleys with a bore of 8mm https://www.aliexpress.com/item/1PCS-Alumium-GT2-30-teeth-Timing-Pulley-Bore-5mm-8mm-6-35mm-for-width-6mm-belt/32795513753.html. Then I could use a 976mm long GT2 closed-loop timing belt https://www.aliexpress.com/item/1pcs-lot-GT2-900-930-976-closed-loop-rubber-2GT-timing-belt-2GT-900-930-976/32843219839.html and it fits perfectly between the lead screws. Note: this setup is for the S4 printer, I don't know the distance or timing pulleys required for the S3 or S5! I then used two carbon fiber pipes (10mm OD, 8mm ID) about 534mm long (since it depends on how square your frame is), and glued the link arm with epoxy resin. Support was only needed for the link arm.
With this file you will be able to print CR-10 S4 Frame Braces with your 3D printer. Click on the button and save the file on your computer to work, edit or customize your design. You can also find more 3D designs for printers on CR-10 S4 Frame Braces.