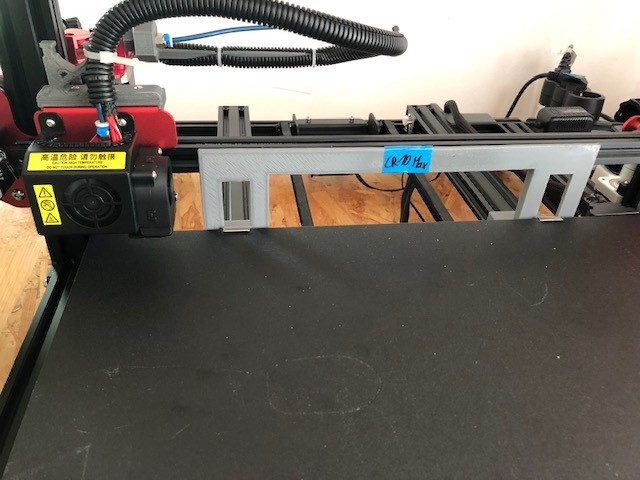
CR-10S Max z height leveling block - direct x to y rails leveling for max precision
thingiverse
There are already a lot of z height blocks around but I was looking for maximum precision while haven also a maximum ease of use. I found some designs leveling x to y rails which would give maximum precision, so I went for this concept. To get the ease of use I designed a one piece block which will stay stable while moving the z axis down since you will need two hands for operate the two spindles at the same time. The process is just straight forward: 1. Disable stepper motors 2. Move the bed to the very front 3. Raise the z axis so the block fits under the beam 4. Place the block on the two rails 5. Lower the z axis manually until it sits perfectly parallel to the two lower rails 6. Use the printer control (or print server like octoprint) to raise the z axis for at least 30mm 7. Remove the block The design is also allowing easy printing without support. If you insist in two separate blocks, I also uploaded the single block design. you can also choose if you want to use the V1 or V2, where the V2 provides more stability but the carriage hast to be moved to the left or right.
With this file you will be able to print CR-10S Max z height leveling block - direct x to y rails leveling for max precision with your 3D printer. Click on the button and save the file on your computer to work, edit or customize your design. You can also find more 3D designs for printers on CR-10S Max z height leveling block - direct x to y rails leveling for max precision.