CR-10S Pro Dual Z Timing Belt Sync
thingiverse
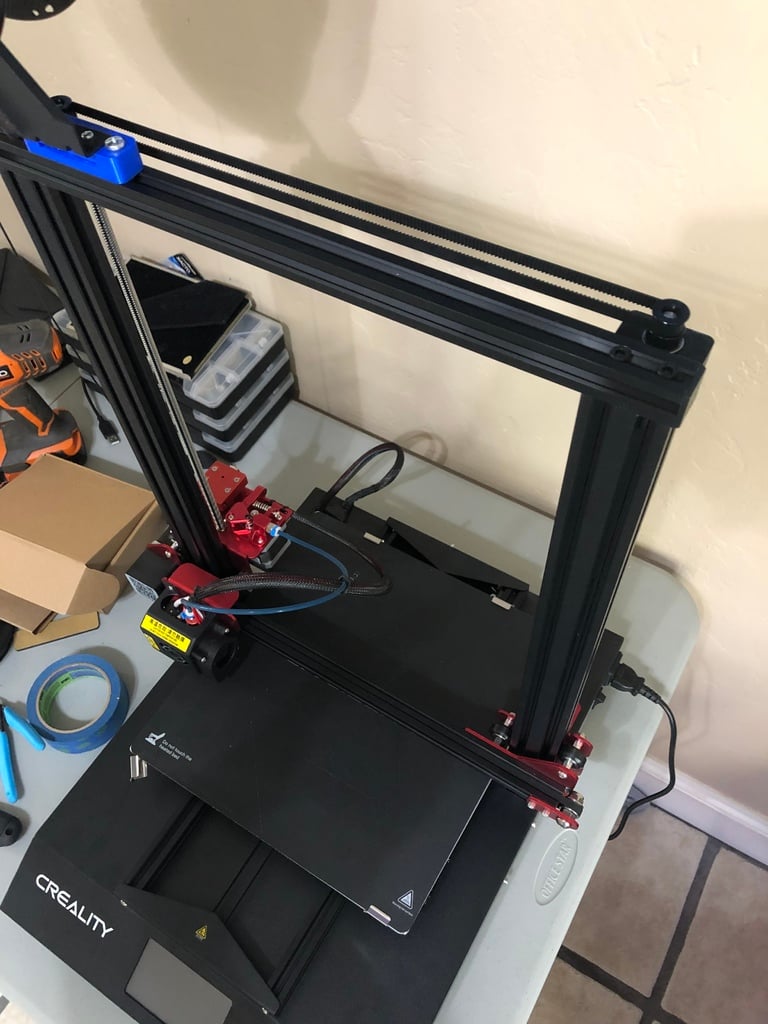
Note - This will decrease your print height slightly! The CR-10S Pro suffers even more than the CR-10 series as far as the Z motors going out of sync on power off. This is the same design as the one by hoegee, but it works perfectly for the Pro as well. This is a must do in my opinion or you'll fight bed leveling forever. Please also note that the original firmware is GARBAGE! Make sure to upgrade it by going here. Tiny Machines loads all their Pro's before shipping with this firmware for the screen AND board. Yes they are different. Removed the bottom of the printer to access the SD card port for the screen firmware and update the board firmware via Cura. https://github.com/InsanityAutomation/Marlin/tree/Creality_DWINTest?fbclid=IwAR3LH1e4NWD8MzKJT8qGYB6McF2RFZ-M7lpgGiJhYQ6yv6GHvOvYRKsfT7A List of material needed - Two 20 teeth GT2 pullies (20T W6 B8) (8 mm bores to fit the lead screw) - https://www.aliexpress.com/item/GT2-Timing-Pulley-16-Tooth-2GT-20-Teeth-Aluminum-Bore-5mm-8mm-Synchronous-Wheels-Gear-Part/32844125364.html?spm=a2g0s.9042311.0.0.TFusEb From Amazon - https://www.amazon.com/gp/product/B07KVHCBDM/ref=oh_aui_search_asin_title?ie=UTF8&psc=1 - One 76 cm GT2 (2GT 760mm 380T) timing belt between the two Z lead screws. - https://www.aliexpress.com/item/LUPULLEY-GT2-Belt-Rubber-Synchronous-Transmission-Closed-Loop-Belt-300-303-305-308-320-335-348/32824053502.html?spm=a2g0s.9042311.0.0.Zfv6H4 From Amazon - https://www.amazon.com/gp/product/B01AXRB13Y/ref=oh_aui_search_asin_title?ie=UTF8&psc=1 Update Instructions - Before doing anything, download the firmware files from here to have the latest updates and read ALL steps first or even a couple times - https://github.com/InsanityAutoma…/…/tree/Creality_DWINTest… Step 1 - Take the SD card that came with the printer and follow this video (https://www.youtube.com/watch?v=EvG4uqx-Oos). You need to copy the DWIN_SET folder ONLY to the SD card and you must flash the SD card before hand. Step 2 - Lay the printer on it's side and take the bottom cover off the machine with the phillips head screws. There are two on each side as well as the ones on the bottom. You do not need to unscrew the feet for this process. Step 3 - Enter the newly flashed SD card into the slot that you find inside the printer, turn on and wait for the files to load. It should do exactly what it does in the video. Step 4 - Power off the printer, remove the SD card and power back on the machine. Step 5 - Connect your computer to the printer via the included cable to the slot next to the exterior SD card slot. Step 6 - Open Cura, go to Settings - Printer - Manage Printers. Step 7 - Select upgrade firmware and navigate to CR10SPro_1.1.9_B5.hex (For the CR-10S Pro) or CR-X_1.1.9_B5.hex (for the CR-X) and upload. Cura told me this failed, but it didn't. Power on and off the machine and the Tiny Machines logo will show and chime. Step 8 - Once that is loaded, follow this video to set the bed leveling. - https://www.youtube.com/watch?v=hitJUx3eKW8 NOTE- I did not use the included shim like in the video just above, I used the included wrench and used that as my thickness to bring the sensor closer to the bed. I found this worked MUCH better than using the shim for accuracy. If you have issues with the SD card not loading the files, then follow this guide and try again. (https://www.youtube.com/watch?v=2eKXToHrYeE) NOTE at the end I use the following command without the quotations "format fs=fat32 quick" as he uses ntfs. And don't forget about Solid Bed Mounts! - https://www.thingiverse.com/thing:3393313
With this file you will be able to print CR-10S Pro Dual Z Timing Belt Sync with your 3D printer. Click on the button and save the file on your computer to work, edit or customize your design. You can also find more 3D designs for printers on CR-10S Pro Dual Z Timing Belt Sync.