CR-10s Pro Z-Sync Timing Belt Tensioner
thingiverse
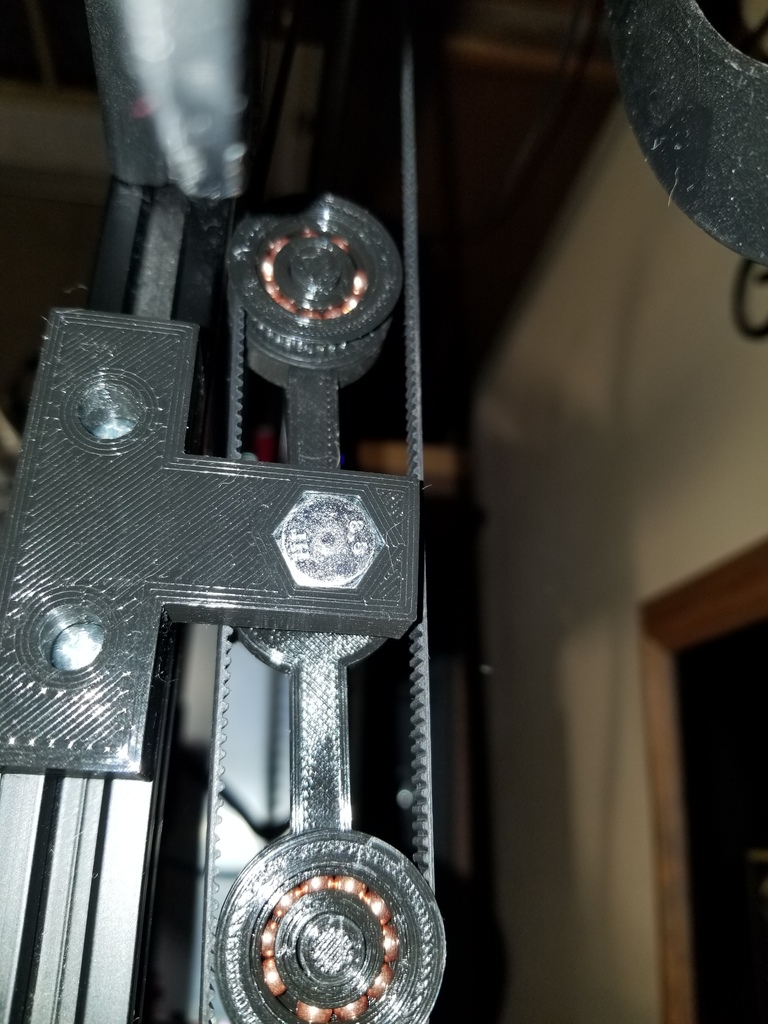
The following mod may be necessary if your Belt tension is a little loose even after adjusting the top blocks outward as mine was. My design will apply equal tension on either side of the belt and therefore is easier and more accurate to setup than the original mod that I made or some of the other mods that I have come across that only apply tension on one side of the belt. Thanks to RickSisco for the original "Simple CR-10S Pro Dual Z Sync Mod" His modification adds 2 GT2 Pulley's and a 6mm Belt to keep your dual z-axis screws in sync with eachother. Print the following: 1 x CR-10s ProBeltIdlerBracket.stl 1 x CR-10s ProBeltIdlerPulleyMountBar.stl 2 x CR-10s ProBeltIdlerPulley.stl or 2 x CR-10s ProBeltIdlerPulleyNoBearing (No Ball Bearing Option) 2 x t_nut_new_2.stl Optional: New Covers that were removed with an enlarged opening to fit over the pulley! 2 x Z-Axis CoverBigHole.stl BallBearingPulley Dust Covers 2 x CR-10s ProBeltIdlerPulleyCap.stl Hardware Required: 1 x M8-1.25 - 40mm Hex Bolt (Minimum Length) 1 x M8-1.25 WingNut or HexNut 1 x M8 Washer 2 x M4-.70 - 12mm Screw 2 x M4-.70 Hex Nut 20 BB's 4.5mm or Ball Bearings 4.5mm (Not needed if you print the pulley's with no bearings) Note: When Printing the bearings I paused the printer at about 3.5-4mm height to insert 10 bearings in the bearing-race, then resumed printing. If you want to use pulley's with no bearings, you can optionally print the following: 2 x CR-10s ProBeltIdlerPulleyNoBearing.stl Assembly: Using 2 T-Nuts, 2 M4 Hex Nuts and 2 M4x12mm Screws mount the Bracket to the top of the 2020 Railing midway. (You will need to remove 2 Cap Screws from the top of the printer on one side to be able to slide the T-Nuts into place. Re-install Cap Screws once T-Nuts are in the channel) Install the M8 Hex Bolt from the top until it is seated in the Hex recessed area of the bracket. Install the MountBar (Pins facing upwards) onto the lower part of the M8 bolt. Install the M8 washer and then the M8 wingnut or hexnut to tighten bar up. Install your 2 pulley's. Adjust the bar to desired tightness of the belt and securely tighten up bar so that it will not move. Enjoy!!
With this file you will be able to print CR-10s Pro Z-Sync Timing Belt Tensioner with your 3D printer. Click on the button and save the file on your computer to work, edit or customize your design. You can also find more 3D designs for printers on CR-10s Pro Z-Sync Timing Belt Tensioner.