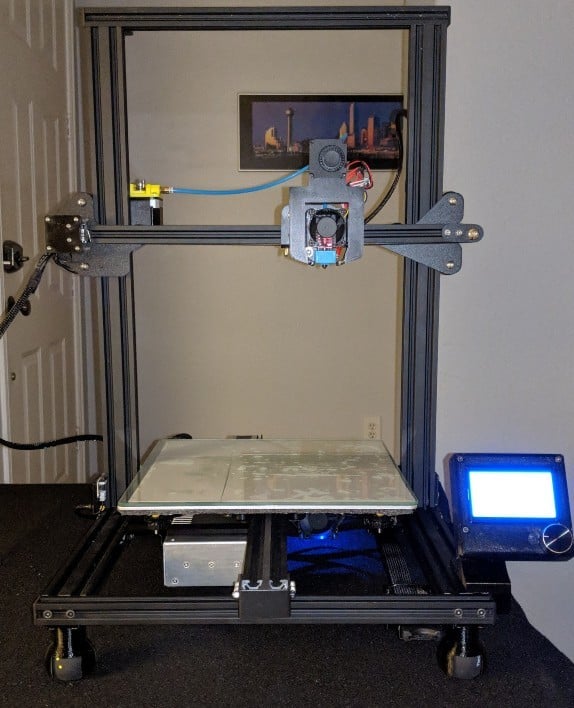
CR10 All-In-One
thingiverse
UPDATE 21 Sep 2018 I'm thrilled to see this project evolving into a collaborative effort. Janis Rocans generously shared his updated electronics cover for newer boards on the 10S, along with a picture and the Fusion file itself. He also showcased an impressive case/stand design for a Raspberry PI with a 5-inch touchscreen - check it out here. UPDATE 16 Sep 2018 I'd like to extend my gratitude to Scott Lahteine for remixing and sharing parts that support the 10S display. Be sure to explore his other designs here, as he has some truly innovative concepts, including great updates for the Creality and Prusa I3 printers. NOTE: It's been reported that this design may not be compatible with newer CR10 control boards and displays, but it is said to work with the CR10 mini. See comments for feedback. To address this issue, I've added the Fusion360 design files, allowing you to update and modify the design to suit your specific CR10 model. Inspired by Thingiverse's 2747280, I set out to create my own version of integrating control box electronics and power supply. This kit includes: - Remodeled feet with integrated power connector and mount for a squash ball for vibration dampening - Mounting plate for power supply and mosfet with cooling fan - Mounting plate for Melzi control board with integrated wire management and cooling fan - Mount for navigator plugs from the stock wire harness - SD card slot moved to the front of the printer, just below the control panel, featuring a full-size SD Card Reader available from Amazon - Case and mount for the control display, along with a new display cable from Amazon - STL for spool holder (added on April 1, 2018) - Cover plate for the remaining area of the printer, including: - A cover plate with integrated mount for power supply - A cover plate for mounting an Raspberry PI - Blank cover plate to cover the remaining area Total conversion cost is approximately $20 plus filament. Original wires are used except for those from the switch and power receptacle to the power supply. The ribbon cable to the display was also replaced, with the original connectors re-purposed onto a new, longer ribbon cable. You may need to lengthen the wires to the fans as well. The stock wire harness remains unchanged, with excess wire length managed by integrated wire management loops below the Melzi board. The Melzi board is raised off the mounting plate, allowing for wire routing underneath and creating a cleaner look while maintaining airflow over the stepper drivers. I designed the cover plates primarily using M3 hardware for mounting boards and M5 for attaching plates to extrusion: - M3 x 8 for mosfet - M3 x 12 for control board - M3 x 10 for Raspberry PI (yes, I enlarged the M2.5 holes in Raspberry PI to M3) - M5 x 10 for mounting cover plates to extrusion The end result is a clean-looking, fully integrated printer with no umbilical cord and clunky control box. This modification may expose live mains voltage wires and terminals. While the leg with integrated power connections has some shielding, it won't prevent users from reaching and touching wire terminals. If someone reaches underneath the printer, they could potentially access live mains voltage terminals. It's recommended to take additional safety measures.
With this file you will be able to print CR10 All-In-One with your 3D printer. Click on the button and save the file on your computer to work, edit or customize your design. You can also find more 3D designs for printers on CR10 All-In-One.
