Crabby Cap Zesty Nimble SeeMeCNC HE280/Accelerometer Mount
thingiverse
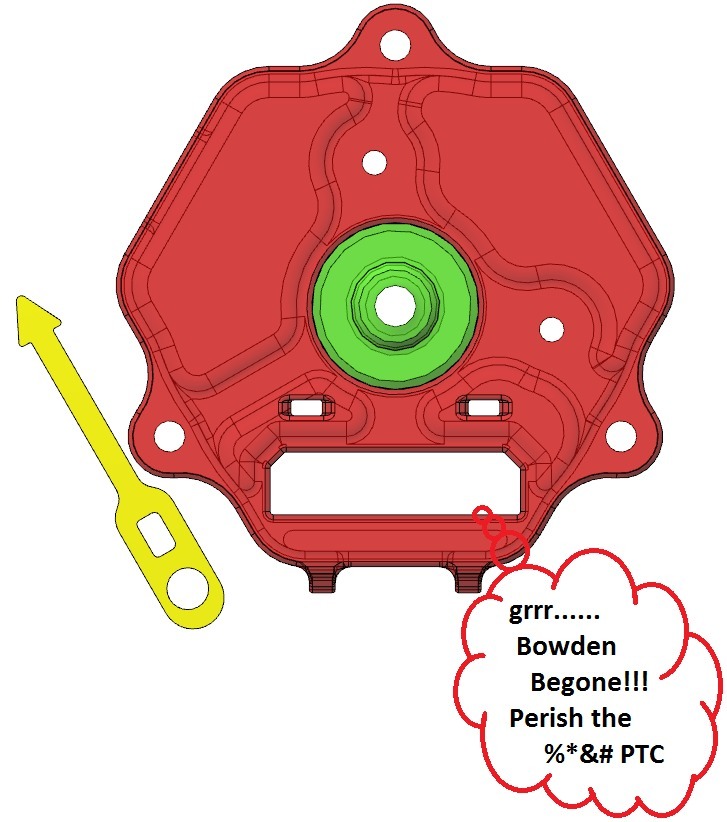
**Update 18 Aug 2017:** System has been working well, with two rolls of filament (Ninjaflex, PETG, ABS and a little PLA) running through it without problems or jams. The Nimble holds the PTFE tube firmly in the bottom of the barrel, while the PTC is loose. **Printing without a Bowden tube is a whole new world!!!** For more detail (with photos) on installation, see the Nimble Adapter section of the [Prometheus variant of this adapter](https://www.thingiverse.com/thing:2487180). **Note:** This is a prototype, and I have only put a little NinjaFlex through it so there are likely to be changes over the next couple of weeks, but so far, so good... Crabby Cap is an adapter to mount the [Zesty Nimble Direct Drive Extruder](https://zesty.tech/) on the SeeMeCNC [HE280](https://www.seemecnc.com/products/he280-hotend-with-accelerometer-probe) (see also [Turpinator's solution](https://www.thingiverse.com/thing:2184991)) for SeeMeCNC [Accelerometer Plate](https://www.seemecnc.com/products/hotend-accelerometer-probe-pcb-board-rev-5c) equipped with fan headers and plugs. **Required Parts and Tools:** + 3 of M3x16 to 20mm Bolts are used to mount the cap + 3mm or 1/8" drill to size cap mounting holes + 2.4mm or 3/32" drill to size Nimble mounting holes prior to tapping + M3x0.5 Tap to tap Nimble mounting holes + ~ 60mm 4mmOD x 1.8 to 2.0mmID PTFE tubing + Drill bit (4mm+) to slightly oversize Guide Bushing bore to suit your PTFE tube size + A half inch or similar half round file for finishing and sizing + Sharp knife or razor to trim PTFE tubing + Metal Saw to cut M3 Bolt + Method of measuring hot end barrel depth **Instructions:** + Cap best printed upside down. Recommend PETG. Size centre hole to 16mm. Size cap retention holes to 3mm. Size the two Nimble mounting holes to 2.4mm and tap. + Guide Bushing should have a total length of 9mm. Smaller diameter 8.5mm, larger diameter just under 16mm. ABS recommended. + Straps can be printed in Ninjaflex after you get your new direct drive extruder up and running! + Trim ONE of the 40mm bolts that come with the Nimble to 35-37mm. + Trim any soldered wires and ensure the fan wiring is arranged to be less than 2.5mm above the board. + Ensure that the Guide Bushing passes freely through the centre hole of the cap + Square one end of the PTFE tube and chamfer the OD slightly. + Drill out the bore of the guide bushing so that your PTFE tube passes smoothly through it. + Measure the depth of the barrel in the hot end and the length of the PTFE tube. + Insert the squared and tapered end of the PTFE tube into the hot end barrel and seat it firmly. + Measure amount of PTFE tube protruding and verify tube is fully seated in the bottom of the hotend barrel. + Install the cap with the M3x16-20mm bolts. They will self-tap. + Place the Guide Bushing over the PTFE tubing and seat it on top of the hot end. + Trim the PTFE tubing so that it just slightly protrudes above the top of the Guide Bushing (0.3mm or about the width of a razor blade). + Place the Nimble Groove Mount Adapter over the Guide Bushing, it should lay flat against the cap top, shorten Guide Bushing if necessary. + Mount the Nimble. Use the 40mm bolt with the Sleeve Clamp (or a 3mm spacer for fit testing without the drive cable) to avoid damaging the board. + Gentle tightening of the extruder bolts should cause the Nimble to seat squarely on the Groove Mount Adapter and the PTFE tube should contact the bottom of the filament guide on centre without distortion. Re-trim the PTFE tube if necessary.
With this file you will be able to print Crabby Cap Zesty Nimble SeeMeCNC HE280/Accelerometer Mount with your 3D printer. Click on the button and save the file on your computer to work, edit or customize your design. You can also find more 3D designs for printers on Crabby Cap Zesty Nimble SeeMeCNC HE280/Accelerometer Mount.