Cradle for Bose Sound Link 3 Speaker
thingiverse
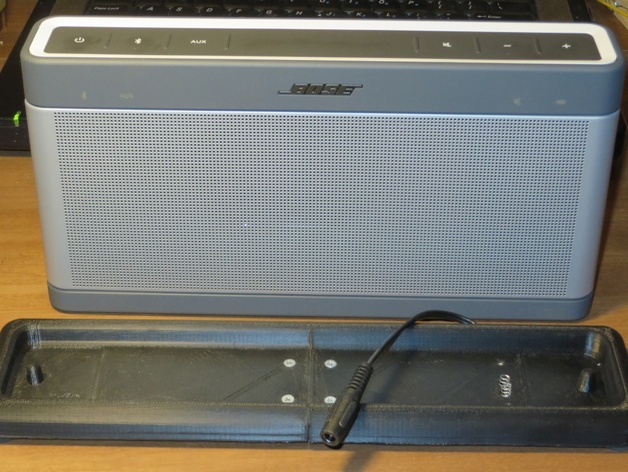
Dock for Bose SoundLink3 Speaker Prints in 2 halves to fit just about any 3D printer. Designed with 123D, files included. This handy accessory fetches $35 from Bose, but you can build one for a few bucks. You will need: Small scrap of 1.5mm aluminum, 32mm x 37mm (1 1/4" x 1 7/16" x 1/16") 6ea. 2.5mm x 3mm L or 4-40 x 1/8" flat-head screws Tap for above, drill bit, countersink bit, etc. 5.5 x 2.1mm coaxial DC power jack to fit the Bose power supply, wiring attached Ball-point pen spring (~3mm diam.) 4 small felt or rubber feet Scrap of single-sided copper PC board material Knife, soldering iron, solder, etc. Print Settings Printer: FlashForge Creator Dual Rafts: Yes Supports: Yes Resolution: .15mm Infill: 25% Notes: Assembly Instructions: Print the cradle "right" side first. Use a raft and extra support ("aggressive support" in MB 3.5.0) for best results. The default support setting doesn't properly support the pockets on the bottom. I used ABS, 25% infill, 2 shells. Look at the bottom of the speaker and note the two gold-plated contacts. These are charging connections for the dock. The positive one is towards the front of the speaker. While it is printing, gather the materials. Cut the scrap of PC board material to size: 19mm x 37mm (3/4" x 1 7/16") Cut the aluminum scrap to 32mm x 37mm (1 1/4" x 1 7/16" x 1/16") Now that it's done... Clean the support material from the pockets on the right half completely, including the wire hole through the side. Hold the PC board in the contact pocket on the bottom and mark the two 3mm spring holes and the two smaller mounting holes through from the top. Using a knife, cut a ~1mm wide slit across the PC board between the two spring marks. This can be done by scoring the foil twice and peeling the copper between away. A hot soldering iron helps remove the copper. See the contact picture for details. Drill out the two smaller mounting holes for your screws. Countersink on the non-copper side. Cut the ball point spring in half. Uncurl the last turn of the tight ends a bit. Solder the two spring halves to the PC board at the locations you marked earlier. Check the fit into the pocket, bend the springs or knife out some plastic until they fit. Solder a pair of wires on your DC power jack, mark the center pin one. This is positive. Insert the wires through the side hole into the bottom pocket. Trim the negative wire about 3/8" shorter. Hold the PC board in the end pocket and mark, drill & tap for the flat-head screws. Now that the cradle left half is done printing... Check the left and right halves fit onto the speaker. File plastic from the end if needed or note any gap needed due to printing shrinkage. Hold the cradle left half into place and mark the other two holes. See picture for details. Drill and tap the aluminum again, countersink the plastic on the top and fasten the left and right halves together. If it isn't flat, remove and bend the aluminum piece a bit. Add four small rubber feet to the corners and it's done. Now check your work - Plug the Bose power supply to your DC jack, and with the springs to the right, check again that positive voltage is on the front spring! Should be about +17 volts. The charge light on the speaker should illuminate as you seat the speaker on the cradle. Enjoy! --N2GX Post-Printing If you want a folding version for travel, the pockets on the left and right halves will accept a U.S. standard 1 1/2" x 1 1/4" hinge. Use 4-40 flat-head screws as above but insert them from the bottom and thread into the plastic. Just stagger the rubber feet so they don't interfere when folded. How I Designed This 123D, files included.
With this file you will be able to print Cradle for Bose Sound Link 3 Speaker with your 3D printer. Click on the button and save the file on your computer to work, edit or customize your design. You can also find more 3D designs for printers on Cradle for Bose Sound Link 3 Speaker.