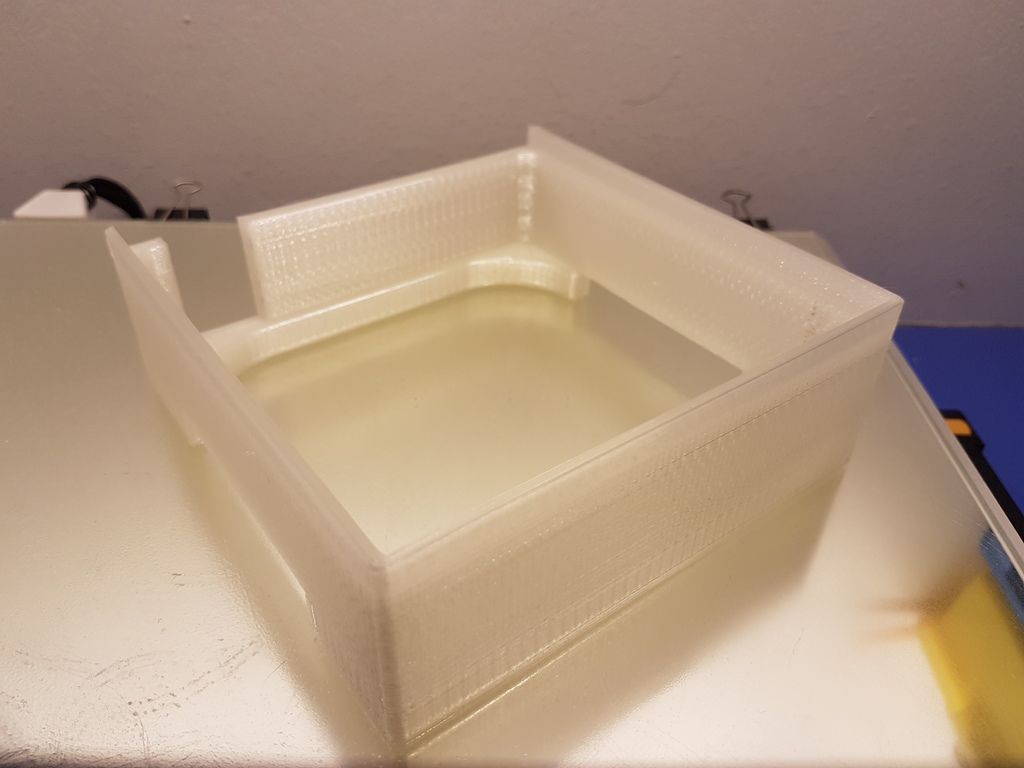
Creality CR-10 Control Box 120mm Fan Mod
thingiverse
IMPORTANT: READ THE SAFETY INFORMATION AT THE END OF THIS. Modification for the original Creality CR-10 control box; replaces the three loud fans inside with either one or two 120mm fans. Print 2 of these stands and fit either one or both with 120mm fans (no screws required). If you only fit one fan, I would recommend fitting the front stand with a fan blowing inwards so the air cools the power supply and goes up the box and cools both the circuit boards. Open the control box, remove the power supply, open the power supply and snip the power cables to all three fans (or unplug them in the case of the power supply). Insulate any loose ends and remove the fans if you are not using them. Use the power cable from the front fan (the one cooling the main PCB) to power the 120mm fan. Sit the control box (sans the bottom) on the two stands and you're good to go. Disclaimer: I have tried this cooling setup (one fan) printing PLA (210 degrees) with a 60 degree heated bed and everything works fine. However, I cannot guarantee that this would work if the printer is pushed to its power limits as I have not tested it. Other notes: To silence the hotend fan, one could use a separate power supply or an appropriate resistor to undervolt the fan instead of buying one of those expensive Noctua or Noiseblocker fans. I undervolted mine to around 6V with no problems (PLA 210 degrees). However, do note that if the hotend fan does not push enough air, the PTFE tube will melt as the heatbreak will heat up too much, so make sure the fan pushes a reasonable amount of air while undervolting. SAFETY: TLDR: Do NOT lead the fan power wires out from the BACK area of the case where the high voltage wires are. Lead them out from the SIDE of the case or even better use a separate power supply. I had used the power leads from the rear fan to power the 120mm fan, all was fine until I moved the printer. When I reconnected the printer and started printing, I realized that the 120mm fan was not working as the connection was a bit loose and had come off. As I fiddled with the wires (the control box was on its side and the printer was printing; I did not want to disturb the print), the red wire slipped and touched one of the high voltage wire connections, and the control box started SMOKING. I was very lucky that I was not touching the 12V red wire that got fried by 240V (I was still holding onto the black wire but God was kind). In the end, everything was fine, and I just lost the power cables to one fan (the rubber burnt off). Kudos to Creality for designing their PCBs to take some 240V interference and print fine afterwards. I dunno what to call this other than what Professor McGonagall would term 'sheer, dumb luck' but as they say, what does not kill you makes you smarter. Learning Points: 1. Try NOT to lead additional wires through areas where high voltage cables connect. 2. Tie your wires properly, especially if they have a risk of touching bare connections. 3. Remove or tie down any loose wires (e.g., from fans that you are not using) just so that there are fewer wires floating around. 4. Work with the mains power OFF and check your work after to make sure no wires cross and stuff like that. Happy modding, guys & stay safe!
With this file you will be able to print Creality CR-10 Control Box 120mm Fan Mod with your 3D printer. Click on the button and save the file on your computer to work, edit or customize your design. You can also find more 3D designs for printers on Creality CR-10 Control Box 120mm Fan Mod.
