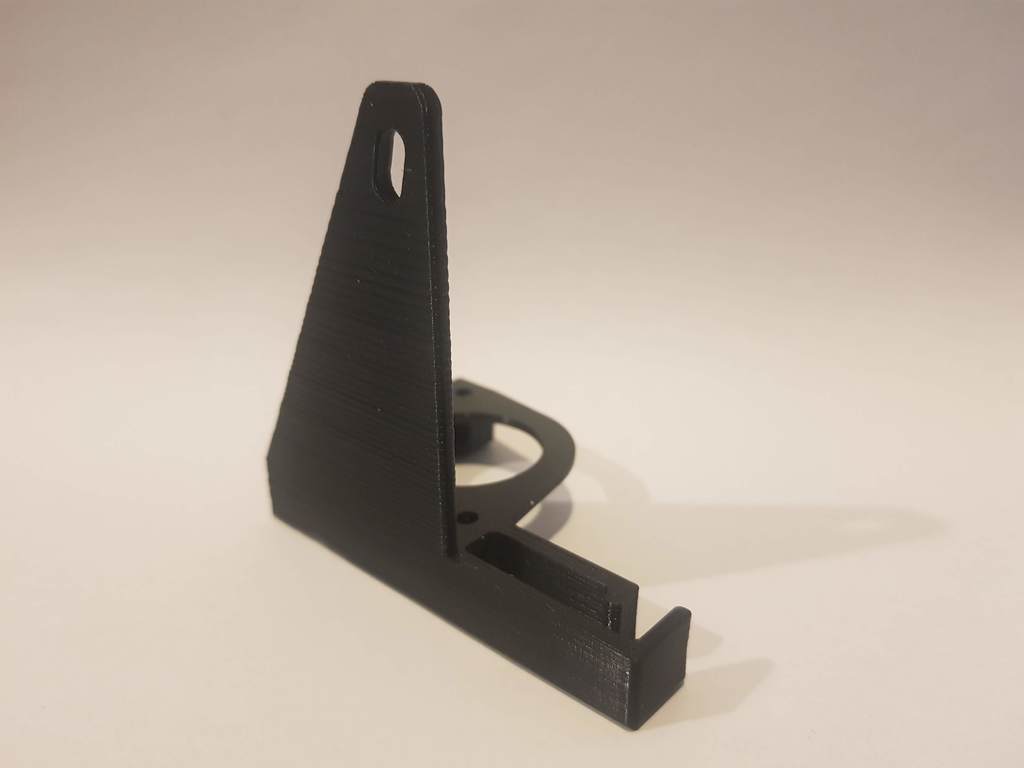
Creality CR-10, Ender 3 Z-axis damper support
thingiverse
The most valuable upgrade for Ender 3 is installing motor dampers, and I'm telling you that from experience. I've printed a lot of mods, and most look great but don't actually improve the printer's performance. Not so with dampers - they make a huge difference in quietness and print quality at the same speed. Let's break it down step by step: Extruder damper: easiest to install, no extra parts needed, just two M3 bolts (you'll need a pair for each damper). This one's not essential, but still worth doing. X and Y dampers: most important. New Ender 3s often come with press-fit pulleys on X and Y, so you'll need to print some parts. Check out this working design on Thingiverse: https://www.thingiverse.com/thing:3245255 https://www.thingiverse.com/thing:3271077 Z-axis damper support: my own design. The Z motor isn't the noisiest, but the damper also stops small jams in vertical rod rotations that can affect z shifts because the engine has less torque when positioning between steps. With this installed, you should be able to move the printer's head assembly up and down with one hand on full z-rod range without holding the printer by the other hand. To install the Z damper: 1x printed detail from here: 2x short M3 bolts 2x M4 bolts (like the original Z motor holder screws, but shorter and with t-nuts) - I don't recommend messing with original bolts in case something goes wrong. You can print your own t-nuts or grab a file to make some from M4 collar nuts. 1x M5 bolt with t-nut to fix the part to the bottom frame (M4 also works) 1x Nema17 damper - you can buy these online for $1-2, or check out this one: https://www.banggood.com/Shock-Absorber-Stepper-Vibration-Damper-for-Nema17-Stepper-Motor-p-1188070.html?rmmds=detail-left-hotproducts__2&HotRecToken=ChQxMDA1Mjg0NTYwMDkxOTQzNDQyNRACGgJJViICUEQoAA&cur_warehouse=CN. This one has a large inner diameter, but this one: https://www.banggood.com/Shock-Absorber-Stepper-Vibration-Damper-for-Nema17-Stepper-Motor-p-1064910.html?cur_warehouse=CN also works for the Z, Y, and E axes. You can even use it on the X-axis after some jigsaw work, but that's not what this post is about. Important notes: * Make sure the detail is aligned horizontally on the vertical frame. Unlike the original detail, it won't align itself. * When re-installing the rod and sleeve, make sure the rod doesn't touch the engine spindle! The rod and spindle should go into the sleeve just to be firmly caught with the sleeve screw and shouldn't meet inside it. Leave at least 4-5 mm between (see the last picture). * Print this with the outer side down like in pictures 3, 4. * You can use the back of the printed part to organize cables. upd 1.0: * You don't really need infill, but I'd set 3 lines shell for good stiffness. If you're using Cura 3.6.0, remember to set the infill pattern to gyroid even if it's set to 0% because it's the only way to get proper ironing - it's a Cura bug.
With this file you will be able to print Creality CR-10, Ender 3 Z-axis damper support with your 3D printer. Click on the button and save the file on your computer to work, edit or customize your design. You can also find more 3D designs for printers on Creality CR-10, Ender 3 Z-axis damper support.
