Creality Ender-3 ButtonBox (for OctoPrint)
prusaprinters
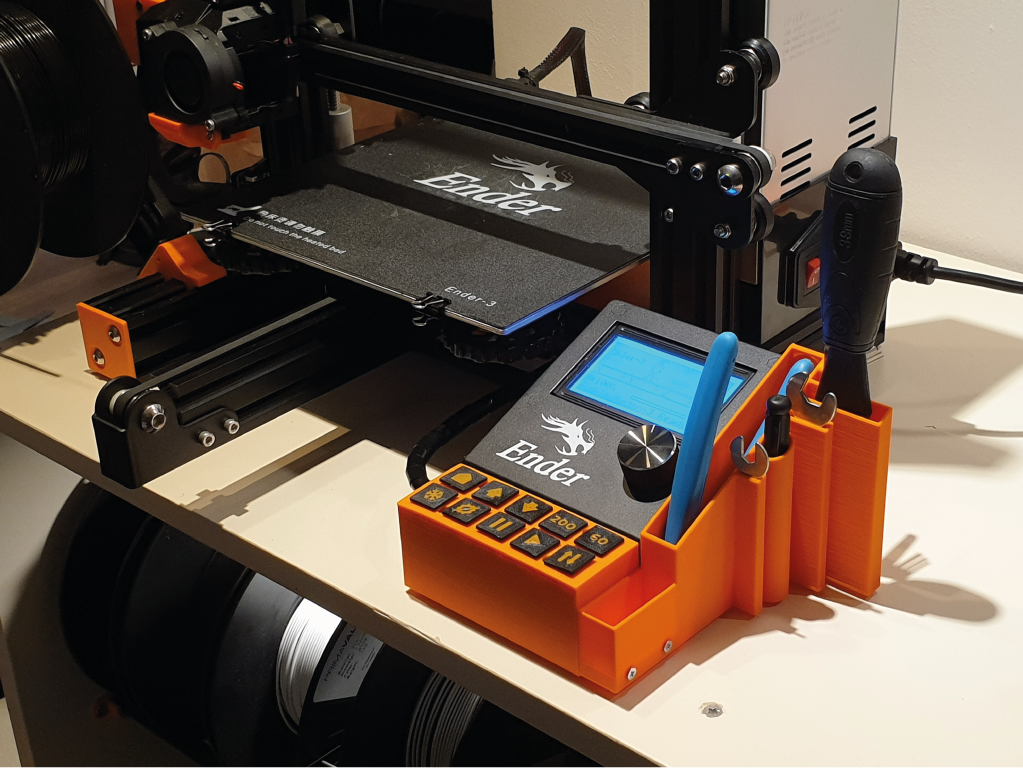
<h3>Now on Printables! Check the Thingiverse page <a href="https://www.thingiverse.com/thing:4024711/files">here</a> to see previous makes and remixes.</h3><h3> </h3><h3>SEE ALSO:</h3><p><a href="https://www.thingiverse.com/thing:4567163"><strong>Universal Buttonbox</strong></a> (for example for enclosures or other printers)<br> </p><h3>Ender-3 ButtonBox (for OctoPrint)</h3><p>This is for the people who prefer to use Ctrl+S over jumping into menus to save something. On my Ender-3 I got tired of scrolling through the LCD menu to use basic functions like homing all axes, preheating for PLA and firing up filament loading and unloading scripts. I needed a quicker and simpler solution to perform these tasks so I could focus on slicing and printing actual models. What is more basic than some good old push-buttons?</p><p>Feel free to remix it as you wish. It would be nice if you upload the remix so we can all benefit. Also feel free to comment with button ideas, ideas in general or your custom GCODE scripts so I can add them to the example document.</p><h5><strong>Credits:</strong></h5><ol><li>The button mechanism is based on a design by rublin (Thingiverse thing: 1850685).</li><li>The tray is based on a design by BlaiseD (Thingiverse thing: 4032383), which is based on a by Kiesling (Thingiverse thing: 3577931)</li></ol><p> </p><h4>How does it work?</h4><ol><li>A couple of push-buttons as inputs for a Raspberry Pi running Octoprint</li><li>Inputs are processed by the Octoprint-Enclosure plugin to activate an output. In this case send your own GCODE to the printer (<a href="https://plugins.octoprint.org/plugins/enclosure/">https://plugins.octoprint.org/plugins/enclosure/</a>)</li><li>The printer does what you want it to do (hopefully)</li></ol><p> </p><h4>What do you need?</h4><ul><li>Check the images for which files you need for your preferred setup</li><li>4x M3 bolts (5-15 mm long)</li><li>If you want a tray: 2x M3 bolts (more than 23mm long) & 2x M3 (lock)nuts</li><li>Printed buttons</li><li>Tactile push-buttons (6x6x5mm)</li></ul><p> </p><h4>How to make it? (see images for visuals)</h4><ol><li>Print the parts for your setup (see images for which parts you need)</li><li>Insert the tactile push-buttons (can be a little tight so you might need some post processing)</li><li>Connect one end of all push-buttons together</li><li>Via a current limiting resistor (resistance does not really matter, I used 1k Ohm) connect this side to the 3V3 of the Raspberry Pi</li><li>Connect the other ends of the push-buttons each to a separate GPIO pin of the Raspberry Pi (remember which goes to which)</li><li>Bolt the parts as shown in the images (bolt the tray to the cover using M3 bolts and nuts through the 2 holes)</li><li>Install the Octoprint-Enclosure plugin in Octoprint (<a href="https://plugins.octoprint.org/plugins/enclosure/">https://plugins.octoprint.org/plugins/enclosure/</a>)</li><li>Define your outputs (for example GCODE scripts and the ones I use, see the file section)</li><li>Define your inputs as GPIO Inputs (Output Control, Input Pulldown, Rise) and associate them with a corresponding output</li><li>Print the button parts. To get the orange icon inlays like on mine, I lined up the orange icons with the black button parts in the slicer, printed the orange part first (one layer) and then over that printed the rest in black. For more detail on how to do that check out the "First Layer Inlay" section of this article: <a href="https://www.matterhackers.com/articles/how-to-print-two-colors-with-one-nozzle">https://www.matterhackers.com/articles/how-to-print-two-colors-with-one-nozzle</a></li><li>Insert these printed buttons in the right places and you are done!</li></ol><p> </p><h4>How to make your own buttons? (see images for visuals)</h4><ol><li>Take one of the two blank button files depending on whether you prefer round or square or create your own shape on the button mechanism</li><li>If you want an inlay, design an icon and make it as high as your first layer height</li><li>Cut the icon shape out of the button (boolean operation)</li><li>Like described earlier, print the inlay first and over that the rest of the button by lining them up in your slicer</li><li>You can also just write on them or stick some paper or a sticker on them</li></ol><p> </p><h5>UPDATES:</h5><p>22/03/2022: Cold extrusion checking is now avoided during filament loading and unloading in the example GCODE scripts by disabling it, doing the load/unload and enabling it again.</p><p>19/06/2020: After feedback, the 4_E3-BB_10Buttons_Mount.stl was modified to remove overlapping geometry as it was giving slicing problems in S3D.</p><p>19/12/2019: Resume is done via LCD in the M600 command when ADVANCED_PAUSE_FEATURE is enabled in marlin. I rotated the button and used it as filament retract button (for cold pull for example). More GCODE examples are added.</p>
With this file you will be able to print Creality Ender-3 ButtonBox (for OctoPrint) with your 3D printer. Click on the button and save the file on your computer to work, edit or customize your design. You can also find more 3D designs for printers on Creality Ender-3 ButtonBox (for OctoPrint).