Creality Ender 3 / Pro / V2 - Part & Hotend Cooling Upgrade Kit
prusaprinters
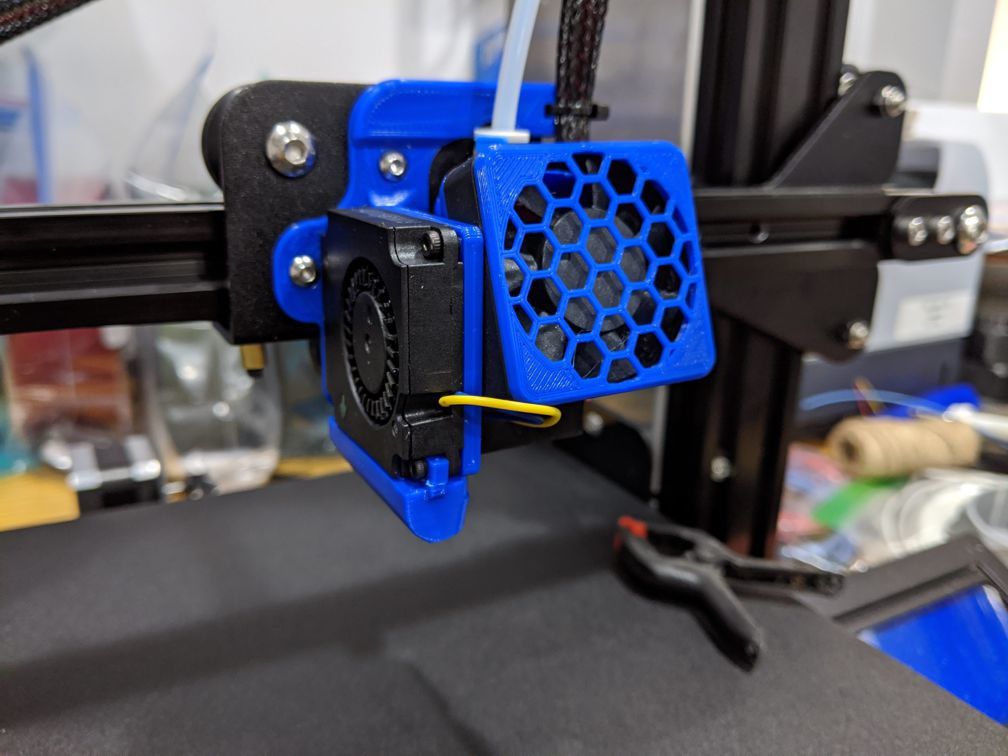
<p>If you find this thing useful, please consider sending a tip. Thanks!<br/> <a href="https://paypal.me/cdsmakestuff">https://paypal.me/cdsmakestuff</a></p> <p> Creality Ender 3 / Pro / V2 (?)<br/> --- I can only assume this could work for the V2... don't have one to test with.<br/> Part Cooling / Hotend Cooling - Upgrade "Kit"</p> <p>Very lightweight<br/> --- Original steel fan support and part cooling duct - around 50 grams<br/> --- Upgrade Kit (all parts plus extra bits) - around 15 grams</p> <p>Airflow is better directed and controlled<br/> --- Original hotend fan just blows passively, even on the heater block<br/> --- New shroud keeps air directed at "coldend" area and away from the heater block... less heat creep.<br/> --- Original part cooling duct is inefficient, not directional enough<br/> --- New duct directs more air at just the tip of the nozzle</p> <p>Required (extra) bits and tools to complete the upgrade<br/> --- Two (2) pieces of light gauge wire, at lease 100mm long each<br/> --- Four (4) pieces of heat shrink tubing, to fit wire above, roughly 15-20mm long each<br/> --- Minimum of three (3) plastic wire (zip) ties - one should be longer, at least 140mm or so - the other two can be shorter<br/> --- Various Allen Hex Key wrenches (the ones that come with the machine are sufficient)<br/> --- Side / Flush cutters, again, the ones that came with the machine are fine<br/> --- Rotary Tool with sanding disk / drum / grinding wheel / etc. - we just need to shorten one screw by about a millimetre or so<br/> --- Heat source for shrink tubing, a butane lighter is good enough<br/> --- Soldering Iron and Solder - low wattage is sufficient, just need to solder the light gauge wires</p> <p>Print all the parts first! 0.2 layer height ;)<br/> --- Part cooling duct - no infill, 3 walls, 3 top / bottom layers<br/> --- Hotend fan shroud - no infill, 3 walls, 3 top / bottom layers<br/> --- Part cooling fan bracket, 25% infil (grid), 4 walls, 3 top / bottom layers<br/> --- Fan Cover, solid infill, 3 walls, 3 top / bottom layers</p> <p>Disassemble the fan housing<br/> --- two screws for the fan cage<br/> --- four screws holding the part cooling fan<br/> --- four screws for the hotend fan</p> <p>Save the screws, needed for reassembly!<br/> Metal fan cage and part cooling duct are no longer needed</p> <p>Extend the wires for part cooling fan<br/> --- Need to be extended enough to get the part cooling fan comfortably to the left side of the extruder<br/> --- Remove at least the last two zip ties from the bowden tube and wire loom to make this easier to work on</p> <p>Reassembly<br/> --- The hotend cooling duct slips over the heatsink from the top down.... Use the longer zip tie to secure it to the heatsink through the holes provided and around the back<br/> --- Attach the part cooling fan bracket with the two screws from the old fan metal fan cage<br/> --- reinstall the part cooling fan... Two of the 4 screws are a little longer, these should be used ate bottom to secure the fan and duct. You will need to shorten one of the shorter screws by about a millimeter or so... this the top outermost screw, otherwise it will hit the side of the hotend cooling fan... Route the fan wires behind the hotend heatsink... The part cooling duct is attached in the same fashion as the original.<br/> --- Install the hotend fan using the original 4 screws from the metal fan cage... the sticker on the fan points in.<br/> --- Install the hotend fan cover... Just a friction fit into the screw holes<br/> --- Secure the bowden tube / wire loom with zip ties</p> <p>NOTES<br/> --- All parts where printed in PLA... I have had no issues so far with any of them melting or getting soft... Also note that I do also keep the silicone sock on my heater block... At the time of this post, this printer is only used to print other PLA's.</p> <p>--- The heatsink cooling shroud and part cooling duct are remixes from...<br/> <a href="https://www.thingiverse.com/thing:3437925">https://www.thingiverse.com/thing:3437925</a><br/> <a href="https://www.thingiverse.com/thing:4419394">https://www.thingiverse.com/thing:4419394</a></p> <p>Let me know your thoughts and how this works out for you! Thanks! :)</p> <h3> Print Settings</h3> <p><strong>Printer Brand:</strong></p> <p>Creality</p> <p><strong>Printer:</strong></p> <p>Ender 3 Pro</p> <p><strong>Rafts:</strong></p> <p>No</p> <p><strong>Supports:</strong></p> <p>No</p> <p><strong>Resolution:</strong></p> <p>medium - .20mm</p> <p><strong>Infill:</strong></p> <p>See description</p> <p><strong>Filament:</strong> any PLA any</p> Category: 3D Printer Parts
With this file you will be able to print Creality Ender 3 / Pro / V2 - Part & Hotend Cooling Upgrade Kit with your 3D printer. Click on the button and save the file on your computer to work, edit or customize your design. You can also find more 3D designs for printers on Creality Ender 3 / Pro / V2 - Part & Hotend Cooling Upgrade Kit.