Creality Ender 3 S1 Pro - Tramming Tool
thingiverse
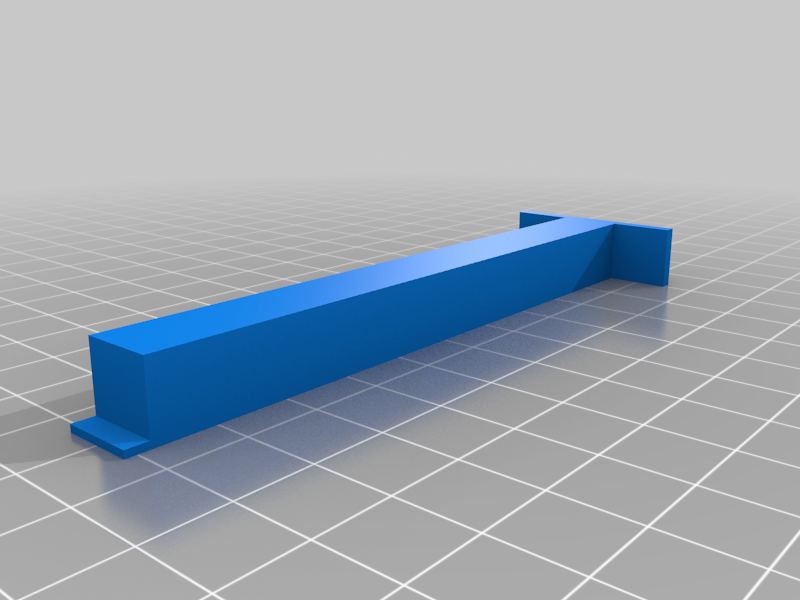
Print two of these and call me in the morning :) Power off your printer and loosen the grub screws on your z axis belt up top so that both sides independently move on their lead screws. Place the tramming tools against the two Z axes extrusions and lower the X gantry down on to them. Turn each stepper until they are both equally snug / compressed between the X axis extrusion and the top of the S1 Pro base plate. Tighten down your grub screws and make sure they are sandwiched properly against their pulleys. Also ensure the tramming tools remain snugly sandwiched between the X axis extrusion and the top of the S1 Pro base plate. Power on your printer, Raise Z 10 mm, remove the tramming tools, and you're done. --- UPDATE --- A second tram tool has been added that allows you to tram to the TOP of the machine. The procedure is much the same, but you square to the top rather than the bottom. Enjoy!
With this file you will be able to print Creality Ender 3 S1 Pro - Tramming Tool with your 3D printer. Click on the button and save the file on your computer to work, edit or customize your design. You can also find more 3D designs for printers on Creality Ender 3 S1 Pro - Tramming Tool.