Creality Ender 3 Upgrade Cable Guide
cults3d
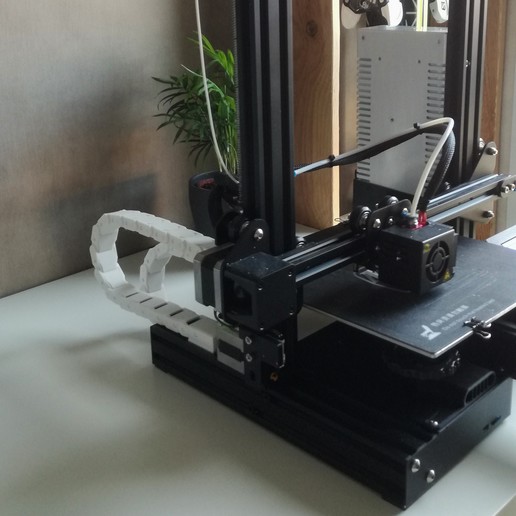
Cable guide for Creality Ender 3: A Step-by-Step Guide to Customizing Your Printer Axis Y and Z: Upgrade Your Printer with Ease To get started, print the following files: Z axis: * 15x Segment: These parts will help you upgrade your Z-axis with a custom cable management system. * 15x Cover: Covers for each segment to keep everything organized and tidy. * 1x Up end Z: The topmost part of the Z-axis cable guide. * 1x Down end Z: The bottommost part of the Z-axis cable guide. * 1x Down end cover Z: A cover for the down end of the Z-axis. To assemble the Z axis, you will need two M4 nuts and bolts with flat heads (max 3-4mm) to secure the upper end to the extruder plate. The holes are already pre-drilled on the stock printer. Y axis: * 10x Segment: These parts will help you upgrade your Y-axis with a custom cable management system. * 10x Cover: Covers for each segment to keep everything organized and tidy. * 1x Up end Y: The topmost part of the Y-axis cable guide. * 1x Down end Y: The bottommost part of the Y-axis cable guide. * 1x Down end cover Y: A cover for the down end of the Y-axis. Assembly: * Clip all segments and ends together (except Z axis upper end). * Slide the down ends into the printer's base 4040 profile. * Clip the Y axis upper end over the stock plastic part. * Remove the whole X axis to access the two holes on the extruder motor plate. * Bolt the Z axis upper end with the two M4 nuts and bolts. * Put back the X axis. * Clip the end of the Z segment chain to the Z upper end. * Carefully place the printer's cable in the chains and put the covers on. You're all set! If you've printed this design, please share your make and a comment below. Let us know if you've seen any improvements or issues with the design.
With this file you will be able to print Creality Ender 3 Upgrade Cable Guide with your 3D printer. Click on the button and save the file on your computer to work, edit or customize your design. You can also find more 3D designs for printers on Creality Ender 3 Upgrade Cable Guide.