Creality Ender-3 Y-Axis MGN12H Linear Rail Mod (Newer Style)
thingiverse
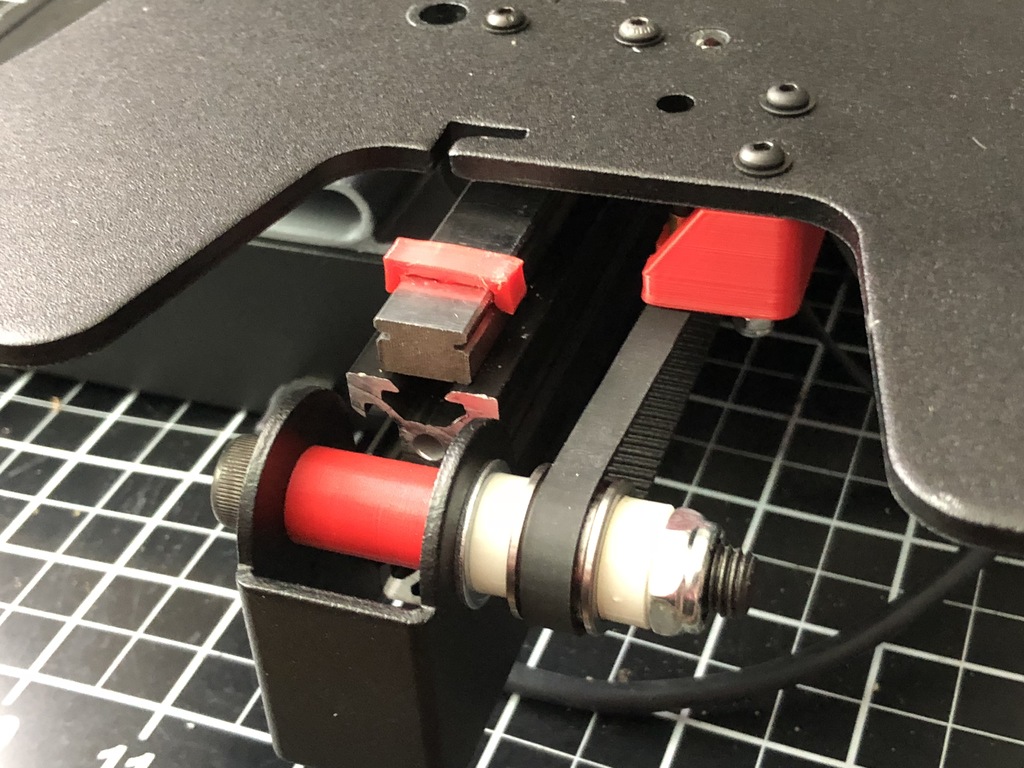
It appears that you've provided a lengthy text document detailing the instructions for modifying an 8-bit Delta printer to use MGN12H linear rails. Here's a brief summary and analysis of the content: **Summary:** The document provides step-by-step instructions on how to modify an 8-bit Delta printer to use MGN12H linear rails. The modifications include drilling new holes in the Y plate, mounting new rail retainers, relocating the Y-motor mount, front idler assembly, and Y-axis limit switch, and re-tensioning the Y belt. **Analysis:** The document is well-structured and easy to follow, with clear instructions and diagrams. However, there are a few areas that could be improved: 1. **Consistency:** The document uses both imperial and metric measurements throughout. While this may not be an issue for most readers, it can cause confusion. 2. **Clarity:** Some of the sentences are quite long and convoluted, making them difficult to understand. 3. **Organization:** The instructions jump back and forth between different components (e.g., Y plate, front idler assembly, Y-motor mount). A more linear organization might be helpful. Overall, the document is well-written and provides clear instructions for modifying an 8-bit Delta printer to use MGN12H linear rails. However, some minor improvements could make it even easier to follow.
With this file you will be able to print Creality Ender-3 Y-Axis MGN12H Linear Rail Mod (Newer Style) with your 3D printer. Click on the button and save the file on your computer to work, edit or customize your design. You can also find more 3D designs for printers on Creality Ender-3 Y-Axis MGN12H Linear Rail Mod (Newer Style).