Creality Ender 5 Part Cooling Fan Duct
thingiverse
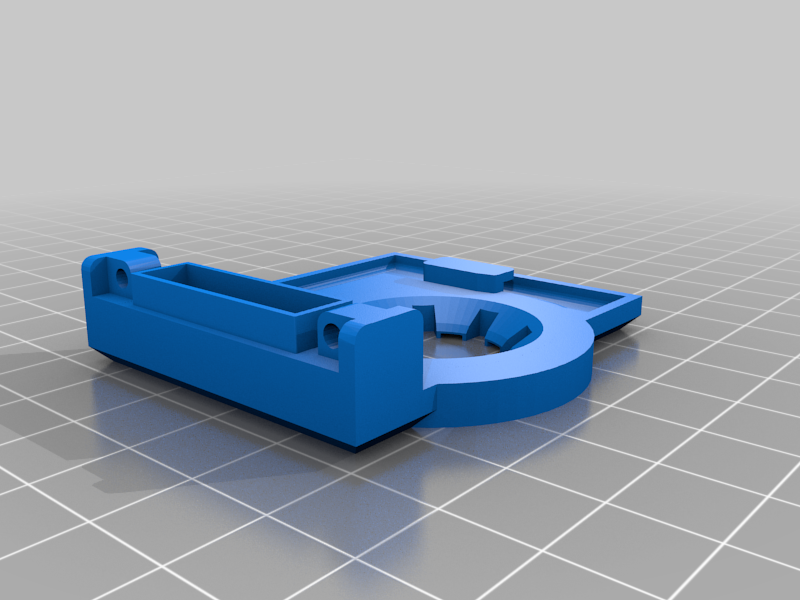
Using CarstenD's 'Creality Ender 3 part cooling fan duct' as inspiration (https://www.thingiverse.com/thing:3091300), I designed a Part Cooling Fan Duct for the Ender 5. This design far exceeds standard or small fan ducts when printing ABS, forcing more air past the hotend and keeping the area around it cooler. As a result, ABS prints warp less due to stray air cooling the print. I used plaetti's Airflow Cooling Duct (https://www.thingiverse.com/thing:3376186/files) because it fits and clips on better than CarstenD's and Filboyt's Ender 3 Vent Ring (https://www.thingiverse.com/thing:2912394). However, I found the Airflow Cooling Duct tends to blow air past the nozzle tip rather than directly at it. So, I combined ideas from all three designs to create this Part Cooling Fan Duct. It simply clips onto the bottom of the fan housing and is retained by the part cooling fan duct screws. https://youtu.be/YgqGTywITV4 -------------------------------------------- UPDATE V1.4 ------------------------------------------------- Thanks for the feedback, guys! Here's an updated model! Some people mentioned that it was too difficult to print with certain materials as it wouldn't handle overhangs. The new update has a split version that can be printed in two separate pieces with full supports that can be removed. You can either glue them together or use your CAD program and add some locators so they just press together. I designed the two halves so that each corner has a solid portion where a stud/hole can be placed, allowing it to be assembled without using glue. I didn't use pins and holes because my printer isn't accurate enough for it. Some people complained about airflow being no good. Keep in mind that I only meshed two popular designs together, and my results were great. The idea is for the vent ring to be restrictive, like an A/C ducting system at Costco or Walmart. Restriction creates pressure. However, upon deconstructing the ring I used on my design, I found that the air output holes varied in size, ranging from 1 mm to 2.5 mm with some being parallelograms and not symmetrical. With this new update, I completely redesigned my own duct ring using air channels that point directly to the tip of the nozzle (-0.5 up from the nozzle to 2 mm below). My previous idea was to provide a 'cushion' of air that blew at the bed and curved up the nozzle, giving a bubble of moving air around the tip. However, when printing narrow walls more than 5mm high, performance was lost because there's no bed for the air to reflect off of. This new design doesn't rely on the bed. The ring inner is now smaller, at 18 mm instead of 20 mm. Some people mentioned that their designs melted or warped due to hotend proximity. I've also spaced the ring slightly further from the hotend, but I must say that I haven't experienced any warping or melting with this design printed in PLA and used for 27 hours. Perhaps you're setting your bed or nozzle temperature too high (60/200C) or using a non-stock hotend/no silicone cup? I'm yet to use this design in the summer, so that could be it. Keep your chips below 60C. The nozzle is now perfectly centered in the ring, which was one person's complaint. Mine was also off-center, but now I've moved the ring 1.4 mm away from the fan inlet. Some people may have already had their nozzles centered; there's not much I can do about it, as a lot of it comes down to the thin steel used to mount the hotend and play in the mounting screw holes. Undoing your screws and moving it or straightening your hotend cage may be all you need to get the nozzle in the center. Happy printing!
With this file you will be able to print Creality Ender 5 Part Cooling Fan Duct with your 3D printer. Click on the button and save the file on your computer to work, edit or customize your design. You can also find more 3D designs for printers on Creality Ender 5 Part Cooling Fan Duct.