Creality Ender 5 Plus (and similar) simple linear Rail Adapter
prusaprinters
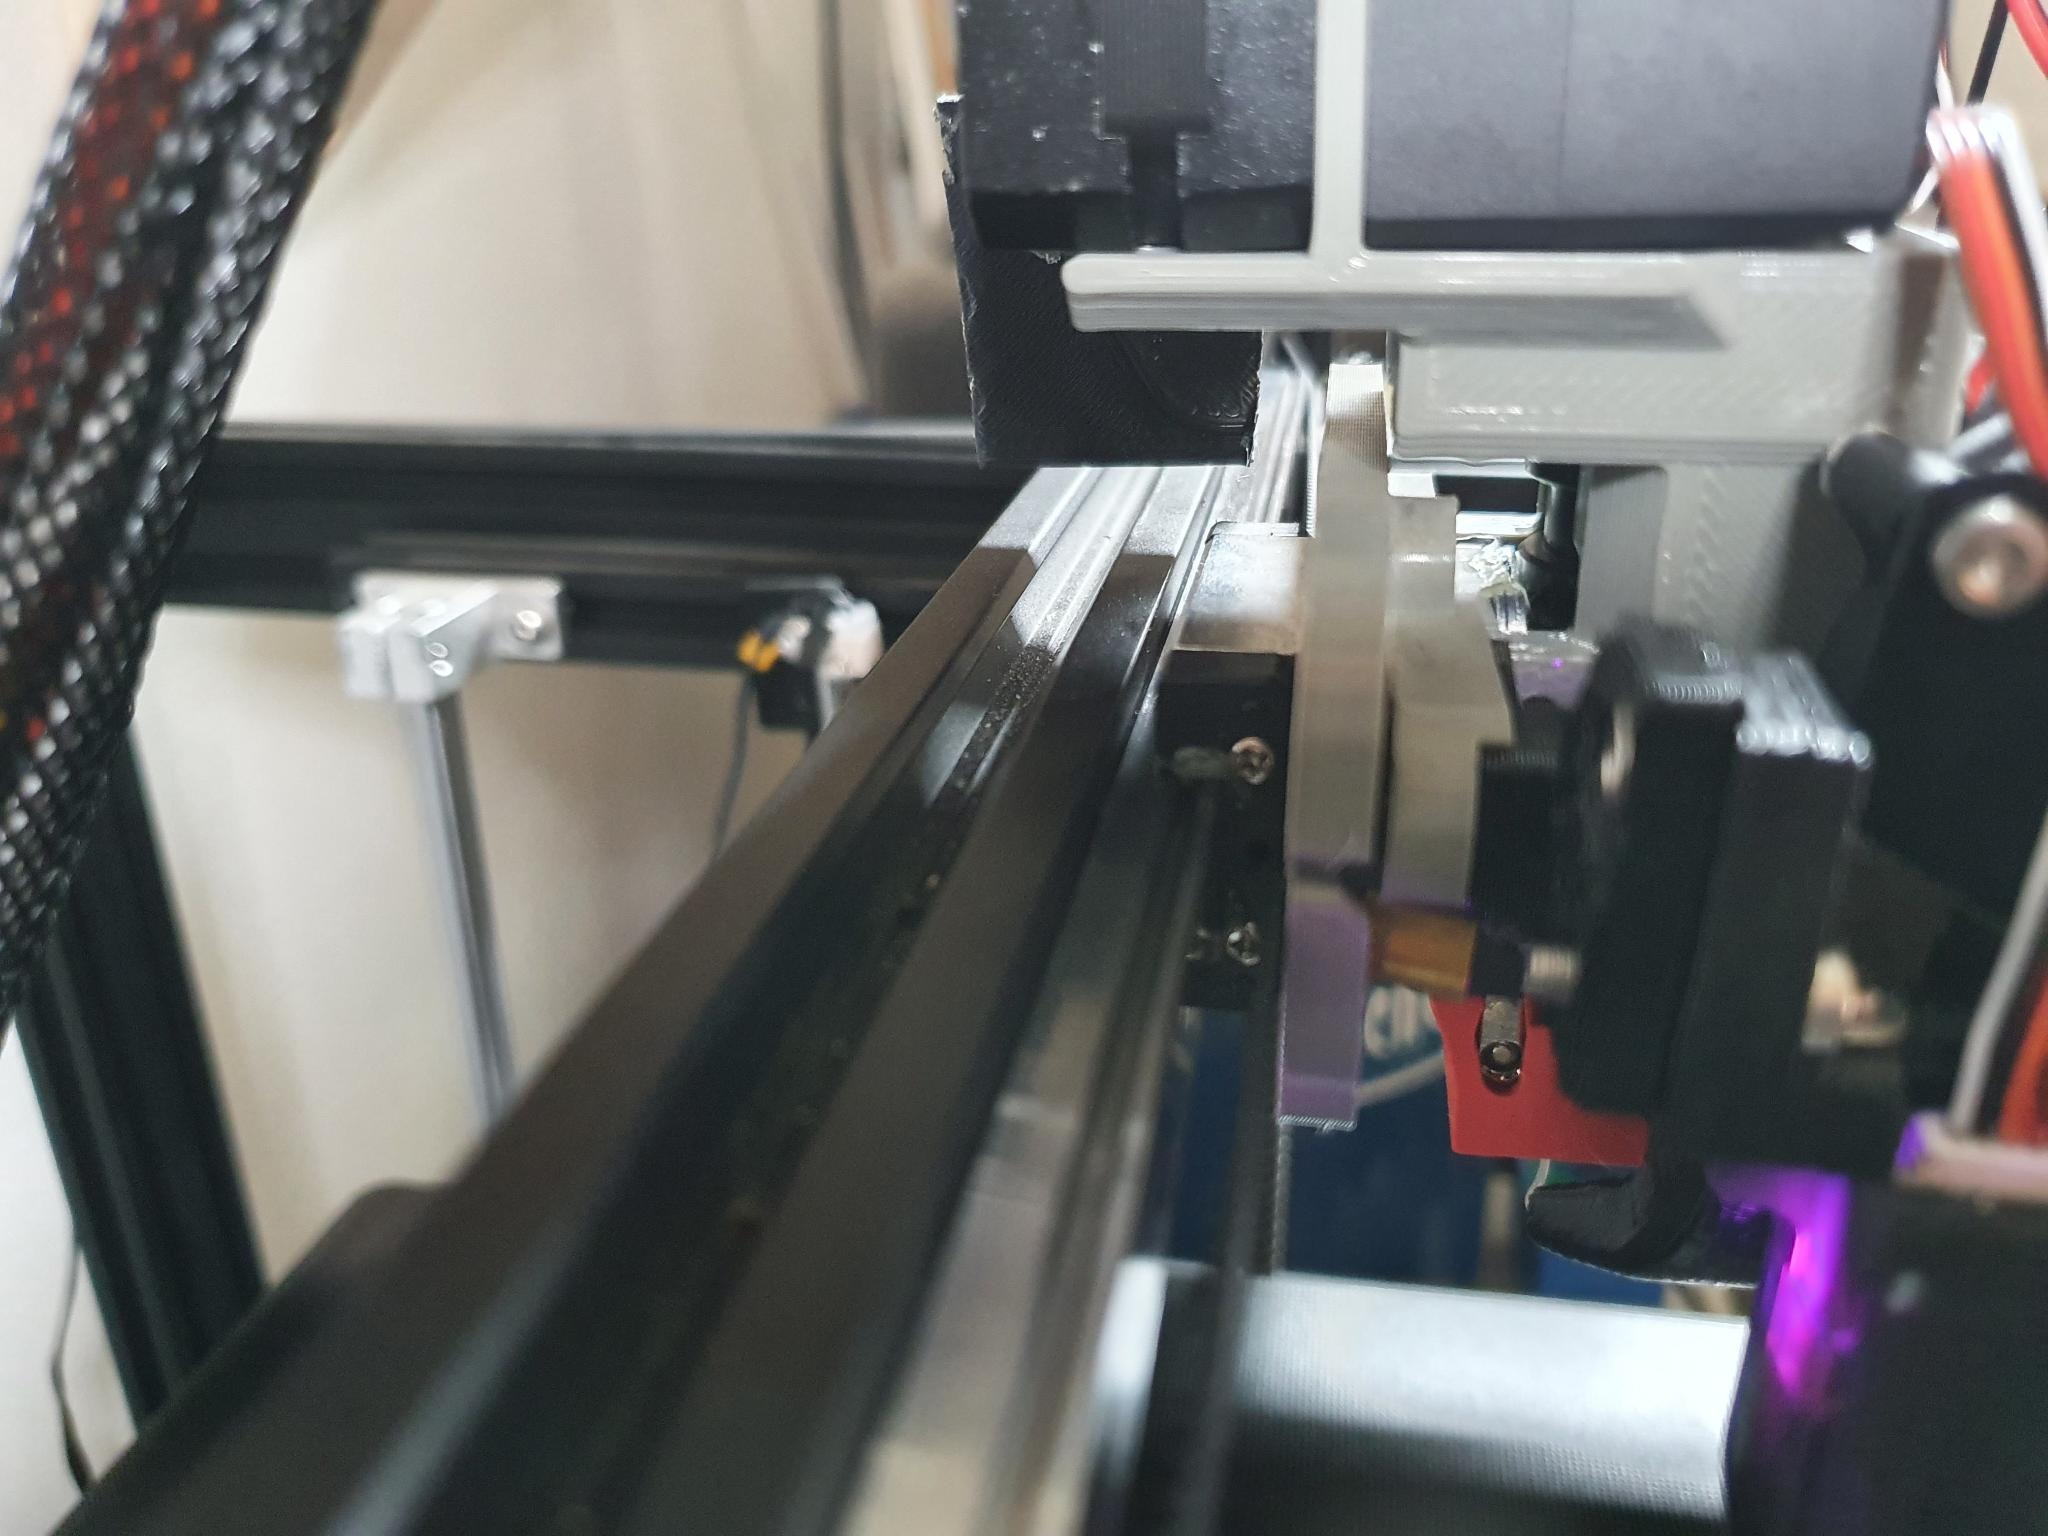
<p>This Adapter has the same holes as the original metal 3-wheel-carrige and is meant to be screwed to a MGN12h carrige.</p><p>I use it with a Hero Me Gen 6 printhead, but as the holes are the same, it <i>should</i> work with the stock printhead. Please post a make if you have tried it!</p><p>I Printed with PETG, 0.6mm Nozzle, 50% Infill</p><p>Parts needed:</p><ul><li>450mm MGN12h linear rail with 4 M3 holes with 20x20mm distance</li><li>4 heat-inserted M3 nuts (the ones you can push into the holes with a soldering iron).</li><li>Longer M3 Screws, as the nuts for the hotend are 5mm more into the adapter.</li><li>I guess a hotend spacer like the one i have included from hero me gen 6</li><li>For mounting the rail:<ul><li>Some M3 nuts</li><li>M3x8 screws</li><li>T-Nut M3 print i have attached to this (no need to buy these ;))</li></ul></li><li>A file to scrape of the outer edges of the liner rail, so the belt does not catch there (see last picture).</li></ul><p>I was able to re-use the old belt without modification. The belt contacts with the end of the linear rails and <i>may</i> wear out at some time. In that case i plan to replace it with a longer one and add some guidiance rolls. I will see how long it holts up, i see no point removing the old belt before there really is a problem.</p><p><strong>Ps</strong>: this adapter will make your hotend some mm heigher. As we have a BLTouch, this is not a problem. I have done this intentional to give me more space for modding the printhead before it collides with the z acix rod holders.</p><p><strong>Pps</strong>: The picture of the adapter is my first iteration, the download is an improved version</p><p><strong>Warning</strong>: It does not include an endstop trigger! Starting printing without WILL crash your printhead in the right side of your printer. I have added a hole where it needs to go but did not yet design one. You can add a long screw there and see if it triggers the endstop on the X axis that is usually triggered by one of the wheels. You can design a endstop and add it as an remix or just use a screw and some hotglue or something to adjust it. I just hot-glued some leftover PLA scrap there to do the job.</p><p><strong>Warning #2</strong>: Depending on where the endstop is, it may cause the nozzle and the printhead to shift some mm compared to the old carrige. After homing, move the printhead slowly to the left and check that X=0 does not crash the printhead or your bltouch into the left side.</p>
With this file you will be able to print Creality Ender 5 Plus (and similar) simple linear Rail Adapter with your 3D printer. Click on the button and save the file on your computer to work, edit or customize your design. You can also find more 3D designs for printers on Creality Ender 5 Plus (and similar) simple linear Rail Adapter.