Creality Ender / CR-6 SE Octopi Touchscreen Case & Mount
thingiverse
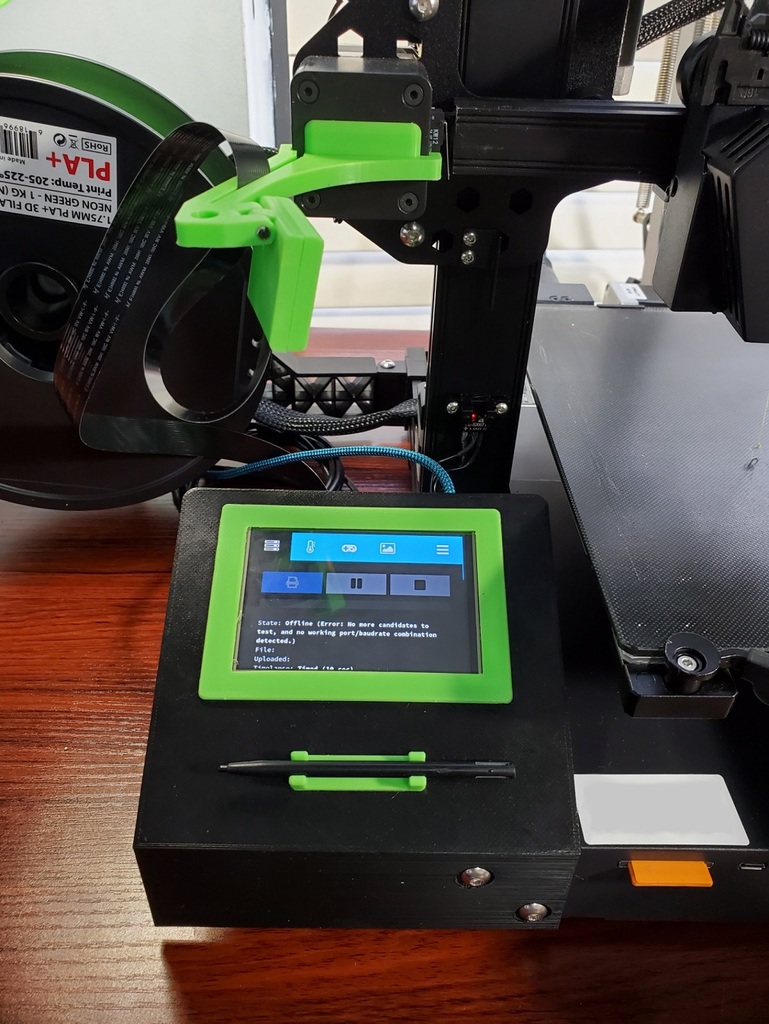
Update: 10-08-2021 --------------------------- 1) Added v2 of the case body with slightly thicker walls, extra vent holes, and some structural ribs around the HDMI opening. 2) Added v2 heavier duty case clamps This is a remix of Frank (Tronnic) Klötzer's Ender 3 Touchscreen Case & Holder for Raspberry Pi. I really like his design, but wanted a few changes for my CR-6 SE: 1) Wider mount plate to help hide cables 2) Additional support that rests atop the 4040 extrusion 3) Case body changes to accommodate an HDMI touchscreen 4) Reroute camera cable The HDMI touchscreen I chose is the UCTRONICS 3.5 Inch Touch Screen: https://www.amazon.com/gp/product/B076M399XX/ref=ppx_yo_dt_b_asin_title_o07_s00?ie=UTF8&psc=1 The original design routed the camera cable through the opening for the HDMI port, which would not be possible with this display, so I added an opening in the case for the cable, as well as additional ventilation holes and openings for the display's 3.5mm jack and micro-USB power input. (Though these connectors are not currently used, they are available for future use) The mount plate was modified to provide clearance for the new path of the camera cable. I then modified the bottom plate to include a cover for the HDMI - HDMI connector, and made some changes to the case clips to provide a tighter fit. With this remix, I have also included the STLs for the Pi Camera body and mounting arm from Michael (Modmike) Triffon's Creality Ender 3 Pi Cam Mount which fit the CR-6 SE as well. You should be able to follow the assembly pictures to see how to route the camera cable as this unit goes together. As you can see in the second picture, I used right-angle USB & Ethernet cables to prevent them from being easily seen. The USB cable is an adapter that I connected to a right-angle micro-USB cable for the printer. This allowed me to use the tape trick on the adapter to block the 5v on the Raspberry Pi's USB port, and avoid damaging either the printer's mainboard, or the Pi itself. See this description: https://community.octoprint.org/t/put-tape-on-the-5v-pin-why-and-how/13574 My next addition to this will be a power switch for the Raspberry Pi. I may evetually use a buck converter to power the Pi directly from the printer's power supply, but I prefer to wait until the warranty expires before I perform any non-essential electrical modifications. EDIT: Just an update on the HDMI touchscreen I used: The fan attached to the board started making a loud noise. Found that the fan chassis had slightly warped, and the paper label had curled and peeled off. Both signs of over heating. I believe the chip it was mounted over was really cooking! I e-mailed UCTronics support, explained the situation, and a new unit is on the way. Great customer support!
With this file you will be able to print Creality Ender / CR-6 SE Octopi Touchscreen Case & Mount with your 3D printer. Click on the button and save the file on your computer to work, edit or customize your design. You can also find more 3D designs for printers on Creality Ender / CR-6 SE Octopi Touchscreen Case & Mount.