Creality printer mods
thingiverse
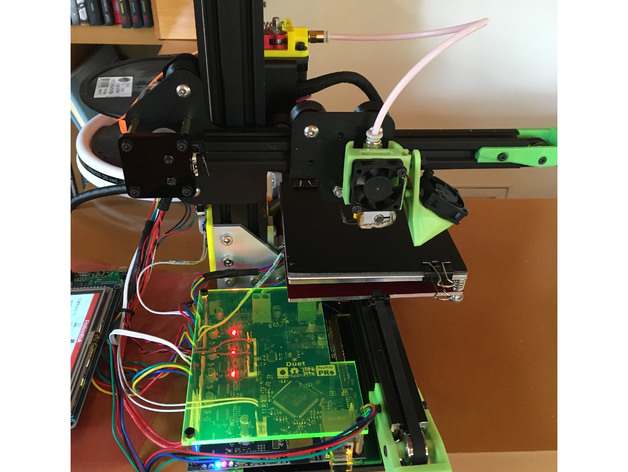
It seems like you've undertaken a comprehensive upgrade to your Creality printer, addressing various aspects such as mechanical stability, electronics, and performance. Let's break down these upgrades: ### 1. Pinch Gear Upgrade - **Upgrade Reason**: To improve the filament feed mechanism with a more aggressive pinch gear for better grip and reduced feeding issues. - **Modification Details**: Replaced the bearing in the lever arm to a flat-faced bearing and modified the drive block to accommodate the larger diameter of the new pinch gear. ### 2. Idler Supports - **Upgrade Reason**: To stiffen up idlers, reducing vibrations and ringing by supporting them on both ends with printed supports. - **Modification Details**: Printed custom idler supports for both X and Y axes, which have interior space for standard extrusion stopper nuts and allow the use of a long M3 bolt as the axle. ### 3. Vertical Tower Stabilization - **Upgrade Reason**: To provide additional support to the vertical tower, reducing movement and potential instability. - **Modification Details**: Installed an L-plate on both the vertical tower and the horizontal member for added stability and considered adding M4 bolts through the bottom plate into the tower. ### 4. Drag Chain Installation - **Upgrade Reason**: For a heated build plate, which requires mechanical isolation to prevent it from moving or warping during heating. - **Modification Details**: Installed a drag chain with a custom printed mount for the end of the long horizontal extrusion. ### 5. Power Inlet Upgrade - **Upgrade Reason**: To handle higher currents required by a heated bed. - **Modification Details**: Replaced the power inlet with a 20A Neutrik jack to safely and reliably supply power to the printer. ### 6. Electronics Upgrade - **Upgrade Reason**: For improved performance, reliability, and safety features such as heated bed support and web interface. - **Modification Details**: Upgraded to Duet 0.8.5 electronics with RepRapFirmware for better control and monitoring capabilities, including a PanelDue LCD touchscreen interface. ### 7. Heated Build Plate Upgrade - **Upgrade Reason**: To allow for larger prints with better bed adhesion. - **Modification Details**: Built a new heated build plate platform to accommodate a Thing-o-Matic heated bed initially, later switching to a silicone heater and moving to a 24V system for improved stepper motor performance. ### 8. Stepper Motor Upgrade - **Upgrade Reason**: To replace unknown-specification stepper motors with reliable and well-documented ones. - **Modification Details**: Replaced the original stepper motors with Kysan 1124090 stepper motors from Ultimachine, known for their quality in 3D printing applications. These upgrades demonstrate a thoughtful approach to improving the performance, reliability, and usability of your Creality printer.
With this file you will be able to print Creality printer mods with your 3D printer. Click on the button and save the file on your computer to work, edit or customize your design. You can also find more 3D designs for printers on Creality printer mods.