Crealty Ender 3 X and Y Linear Rail Install
thingiverse
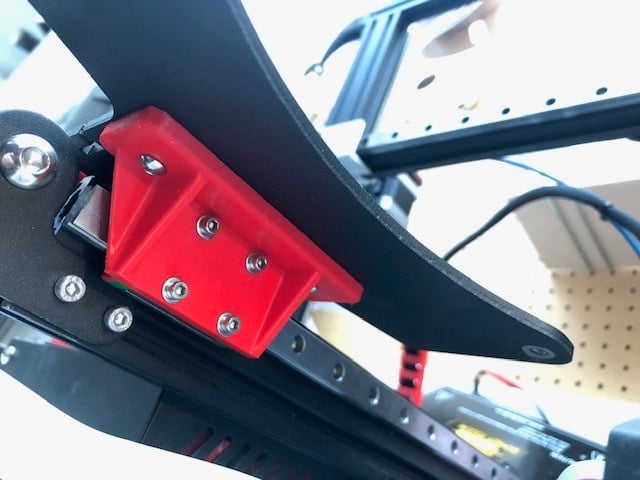
This is my attempt at a Linear rail modification, and it's now fitted, tested, and working flawlessly as intended. To replicate this mod, you'll require three 12mm linear rails, along with various M3 'T' nuts and bolts; however, most parts serve as spacers, so feel free to reuse existing items where possible. A key aspect of this modification is that it doesn't necessitate the removal or alteration of any belts on any axis. This was a deliberate design choice to avoid getting involved in belt-related modifications. As such, two rails are used on the Y-axis. Dampers have been fitted, and the X-axis cover spacer has been tailored to accommodate this, reusing existing M3 bolts in the process. All components were printed using PLA at 30% infill. To complete the mod, you'll need to remove the X-axis rollers and plate and replace them with a cut and drilled Aluminium 'L' section. You have the option to tap and die the hot end into the aluminium plate or simply drill through it and bolt on, as I've done. The Y-axis rollers are removed, and my custom-designed 'X-shaped carrier bed carrier plate' features extra holes that can be utilized; this has been taken into account when designing the base bracket. The bracket connected to the Y-axis linear rails includes a tag to hit the Y-axis stop switch. I've also integrated the Petfang design, which belongs to another member on Thingiverse, as it perfectly complements my design. This mod can easily be modified to accommodate a BL Touch or Ezabel gadget; I've included the full CAD model of the Ender 3 in my design for any assistance you may need. As this is an ongoing project, I'll update the listing with any necessary amendments.
With this file you will be able to print Crealty Ender 3 X and Y Linear Rail Install with your 3D printer. Click on the button and save the file on your computer to work, edit or customize your design. You can also find more 3D designs for printers on Crealty Ender 3 X and Y Linear Rail Install.