Creatr Extruder modification for E3D v6 Hotend
thingiverse
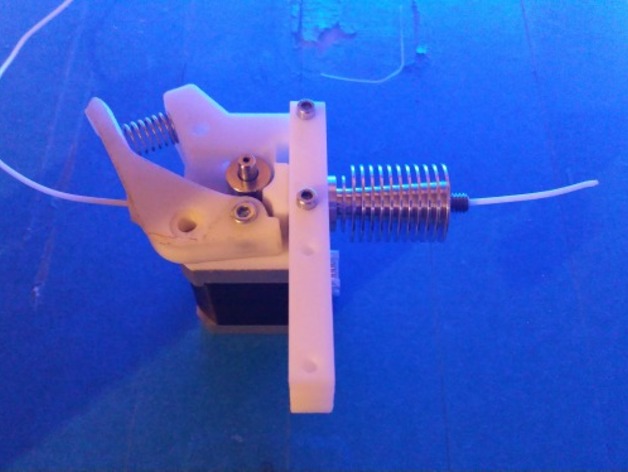
As the owner of a Leapfrog Creatr printer, I'm thoroughly impressed by its performance, but unfortunately, I believe the hotends fall far short of expectations. Undeterred, I decided to take on a challenge: replacing them with E3D hotends, all while making as few changes as possible to the original design and ideally none at all. Having successfully printed the modifications needed for a spring-loaded extruder, I can attest that it's a game-changer. The new extruder is the foundation upon which my E3D support system is being built. Please keep in mind that this is an ongoing project, still in its infancy. I'm sharing it at this stage to gauge interest and see if others would like to join me on this venture. To get started: 1. Print all the parts of the extruder, excluding the plates from the original design. Believe it or not, you can even use the extruder without an E3Dv6 Hotend - I've done just that for quite some time. 2. Replace the printer's base with the one designed for the E3D hotend. 3. Don't forget to adjust your Z sensor downward! That's about it. Let the fun begin!
With this file you will be able to print Creatr Extruder modification for E3D v6 Hotend with your 3D printer. Click on the button and save the file on your computer to work, edit or customize your design. You can also find more 3D designs for printers on Creatr Extruder modification for E3D v6 Hotend.