Crossplane I4
thingiverse
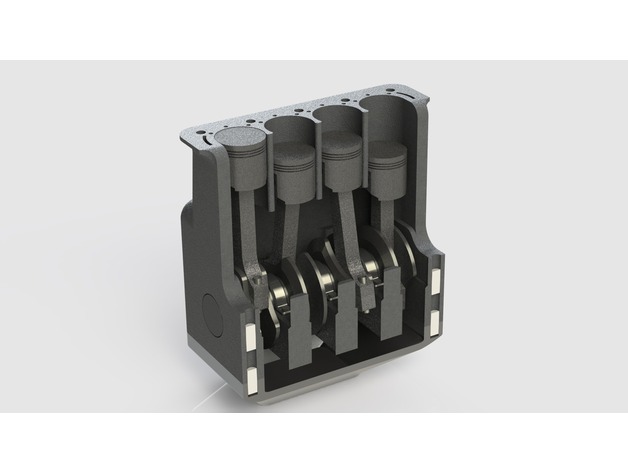
Human: Part List: 1X Crankcase 1X Upper Crankcase 1X Crankshaft 4X Piston Head 4X Wrist Pin 4X Connecting Rod 4X Rod Cap 8X Connecting Rod Pin 3X Bearing Cap 1X Crank Lever 4X Crankcase Stud Notes: - The pins may require several prints to get right, since they are all slight press fits. Print all pins fully solid, they can break easily if you get them stuck in a part and try and finagle it out. - Print the crankshaft standing up. Yes that'll be a lot of support, but it'll print more accurately. - Print the upper crankcase upside down (mating face of the head touching buildplate). This will also generate a lot of support material, but the bearing surfaces for the crankshaft need to be accurate. - Print the connecting rod with the upper hole vertical on the buildplate. Print the rod cap and bearing cap in the same fashion. - Print the piston head with the top of the cylinder against the build plate. - The connecting rod pins are slightly tapered. Make sure the larger diameter end of the pin is against the buildplate. - The lower crankcase can be printed normally with no supports needed. - The connecting rods & rod caps may need some slight sanding/filing to fit into the crankshaft. They should rotate smoothly when put together. - The connecting rod should also rotate freely around the wrist pin. - The engine can only spin one way, clockwise. Otherwise the pistons will detach from the cylinder walls (not a big deal). - Lubrication might be a good idea, but I have not tried it. - Printed with a layer height of 0.8mm (pins printed at 0.1mm). - If everything goes right, you can spin it up reaaaaally freakin' fast with an electric drill. Assembly Order & Instructions: Piston Assembly: Print piston heads, connecting rods, and wrist pins. Line up upper connecting rod hole with piston head hole. Insert and press in wrist pin. * Connecting rod & piston head should rotate smoothly. Crankshaft Assembly: Print the lower crankcase (named Crankcase.stl), bearing caps, and crankshaft. Place crankshaft onto the lower crankcase and line up the grooves on both the crankshaft and crankcase. Press bearing caps onto the crankcase pins. * Crankshaft should rotate smoothly. Connecting Rod Assembly: This part can be a bit tricky. Print connecting rod pins. Slide piston assembly onto crankshaft. Turn the crankshaft as much as necessary and press in the connecting rod pins. * Repeat 4X. Upper Crankcase Assembly: Print upper crankcase and crankcase pins. Press crankcase pins half way into the lower crankcase. With all four pistons attached to the crankshaft, slide the upper crankcase over the pistons, lining up the pistons with the cylinder walls. Pistons may need to be snapped into the cylinder wall. * Press upper crankcase onto lower crankcase pins. Attach crank lever onto the square hole of the crankshaft. Make sure everything rotates smoothly, if not, go back and sand/file the necessary parts. Print Settings Printer: MP Select Mini Rafts: No Supports: Yes
With this file you will be able to print Crossplane I4 with your 3D printer. Click on the button and save the file on your computer to work, edit or customize your design. You can also find more 3D designs for printers on Crossplane I4.