Crud Catcher for Teaching Tech Modified Ender 3
thingiverse
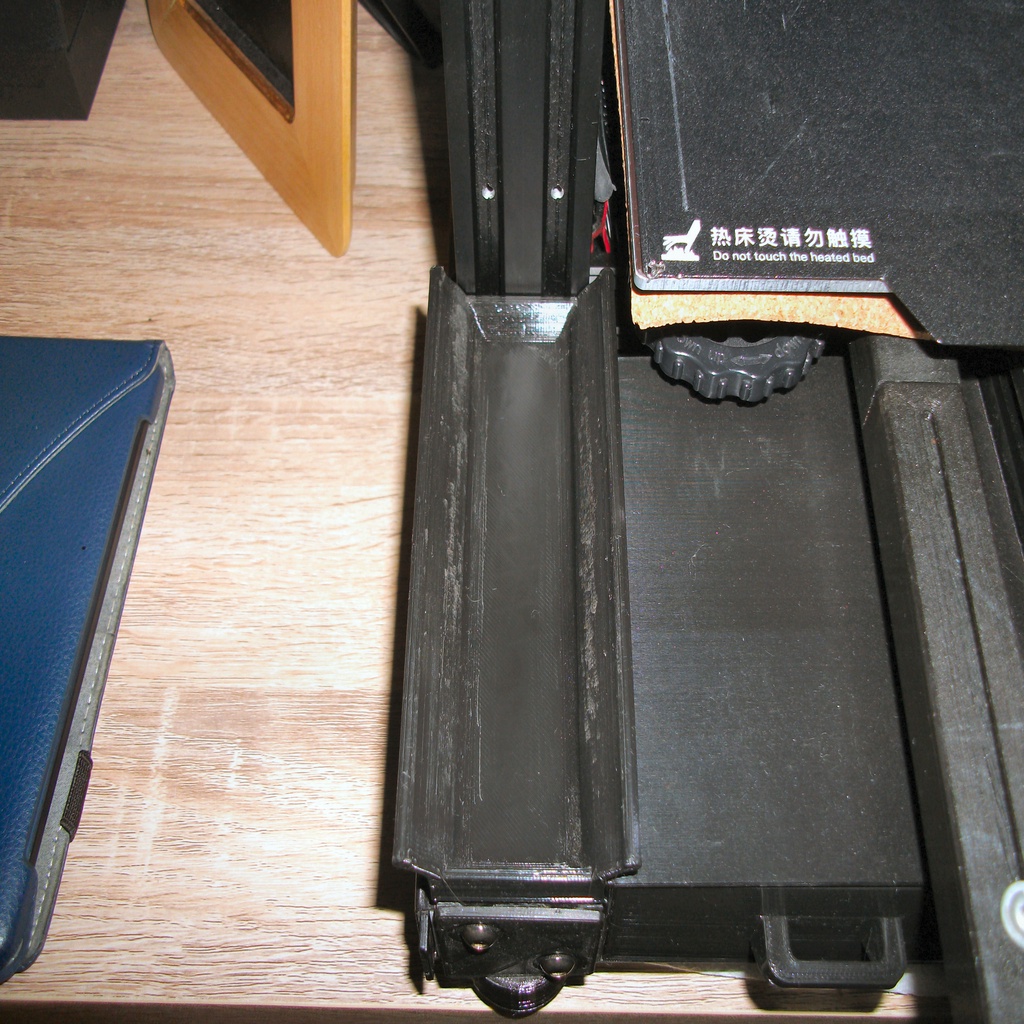
When I got my Ender 3, a while ago, one of the first things I designed was a tray that sat over the original electronics case, and acted as both a fan cover and a catcher for all the annoying filament droppings that sometimes ooze from the hot end in the home position. Now that I've upgraded to a variant of Teaching Tech's all-in-one case it was no longer suitable - especially as I had filled the original case's spot with a second drawer unit - so, of course, I discarded it. But the original annoyance returned: My V-slots were constantly accumulating filament droppings that were a pain to get out without using a vacuum cleaner. And, let me tell you, there ain't NOBODY wants crap stuck in their crevice! This is my new solution. One of the bonuses of fitting a BL Touch is that the Z-stop microswitch is no longer required, and it can be removed from the machine. I used the space previously occupied by the switch to create a full-length catcher. This means that, if you still have your switch in this location, then my printed part won't fit! But I have provided the Sketchup file for anyone who wants to shorten the design to fit machines where this switch is still fitted. Two small magnets hold it in place on the machine, but leave it easy to lift off for emptying, or for access to the bed knobs. The wings on each side of the tray have two purposes: they can be used to lift and carry the tray (hence the odd shape), but they also provide a wider "throat" area to catch as much crud as possible without getting in the way of bed travel. I used some 10 X 1 mm rare earth magnets leftover from the previous design, and just glued them into the recesses provided on the underside of the tray. The plan was to use steel penny washers for the magnets to stick to, but as I was on my way out to my workshop, I stumbled across an electrician fitting some metal wall boxes in one of the communal areas of our flats.On the floor by his feet, were a handful of steel cable-entry knockouts he'd removed from the wall boxes, and discarded. Thank you, serendipity, these will do just fine!! I grabbed two of 'em, went back into my flat, and modified the rail fixing design to accept these instead. The rail fixing is best printed vertically, with a brim. It's a little tight in the slots (I never seem to get it quite right; either too loose or too tight!), and you may find a little cleaning and filing necessary depending on your printer's accuracy. Mine went straight in with a smear of olive oil (as I happened to have it handy), but I seemed to be having something of a jammy day, so it might not work out as well on yours. The tray piece prints without any supports - However, mine came out with some strange artifacts that are either down to my slicer settings being wrong, or indicative that it's time to clean my nozzle. This meant that I had to sand away quite a few sharp little nibs on the inner faces - hence the slightly abraded look on the inner walls of the tray in my pics. I'll try to live with this, but deep down I know I'll probably cave in and reprint at some time, no matter how perfectly functional it is! Happy crud-catching!
With this file you will be able to print Crud Catcher for Teaching Tech Modified Ender 3 with your 3D printer. Click on the button and save the file on your computer to work, edit or customize your design. You can also find more 3D designs for printers on Crud Catcher for Teaching Tech Modified Ender 3.