Cube of Rainbow Torment: LED Cube w/ cheap WS2812 / Neopixel panels
prusaprinters
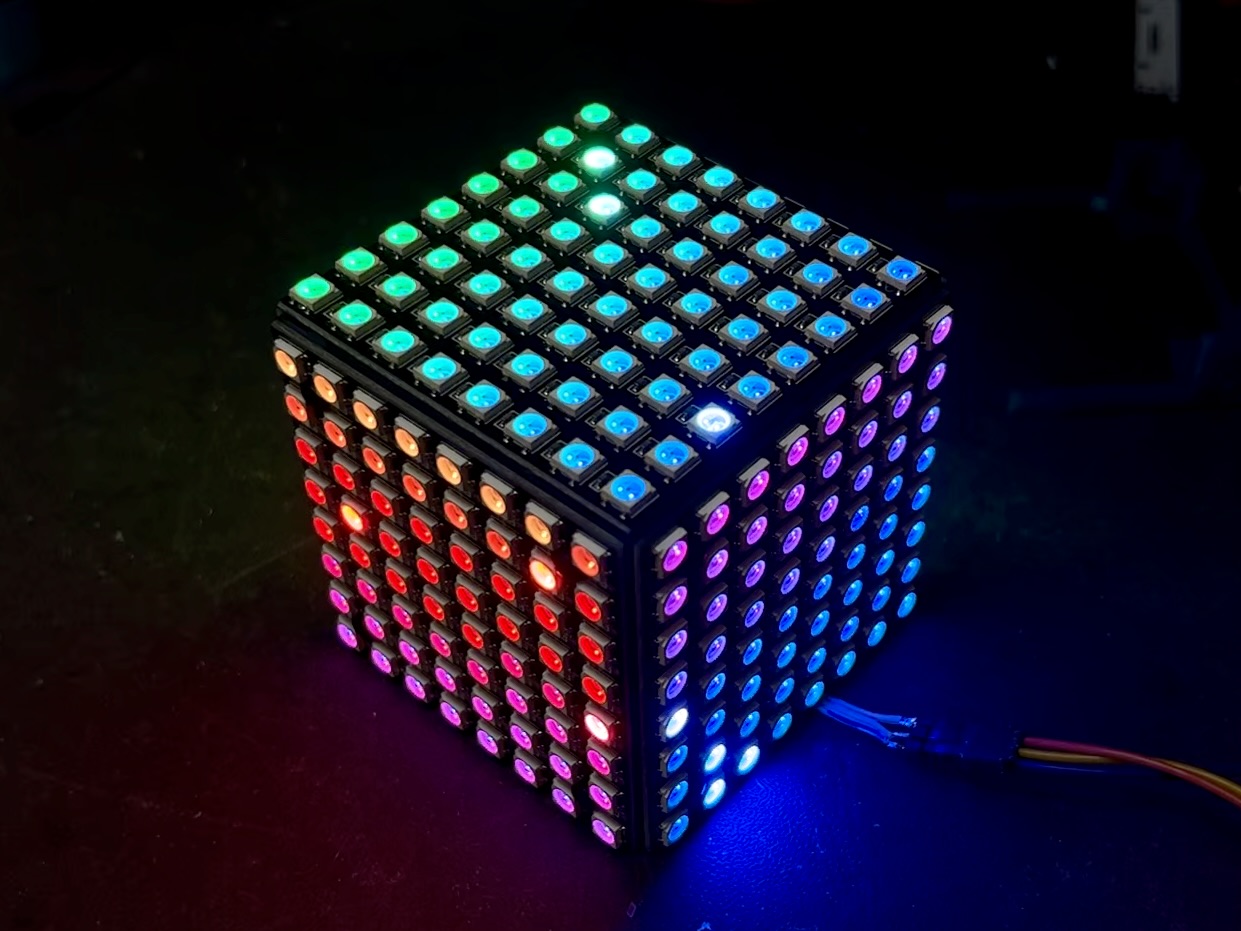
<p>Here's how to build a simple RGB LED cube using cheap 8x8 WS2812 / Neopixel LED panels. The design is a single 3D printable piece, printed four times, that screws to the panels and forms a frame to hold them in place.</p><figure class="media"><oembed url="https://youtu.be/wjaaHKXSu0w"></oembed></figure><p><strong>Parts Needed:</strong></p><ul><li>4 x prints of “ledcube_side.stl” </li><li>6 x WS2812 8x8 RGB LED panels (<a href="https://amzn.to/3QAj5HE">exact ones from Amazon ones I used</a>, 3 for $12!)</li><li>24 x M2.5 black nylon nuts (from <a href="https://amzn.to/3xBqcXq">this assortment</a> or <a href="https://www.adafruit.com/product/3299">from Adafruit</a>)</li><li>24 x M2.5 x 6mm black nylon screws</li><li>stranded hookup wire</li><li>microcontroller (I like <a href="https://www.adafruit.com/product/4900">Adafruit QT Py RP2040</a> & <a href="https://www.sparkfun.com/products/18288">SparkFun Pro Micro RP2040</a>)</li></ul><p><strong>Build Steps:</strong></p><ul><li>Print 4x “ledcube_side.stl” at standard 0.02mm resolution</li><li>Insert nylon nuts into their wells of the part, use a drop of CA glue to hold them in place</li><li>Solder thin wires to the OUT pads on the LED panels (start with middle pad, it solders faster since less copper than V+ & V- pads)</li><li>Route the wires through the printed parts, solder the wires to the IN pads of next panel</li><li>Repeat until all wires are soldered</li><li>Attach panels to printed parts with screws, being careful to pull in wire slack</li><li>Note: the top & bottom holes have some alignment issues, so you may want to attach those panels with a single screw and/or double-sided tape</li></ul><p><strong>Coding:</strong></p><p>By far the easiest way to get started with Neopixels / WS2812 LED is CircuitPython. Below is the code <a href="https://twitter.com/todbot/status/1536870075621289984">I used in the demo above and on Twitter</a>. Both <a href="https://learn.adafruit.com/adafruit-neopixel-uberguide/python-circuitpython">Adafruit</a> and <a href="https://learn.sparkfun.com/tutorials/addressable-led-strip-hookup-guide">SparkFun</a> have really good guides on WS2812 LEDs.</p><p> </p><p> </p><pre><code class="language-plaintext"># The Cube of Rainbow Torment - 14 Jun 2022 - @todbot / Tod Kurt import board import neopixel from adafruit_led_animation.animation.rainbowsparkle import RainbowSparkle leds = neopixel.NeoPixel(board.TX,64*6,brightness=0.2,auto_write=False) rainbow_sparkle = RainbowSparkle(leds, speed=0.1, num_sparkles=15) while True: rainbow_sparkle.animate(show=False) leds.show()</code></pre><p> </p>
With this file you will be able to print Cube of Rainbow Torment: LED Cube w/ cheap WS2812 / Neopixel panels with your 3D printer. Click on the button and save the file on your computer to work, edit or customize your design. You can also find more 3D designs for printers on Cube of Rainbow Torment: LED Cube w/ cheap WS2812 / Neopixel panels.