Cubic Duck
prusaprinters
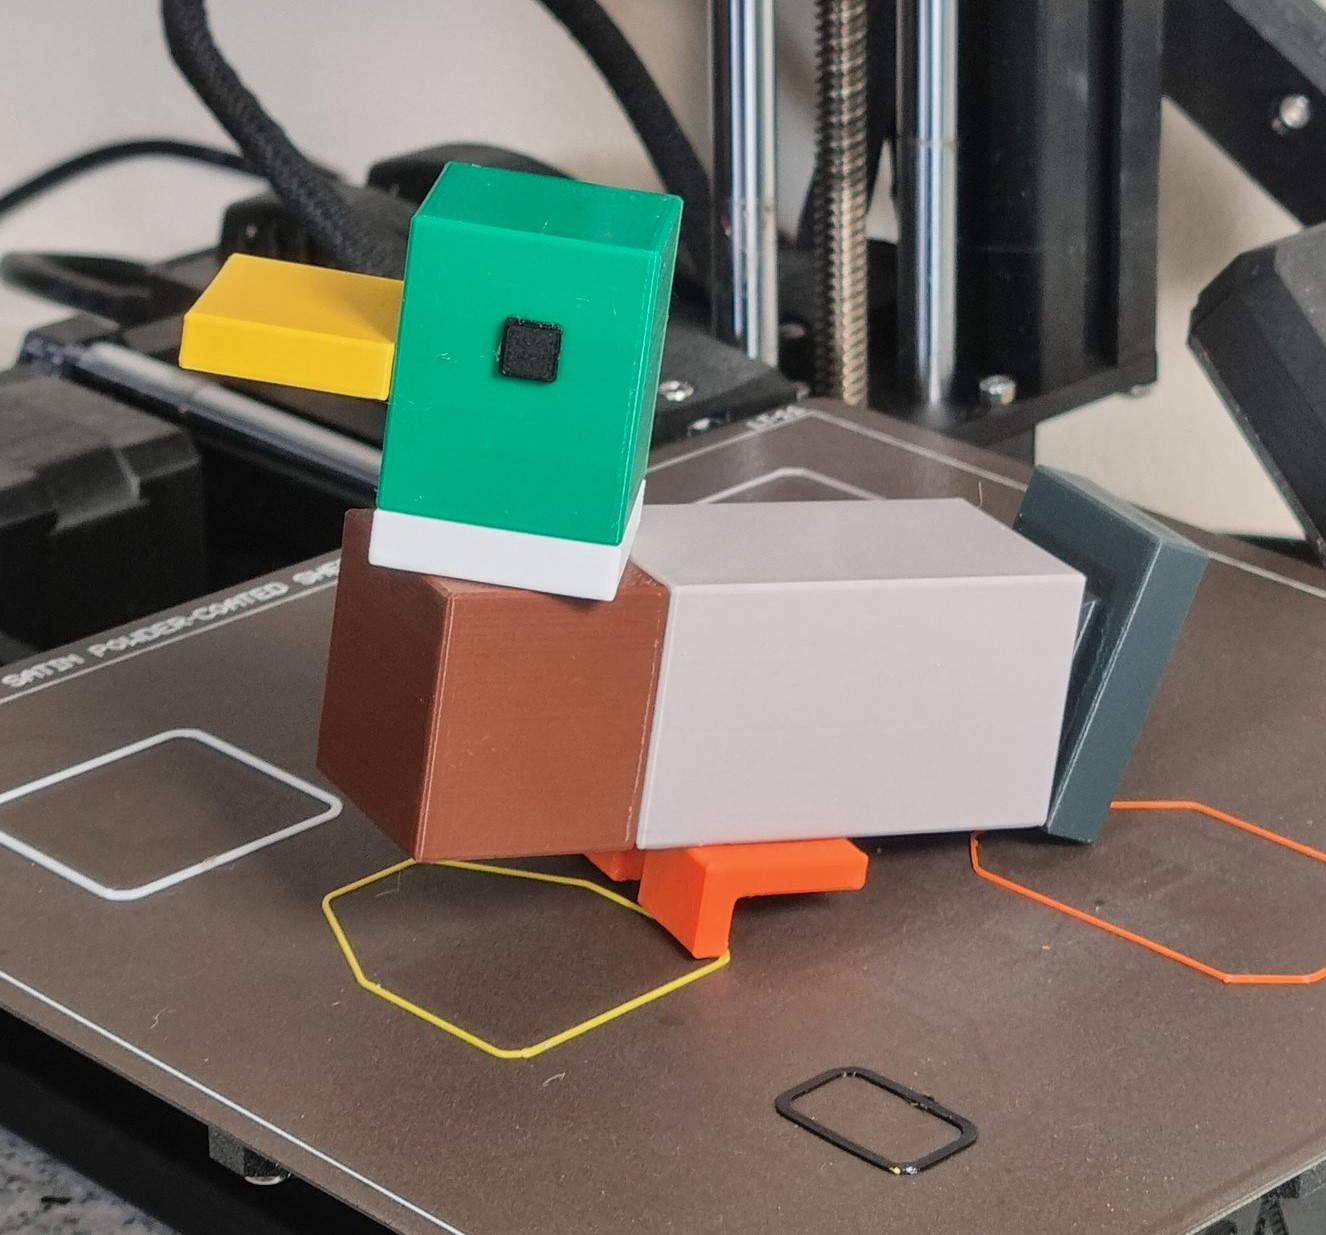
<h3>Overview</h3><p>A cute cubic style duck for you to print, as featured on PrusaLive #26.</p><p>The head rotates and the tail can be angled, all the the other joints are not designed to be disassembled once they are fitted together.</p><p>Please post photos and feedback of any prints you make; did the tolerances work for you? If it gets enough likes I'll be motivated to sort out an upload the parrot, and perhaps work on a few more species :)</p><p>Based on the art of <a href="https://www.behance.net/gallery/70342567/CuBirds-game">Kristiaan der Nederlanden</a>.</p><h3><strong>How to Print (easy)</strong></h3><p>The easiest way is with the pre-sliced g-code - load each one up in turn in the appropriate colour and print.</p><p>The pieces are designed to print without generated support or rafts, with PETG on the Prusa Mini/Mini+ with the satin sheet. If you have problems then see the Advanced Printing section below for tips.</p><p>The Head piece will colour change (M600) at the appropriate layer to allow you to change from white to green.</p><h3><strong>Assembly Instructions</strong></h3><p>The Chest part has two printed supports within the socket, this can be broken with a craft knife or side clippers. It doesn't need to be tidy in there as you'll never see it again, just separate the top from bottom to allow it to expand as the peg is inserted. I've printed the feet at the same time, but you may wish to print them individually to minimize clean-up from stringing.</p><figure class="image"><img src="https://media.prusaprinters.org/media/prints/67296/rich_content/645a3802-594e-4a6c-9ea5-6cf5995de9da/image.png#%7B%22uuid%22%3A%22326c116d-2e0c-46a5-8135-a0e08bd7099d%22%2C%22w%22%3A1276%2C%22h%22%3A1194%7D"></figure><blockquote><p><i>The red parts here are the supporting parts that need to be cut or removed prior to assembly</i></p></blockquote><p>If you are painting the print instead of using coloured filament, then be sure to mask off the connectors or else the paint could interfere with the fit.</p><p>The pieces should snap together under moderate pressure - </p><ul><li>Connect the chest, head and body together first in case anything breaks - if necessary apply gentle heat to the sockets to soften the plastic a bit before assembly.</li><li>The eyes are a friction fit, with any stringiness from the print helping to hold them in place - a dab of superglue can make them permanent.</li><li>The beak has a top and a bottom - there is a slight taper on the top of the clip so you can't see the join from the top of the model.</li><li>The feet go in at a bit of an angle, but snap flat as they lock into place - just get them facing the right way.</li><li>The tail needs a little bit of pressure to seat it, and it can repeatedly be inserted, repositioned or removed. I could have made it a lock-fit like the other joints, but liked the ability to pose for just a little bit of added character.</li></ul><h3><strong>Finished Model</strong></h3><p>Thanks to the great Prusament range, the brown is the only colour that you need to source from elsewhere. I used a Filatch chocolate brown PETG that was available on ebay, which ended up printing fine with the Prusament PETG settings.</p><figure class="image"><img src="https://media.prusaprinters.org/media/prints/67296/rich_content/10d68099-b24e-4c48-8a83-750efbd07a64/image.png#%7B%22uuid%22%3A%22fc5d9b8b-f48a-42cd-90b1-4d4816885d8d%22%2C%22w%22%3A1504%2C%22h%22%3A1113%7D"></figure><h3><strong>Advanced Printing</strong></h3><p>In general I used the Prusament PETG 0.15 detail profile with a 0.4mm nozzle, Ironing (top surface only), Detect Bridging Parameters and Thin Wall Detection enabled to generate the print files. Part orientation should be as the ‘All Parts.3df’ file. A few parts need some modifiers applied, as detailed below - Rectilinear or Grid infill is needed on these parts as the infill has to bridge on them.</p><p>The model is modelled to tight tolerances, with little ledges and steps to assist with the locking of parts together. I ended up modelling it at half size, so scale the .stl files to 200%. Just be aware that if it is scaled differently to 200% or printed from different materials, the deformation characteristics may be sufficiently different that small offsets or tweaks are needed to get it to fit together perfectly.</p><h4>Head</h4><p>The head is possible the most complicated part - the socket should have a modifier to prevent support material from attaching to the side of it to allow it to expand radially as the peg is inserted. However, immediately above it there needs to be support to prevent delamination from the forces as the Chest is inserted. A carefully placed cylinder modifier with 0% infill does the job.</p><p>In addition to this, a colour swap occurs at the bottom of the chamfer to change from the white to green.</p><figure class="image"><img src="https://media.prusaprinters.org/media/prints/67296/rich_content/5080f652-16d2-49d2-b893-4a64a94c1ada/head-print-setup.jpg#%7B%22uuid%22%3A%22db78be42-2d5f-45e7-af69-abca50fbdd65%22%2C%22w%22%3A3649%2C%22h%22%3A1892%7D"></figure><h4>Chest</h4><p>Again the socket should have no surrounding material, with the added complication that the very bottom needs support, so I used stacked modifiers to achieve this - one removing the infill and the second adding it back in where needed. Ironing can also be disabled for this part as it is mostly hidden (or set it to the topmost surface of the cube).</p><figure class="image"><img src="https://media.prusaprinters.org/media/prints/67296/rich_content/d1f21d86-5506-4e50-a5fa-31a555ee758a/chest-print-setup.jpg#%7B%22uuid%22%3A%2238bfa380-4dd0-443c-ae85-c0a669708ab0%22%2C%22w%22%3A3421%2C%22h%22%3A1691%7D"></figure><h4>Body</h4><p>The peg on this will print fine without supports - may look a bit ugly on the underside due to the extreme angle but is hidden when assembled and does not affect the joint strength. Feel free to add support if you prefer - it won't hurt.</p><figure class="image image_resized" style="width:62.17%;"><img src="https://media.prusaprinters.org/media/prints/67296/rich_content/5aee70df-4d3d-4f86-944a-18cc9e748c76/image.png#%7B%22uuid%22%3A%22fdd3fd60-cfbf-4db5-88e7-98bf826dafe1%22%2C%22w%22%3A1938%2C%22h%22%3A1491%7D"></figure><blockquote><p>The lower side of the peg is shaved off to prevent a full overhang</p></blockquote><h4>Tail</h4><p>The only danger with this part is that it is quite tall with a small footprint, so you might want a raft if you have bed adhesion problems. It's easy to remove though.</p><h4>Beak/Bill</h4><p>Since this is a thin part in a light colour, it may benefit from an extra layer or two or denser infill. Experiment with your filament, but decide before you assemble as removing it from the Head is a destructive process.</p><h4> </h4><figure class="image"><img src="https://media.prusaprinters.org/media/prints/67296/rich_content/26c91bd3-d8c7-4f6f-8803-a86626dc35f5/image.png#%7B%22uuid%22%3A%22e85f8a1b-e386-43b3-9ad7-77335936609b%22%2C%22w%22%3A1698%2C%22h%22%3A1226%7D"></figure><blockquote><p>The tiny edge chamfers are to small to really see when printed, but take the sharp edges off the print</p></blockquote>
With this file you will be able to print Cubic Duck with your 3D printer. Click on the button and save the file on your computer to work, edit or customize your design. You can also find more 3D designs for printers on Cubic Duck.