Cubic lounge system - outdoor furniture
thingiverse
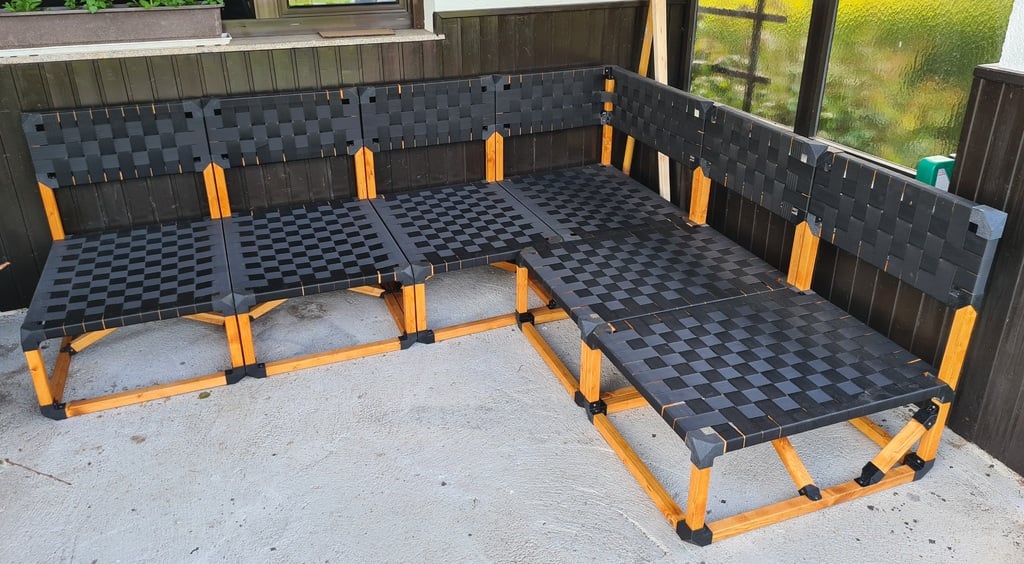
> In advance: > The stability of the furniture depends on the dimensions and materials you choose. I take no liability for the piece of furniture you build or consequential damages from it. I was looking for new furniture for our terraces, but I felt that the prices for lounge furniture are extremely high, and I could not find anything I liked (at the time I was already thinking of building it myself, so this may be biased). Here the project starts, I'm not sure whether it is cheaper than a purchased piece of furniture, it depends how much they are at your place and which one you would buy. Nevertheless, do it yourself and with 3d printing is just fun. The project is designed so that almost anyone can do it. That means: - Easy printing (no support, etc.) - No special tools - Easy assembly First you need to choose the cushions, these give the diemnsionen of the lounge. If you have some at home, you can measure them. I used a set that is designed for EURO pallets and since they are so popular it is also cheap. [https://amzn.to/3V9WVP1](https://amzn.to/3V9WVP1) * Next you need to choose the wood. When it comes to the type of wood you need to make sure that it is suitable for outdoor use and weathering. For the dimensions, use a square format. I used 34X34 mm because my local dealer had this in stock. If the format you use is not yet in the downloads, let me know, I will create the models for it. Now print the test part (#0 testmodel) start with the smallest tollerance and try to push the test part over the profile, it should not go strongly but a good fit. If you are not satisfied, print the next tollerance and try this one. But note that wood changes its dimensions when it absorbs moisture. You should optimize the fit on the push-on parts, the parts with outlets have an additional tollerance of 0.2 mm so that there is no pronlem when pushing the wood through. Now you can start printing. I added an Excel file that makes it easier for you to see what lengths and quantities of wood and print parts you need. Adjust the BOM to your dimension. (yellow marked fields) Since I was using PETG and the surface (at least for me) was not as good as I would like, I used the Fuzzy skin Oprion (Prusa Slicer / Super Slicer). The result speaks for itself (but you have to do this even on the test part because it is a bit bulky). Since I have a textured print bed this fits perfectly together 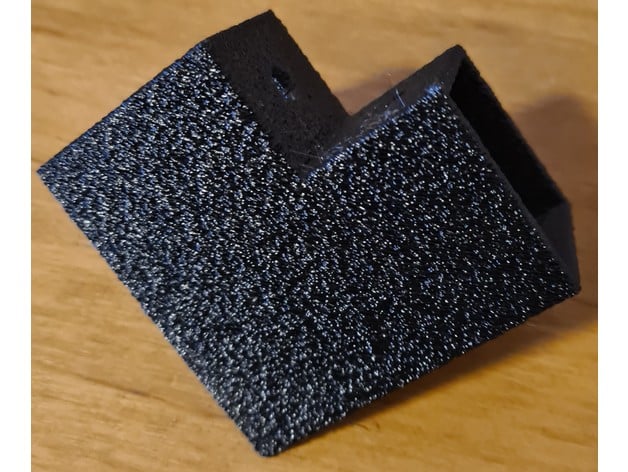 After all parts are printed and the wood is cut to length and painted, you can start assembling. I do not want to create a detailed tutorial because even I make mistakes and so it should only show how I did it. First I put the base part together, for this you need 4X part-1 and the corresponding wood. Since these have no real load-bearing function, you can use the "worst" ones here. 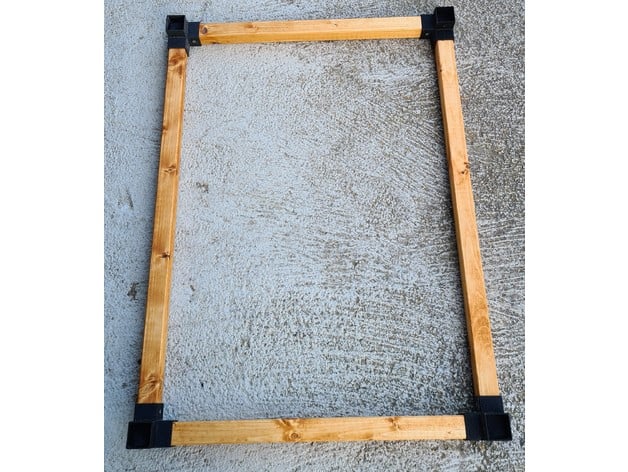 **Be careful when pushing the wood into the printed parts, if they become wedged, the printed part can break because you are applying an extreme amount of force to a comparatively small area. this does not happen in normal use.** Next, assembled the seat, screwing the front supports right in, and only passing the rear ones through later. For this you need two times dat part-3 and once each 4 and 5.  Part 4 and 5 are ment to hold with carriage bolts to the backrest, these should point with the head to the rear, accordingly the 4-cornered hole of the parts must point to the rear in each case.  Now the back rest is screwed and put on, I first screwed the lower part with the print parts 6 and 7, I aligned the shaft upwards so that it is a mirror of the upper parts. 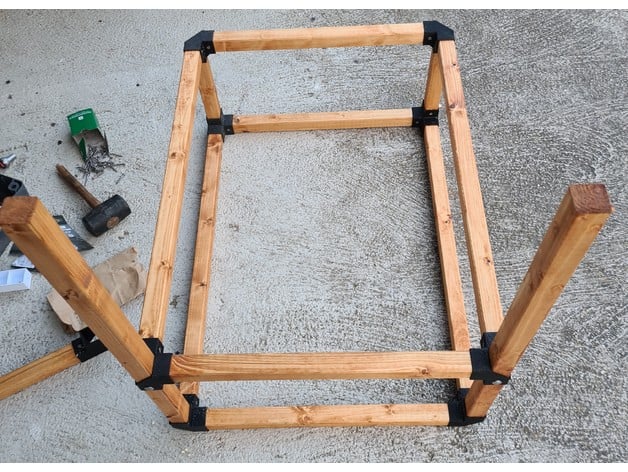 Same with the upper part of the back, the part 2 is needed twice for this. The next step are the struts for the backrest. I have planned it that the outer segments each have a single and a duo strut. the duo not only supports 2 segments, it also connects them. You must therefore mount two supports on the outer segments and only one on each of the other segments. 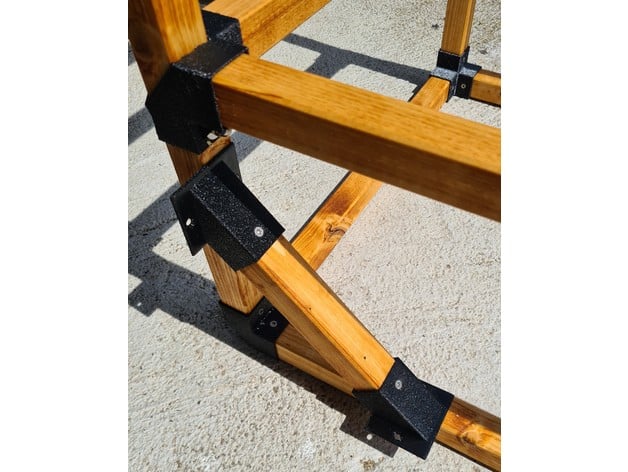 For me, it was easiest to completely mount the double support first on one segment and then screw it to the second later on. 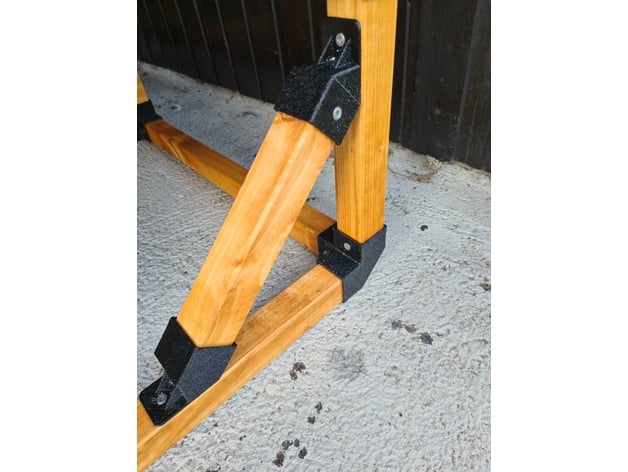 The next step is the belting of the seat as well as the backrest. I used 5cm polypropylene bands for this: [https://amzn.to/3pUhovU](https://amzn.to/3pUhovU) * The width of the straps should be matched to your dimensions, first calculate at what width you have a small distance between the strips but also not too much. furthermore, if possible, an odd number of strips is recommended because then the last cross-belt is the same as the first. To determine the length you can get help to hold the belt in position on one side while you take the diemension on the other side. Once you have determined the length, you can start cutting. After you cut the belts you will notice that the fibers are loose at the end and the belt wants to unravel. To prevent this, you should "seal" the cut edge, the easiest way to do this is with a torch. but do this outdoors because you are basically burning plastic and the fumes are anything but healthy, 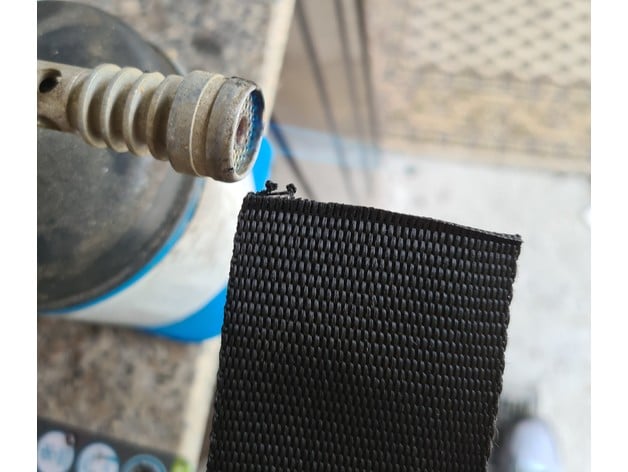 Now you can start to mount the belts, you need a stapler. First start to mount one direction on one side, pay attention to the distances, otherwise you may have too much or too little space for the last belt on one side. One important thing is that the belts are tightened around all sides, this way the staples are not visible and you increase the friction which keeps the belt in position (the staples alone would not be able to do this). 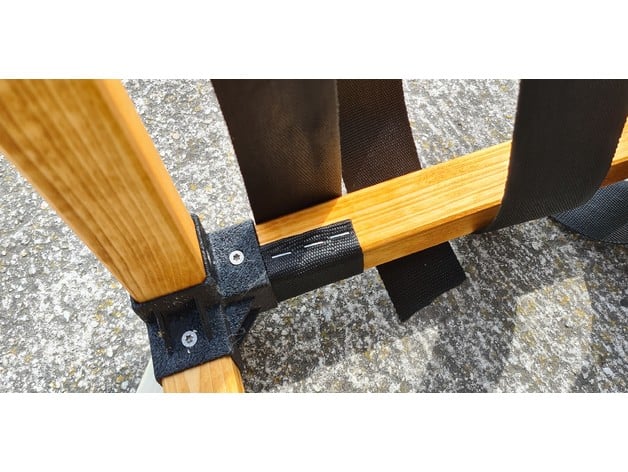 To increase the thickness of the belt at the position where the staples are, you should wrap the belt. This will give you the best result.  Once you have all the belts mounted on one side, turn the segment over and start tensioning them and attaching to the other side.  When completed one direction, it is time to attach the other direction, starting as before. However, before you attach the belts to the second side, you need to create the checkerboard pattern. This is very easy and quick. First take every second beltand hold them together. then start braiding.  The belts you have left out at first, must now weave in individually and of course in the opposite direction to the already braided. In the end you have a nice checkerboard pattern and you will notice that the structure is already supported, although the straps are not yet tightened or attached. Finally, tighten the straps (as much as possible) and secure them with the staples, repeat the entire process for the backrest.  You can now try the seat. However, it is important that you check whether you need a stabilizing cross or not (You will feel it if it is a stable construction or can be moved). This depends on the one hand on your dimensions and on the other hand on the type of wood. Since the angles depend on your dimensions, I have uploaded a Fusion 360 file (Lounge Cross v14) that allows you to create the necessary print parts. Take the dimensions of your segment. The seat height and the width of the segment are the outer dimensions of wood to wood. Transfer these into the Fusion File then the angles and distances should be calculated correctly.  In the component cross in the sketch7 you can see the dimensions of the wood you need to build the cross.  The cross is now inserted, you should place it in the middle, it will be strong but it should also bring tension into the construction, if it is too much you have to shorten the wood slightly. First put in the long part and then the two short ones. I made it so that the connector is closed at the front.  And yes the staples look a bit wild but as I said you dont see them, the important thing is the tension of the belts. With part 8 you can connect the segment where you like. I hope you like the project and if you have any questions just contact me. > The links marked with an asterisk (*) are so-called affiliate links. If you click on such an affiliate link and buy through this link, I get a commission from the respective online store or provider. The price does not change for you.
With this file you will be able to print Cubic lounge system - outdoor furniture with your 3D printer. Click on the button and save the file on your computer to work, edit or customize your design. You can also find more 3D designs for printers on Cubic lounge system - outdoor furniture.