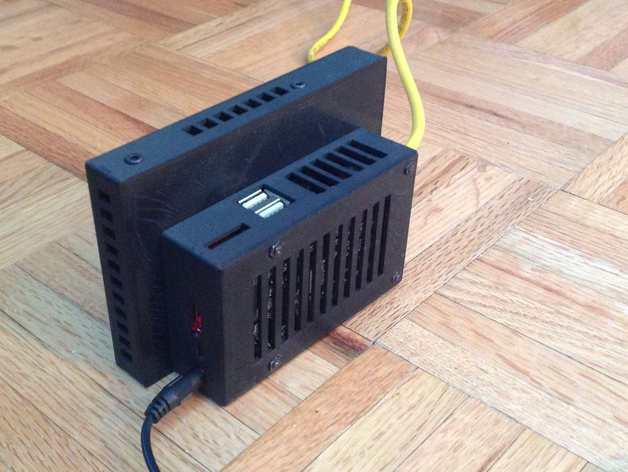
Cubieboard NVR case
thingiverse
Network video recorder (NVR) solutions in the market cost a fortune. Just a software license for NAS-based solutions are >$50/camera, and custom hardware solutions are in the thousands of dollars. So I decided to custom build-one. Total cost: about $140 (including SD card and power brick). That's less than just software license costs for four cameras (and there's CPU cycles to spare, for more cameras), and an order of magnitude cheaper than typical custom hardware! I used a Cubieboard2 (AllWinner A20 dual-core ARM, 1G RAM), a 2.5" 500G HDD, and Zoneminder. It can handle four standard-def (VGA) MJPEG streams (Foscam cameras) in modect mode (1 zone each) at 1fps, with cycles to spare (load avg is high due to I/O, but each core doesn't seem to go above 20% max, usually much lower than that). YMMV with different video formats and cameras. Cubieboard parametric model. In addition to the case, cubie-nvr.scad also has a model of the Cubieboard, with outward extension and slack parameters for connectors, so you could use it to cut out holes in your own case designs. Note that OpenSCAD seems to have issues rendering some parts in preview (F5), but all works fine in final render (F6). Instructions Case Print all three parts. Clean out holes. Test fit everything. Insert four M3 nuts in base holes at bottom. Insert Cubieboard into base part. You may need to file audio jack holes slightly (PCB should be tight but should insert without force -- it you find you have to push too hard, then probably the audio jacks are not going through their holes). HDD part screws onto bottom part. Use four long M3 screws and thread: HDD case part, spacer cylinders, then base part with PCB. Screw onto nuts previously inserted. Insert SATA+power cable into Cubieboard, then insert HDD into HDD part, screw (6mm M3 screws, two are enough, you can use all four holes though) and route cables (it's tight, but they fit). Lid is simply friction-fit. You may need to file rim corners slightly (just enough so it lid goes in, but not too much so it's loose). The case was a quick job, to get the NVR together. It could conceivably be used without the HDD part (you'd just need to add a couple of mm height and modify lid dimensions). I was just in a hurry and too lazy to do these minor mods. Case isn't the cutest thing you've seen, but I was going for function over form (I wanted all ports easily accessible), and this was the only layout I could come up with that works. My HDD is a WD Blue 2.5" Slim drive, nice and quiet. Case should be ok with standard height 2.5" (not tested) and it should be easy to modify source. If you need a power brick, the Amazon Basics one is rated for 2A, decent quality, and just $9. Software These are not meant to be complete instructions, but this is a fairly standard install. Basically: Install your distro of choice (I used Cubian, very nice -- installs on either SD or built-in NAND), configure network, create HDD partition and edit /etc/mount, etc etc. Note that you can assign the cubie a fixed MAC by editing /etc/network/interfaces. Install zoneminder (apt-get install zoneminder). Move zoneminder cache (/var/cache/zoneminder), log (/var/log/zm), and tmp (/tmp/zm) directories to the HDD partition. Update symlinks in web dir (/usr/share/zoneminder) and configuration (via web interface). Set up Zoneminder following instructions for whatever camera you have (can't help you there, but there's lots of info on the web). Move mysql data dir (/var/lib/mysql) to HDD partition and edit /etc/mysql/my.cnf accordingly. (Re)start apache2, mysql, and zoneminder services, and make sure they come up on boot.
With this file you will be able to print Cubieboard NVR case with your 3D printer. Click on the button and save the file on your computer to work, edit or customize your design. You can also find more 3D designs for printers on Cubieboard NVR case.
