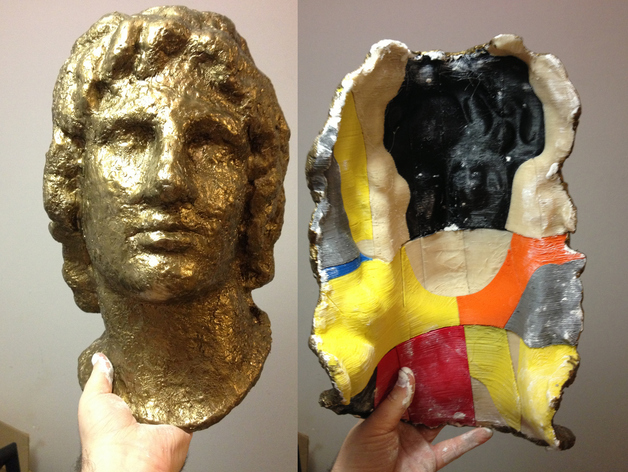
Cupcake Alexander the Great
thingiverse
I've sliced Cosmo Wenman's Portrait of Alexander the Great into smaller pieces for the MakerBot Cupcake. I know that's sort of insane, but I'm seriously underemployed and my Cupcake MK4 w/HBP is all I've got. :) Two sets of files are available: One for stock Cupcakes (39 parts, untested), and one for tall Cupcakes like mine (27 parts). (Zydac's Z-axis upgrade at http://www.thingiverse.com/thing:4716 is very easy and highly recommended.) Big thanks to Cosmo Wenmen for creating this 3D scan. I've always loved making large, multi-part prints (thundercats sword, bathtub u-boat, etc), but his two recent life-size sculptures inspired me to think bigger. When I can afford more plastic I'll attempt some life-size 3D scans of my own! Instructions ||| Production Notes ||| Sliced and printed using ReplicatorG 37 + Skeinforge 35 with raft & exterior support enabled, no shells, 10% infill, .4mm layer height, reduced raft footprint. The parts were split in Netfabb Studio by eyeballing some larger cuts, then cutting them down into mostly ~60mm x ~60mm x < 200mm sections. Many of the cuts are a bit conservative, but the overall shape is kind of an odd one to slice into practical chunks. A few parts use way more support than they would if optimized a bit, but the whole thing uses a lot of plastic no matter what. After that, I arranged the files in RepG for best print orientation, then resaved them all as binary STLs back in Netfabb. ||| Downloads |||alex_stl_tall.zip and alex_stl_stock.zip Contain the full set of STL files for each version, tall Cupcakes (27 parts) or stock Cupcakes (39 parts). alex_gcode_tall.zip and alex_gcode_stock.zip Contain gcode for each set of STL files. Save time if you're using a Cupcake MK4 and heated build platform. alex_skeinforge.zip Contains my Skeinforge 35 profile for this project if you'd like to use it. alex_parts.xlsx A spreadsheet that sorts the parts by group and lists each one's printing time. Has two worksheets: one for tall Cupcakes, and one for stock Cupcakes. alex_assembly_photos.zip A series of photos that show each group of parts during assembly. ||| Printing ||| Print parts in groups according to the spreadsheet. Place groups of parts together in separate labelled containers. I used Ziploc freezer bags. ||| Cleaning ||| Carefully remove rafts and support material from each part. Some parts have very thin sections, and all of them have 10% only infill, so try to be gentle. Stringy bits left by non-stepper extruders can be plucked manually, or "shaved" off by quickly running a craft knife over an area several times. Remove stubborn raft bits and do touchups with sandpaper as necessary. ||| Assembly ||| Work with groups of parts according to the spreadsheet, starting from alex_top_front_head_front. Refer to the assembly photos if you're not sure how parts fit together. Bond parts together using Gorilla Super Glue or your favourite adhesive. (I normally fuse ABS parts together with Plastruct Bondene, but I'm not satisfied with how it performs on low-infill objects.) Use scrap plastic to fill gaps where more glue surface area is desired. ||| Finishing ||| Use Aves Apoxie Sculpt modelling compound to correct join flaws, warping, and to fill in surface areas that came out messy. Coat the rest of the outward-facing surface with the modelling compound. It took me just over three hours to do it, so consider mixing batches of the compound in stages. (It has a working time of 2-3 hours.) Use your own techniques for painting. Applying one coat of acrylic paint shortly after the modelling compound worked well for me. ||| Links ||| Gorilla Super Glue:http://www.gorillatough.com/index.php?page=super-glue Aves Apoxie Sculpt Super White: http://www.avesstudio.com/index.php?page=shop.product_details&flypage=flypage.tpl&product_id=28&category_id=7&option=com_virtuemart&Itemid=7 Aboveground Value Series bronze acrylic paint #54425: https://www.abovegroundartsupplies.com/sagro/storefront/store.php?mode=showproductdetail&product=37869
With this file you will be able to print Cupcake Alexander the Great with your 3D printer. Click on the button and save the file on your computer to work, edit or customize your design. You can also find more 3D designs for printers on Cupcake Alexander the Great.
