Curved illuminator for Ciclop 3D Scanner
thingiverse
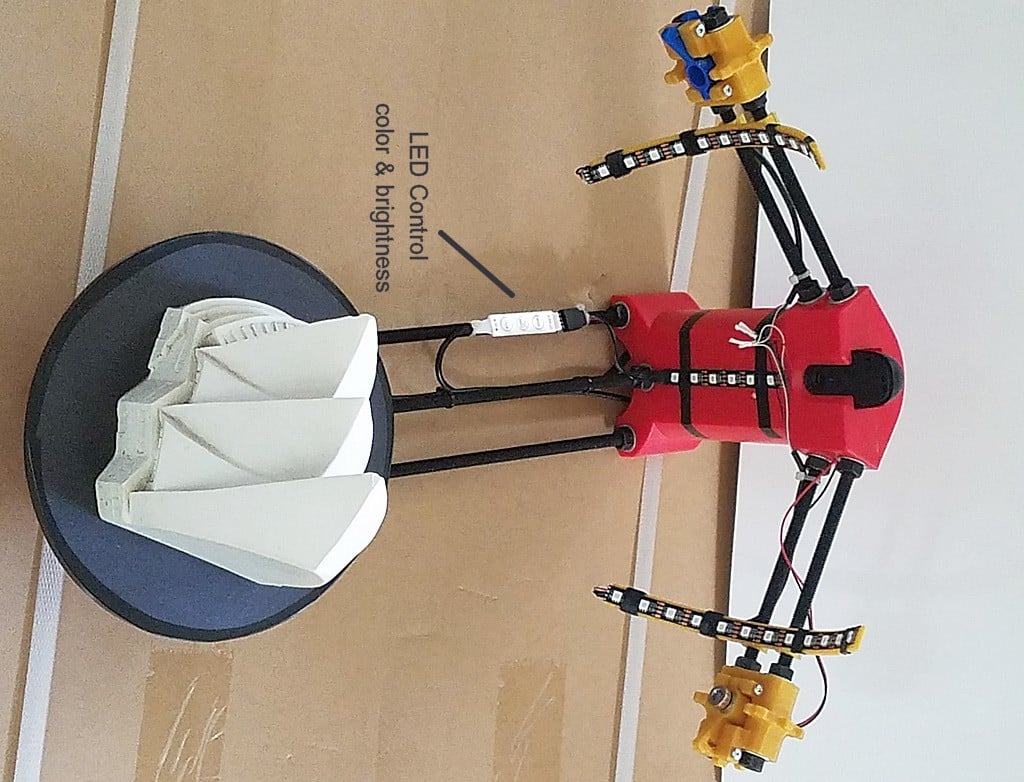
My Ciclop 3d Scanner by BIQU is teaching me a lot about 3D scanning and the limitations of a bargain solution. In an earlier upload I shared an adjustable laser mount to make calibration easier. I also noticed a lot of versions of the Ciclop with strip LED lights along the horizontal laser mounting arms. Having made many captures I soon realized that lighting is a major issue in Ciclop scanning, so I bought a $4 LED strip & control kit from eBay. As I looked at others use of these LED light strips I realized that having them across the mounting arms was too planer and that the captures might be improved by providing illumination from top and bottom as well as center to capture detail above and below over-hangs. So, I modeled a parabolic mount to shine light above and below objects being scanned. The LEDs on the strip appear to have about a 90 degree field or cone of projection... so the 45 degrees off center appears to provide enough overlap so there are no dead spots in the lighting of the object. Th $4 LED light strip included 30 multi-color (RGB) LEDs and a simple little control that provides color and brightness selection. The strip I chose was NOT sealed or watertight on purpose since I wanted to cut up the strips and use their double sticky backs for mounting. This requires some soldering skill since the pads are small and you're working on a thin and lightweight flexible printed circuit board. I used strips of black electrical tape to hold them to my mount and and another layer of tape to dress the wiring. I sacrificed an old wired USB mouse to get its lightweight four conductor wire and used the remaining strip of six LEDs as a center light. The LED strip has pads labeled +5v, G, R, B for Power, Green, Red, & Blue (RGB) between each LED segment. The LED manufacturer used wire from their controller that was Black(+5v), Green, Red, & Blue. The mouse wire was conveniently Black, Green, Red, & White making it easy to keep track of the wiring and soldering work. ( I recommend marking the LED strip connector before disconnecting it so you don't have a awe sh.. moment when you forget how it was attached.) All the connections at the top of the six LED segment are in parallel and you can see the junctions with white 1/8" heatshrink where the top of the strip joins with the wiring from the left and right strips. I made the connections at the bottom of the 12 LED strips to make it less likely they'd get bump and might go back later and paint the connections with 5-minute epoxy to add some strength. The results were a bit surprising. Turns out that having color selection of the lighting can make a huge difference in the quality of a scan. Green and blue lighting were great for the off-white Opera House model. The problem is that there is no easy way to select exact color or brightness... you simply toggle through all of the colors and brightness selections until you find one that improves the scan while Horus is running and collecting data. *** Running Horus in collection mode lets you see in real time how each color and brightness setting effects every current vertical capture line. This lets you rule out colors that create lots of noise points and find colors that provide more solid and less fragmented lines.*** Finding your way back to the same exact setting is annoying and a matter of counting clicks of the button from a known color. Once I found the best color light, I stop the scan and restart with the new color. This parabolic mounting does a good job at lighting above and below over-hangs and snaps onto the threaded rods easily. Too many hours of fun... My choice of the Sydney Opera House as a sample model has taught me a lot about shadows, over-hangs, and obscured features. Now, I need to explore Meshlab and learn how to register and combine multiple scans of the same model from different angles to see if I can get useful scans from the Ciclop, or just chalk it up to a educational toy?? Please write back if you have advice on combining Meshes using free software....
With this file you will be able to print Curved illuminator for Ciclop 3D Scanner with your 3D printer. Click on the button and save the file on your computer to work, edit or customize your design. You can also find more 3D designs for printers on Curved illuminator for Ciclop 3D Scanner.