Custom Logitech C270 Lens Case, Mount & Stand
thingiverse
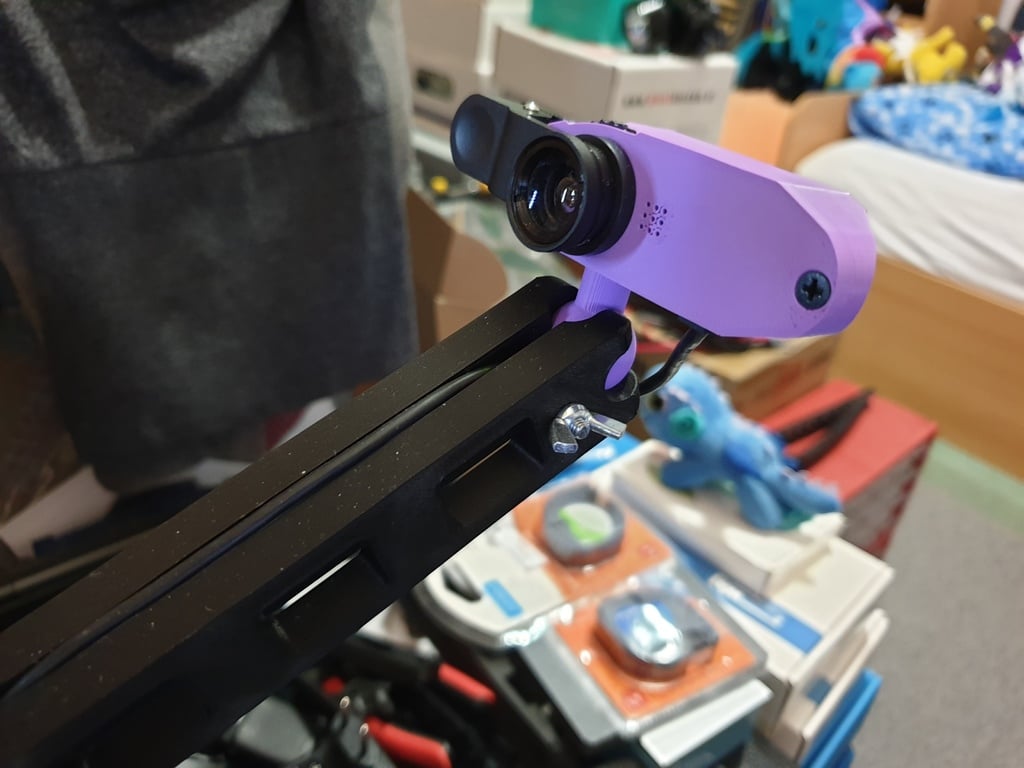
A custom case for the Logitech C270 webcam! Comes with a focusing knob, slot for a custom lens kit, clamp mounting and more! **WARNING: Using this case requires you to destroy the original webcam's housing and void your warranty. I am not responsible for any ruined webcams.** NOTE: The NR and Luna logos are not included in the final STLs. They are logos of my printer and my smart home Discord bot system respectively. You can add your own text using the provided Blender file however. **Features** * A completely custom case for the Logitech C270 webcam electronics. * Focusing knob which allows you to adjust the focus of the webcam. * Slot for a cheap eBay phone lens kit. Allows for a wide angle upgrade! * Easy and flexible yet stiff mounting solution. Can use a clamp mount for tables or aluminium profile mounting. * Also comes with the original C270 holder in case you want to skip on disassembling your webcam. **Required Components** * 1x **Logitech C270 webcam** - Obvious... * *Optional* 1x **eBay Phone Lens Kit** - In case you want to upgrade to wide angle. Doesn't have to be exactly like the one in the link, as long as it has exactly the same shape when ordering. [Link (ebay.co.uk)](https://www.ebay.co.uk/itm/254418997984) * 2x **M3x10 screw, countersunk** - Used to assemble the new webcam case. * 2x **M4x30 screw, countersunk** - Used for the arm. * 2x **M4 nut, hex shaped** - Used to tighten the arm screws. * 2x **M4 wing nut** - Used to adjust the arm screws later. * *Optional* 2x **M5 Aluminium Profile Mounting** - You will need this if you decide to mount it on an alu profile. **Parts To Print:** The list below shows which parts are required for what. The filenames carry these same names for ease of finding what you want. * **Camera Parts** - These parts are needed to assemble the new webcam case. The Back part requires supports. * *Optional* **Original Parts** - These parts are optional. You can print them in case you want to completely skip disassembling your webcam. A simple mount for the camera, from the original [Ball and Socket Webcam Mount for Logitech 270/310](https://www.thingiverse.com/thing:2368146). * **Arm Parts** - These two halves are used to assemble the arm which allows you to position the webcam. * **Clamp Parts** or **Mount Profile** - Depending how you want to mount your camera, you may either print the clamp or the aluminium profile mount. Clamp parts are made out of the frame, screw and a joint. The joint comes in two versions: loose and tight. I suggest printing both and checking which one fits better. The profile version is designed to be mounted on a standard aluminium profile using standard mounting solutions. **Printing Instructions** * Supports are needed for Camera_Back.stl, Original_Holder.stl, Clamp_Frame.stl and Mount_Profile.stl. Basically all the parts which have the large joint ball on them. * Print all parts exactly as already oriented to maximize quality, strength and ease of printing. * You may use 20% infill for all parts. * You may print all parts at 0.2mm layer height. **Assembly Instructions** Camera Case: 1. Print all of the necessary parts. Use the explanation above to decide what to print. 2. Disassemble the Logitech C270 webcam. 1. The front plate is held by little clips and you can just easily clip it off. 2. Remove the screws holding the plate below in place and remove the plate. 3. Remove the two screws holding the electronics board inside in place and remove the board 4. Cut into the webcam's case to release the USB wire. This seems to be the only way to get it out. 5. Remove the rubber "tube" on the microphone. 6. Remove the glue which holds the camera's focus ring in place. This part is tricky. It seems that newer cams are better glued together than the previous ones. Force may be necessary, but **don't break your camera**. 3. Insert the C270 electronics into the Camera_Back.stl and tighten it using the original screws. 4. Place the Camera_Focus.stl onto the camera module. Check and make sure it turns freely. The raised lip should face towards the electronics. 5. Cover the electronics and all using Camera_Front.stl. Use two M3x10 screws to secure the cover. 6. Clip on the phone lens kit. Use wide angle lens of your choice! Arm: 1. Insert the two M4 nuts into Arm_A.stl. 2. Screw two M4x30 screws from the other side, tighten them to the nuts. 3. Press Arm_B.stl against the Arm_A.stl. 4. Use two M4 wingnuts to finish the assembly. Clamp: 1. Screw the Clamp_Knob.stl into Clamp_Frame.stl. 2. Snap Clamp_Joint_Loose.stl or Clamp_Joint_Tight.stl to the Clamp_Knob.stl. Whole Thing: 1. Combine either the Clamp or Profile Mount with the Arm on one side, and Camera case or Original holder on the other side. Should be pretty easy! This is also a good moment to do some wire management and thread the cable through the arm. If you have any questions or found some issues, be sure to comment! I will see what I can do! As usual, I have also included the Blender file in case you want to edit it further.
With this file you will be able to print Custom Logitech C270 Lens Case, Mount & Stand with your 3D printer. Click on the button and save the file on your computer to work, edit or customize your design. You can also find more 3D designs for printers on Custom Logitech C270 Lens Case, Mount & Stand.
