Custom Nameplate
thingiverse
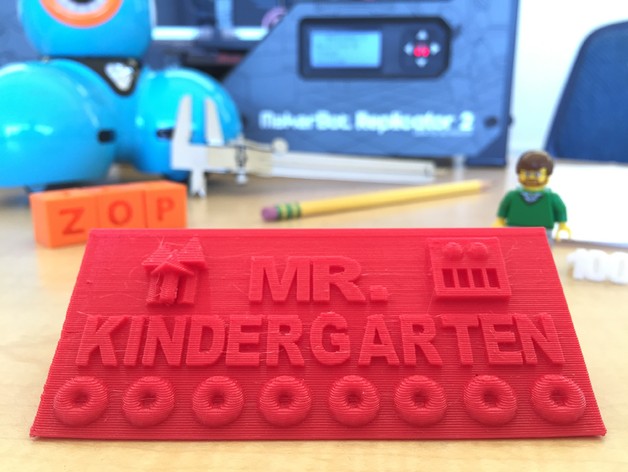
Kids love to personalize their desks. This project allows them to do just that, while learning some design skills, with a custom designed, 3D printed desktop name. How I Designed This I created this thing using Tinkercard, and if working with elementary students new to design software, I encourage you to do the same. Standards NGSS CCSS Overview and Background This lesson, intended to introduce upper elementary students to 3D design and desktop fabrication, could possible be one of the most memorable back-to-school activities of all time! Students share interesting facts about themselves as they create their own customized nameplates, which they can proudly display throughout the school year. Objectives: Students will learn the use of a design program, I recommend Tinkercad, while creating a custom nameplate for their desks. This lesson can also lead to some inspiring writing and presentation skills! Skills Learned (Standards): NGSS: 3-5-ETS1-1 CCSS: (4th) LITERACY.W.4.2, (5th) LITERACY.W.5.2 Lesson Plan and Activity Introduce the lesson by sharing your own custom nameplate, explaining the significance of each design element. For instance, on the example above I would cite the forest as one of my favorite place to go, robotics as a favorite hobby, and doughnuts as a favorite food. Students then complete the graphic organizer to record and/or draw some of their favorite things. This activity can also be done for table groups as a way to build teamship as they come up with a group name and complete the graphic organizer with mutually favorite things. Using the graphic organizer as a starting point, each student will write an essay introducing themselves to the class. These can be read to partners, within table groups, or to the whole class. Extension- Have students create short presentations in which they share facts about themselves and their design process. Introduce students to Tinkercad, or your design program of choice. Give students the time to complete the tutorials and play a bit before diving into their nameplate design. I like to limit the overall dimensions (or if you've covered volume yet, go that route for an added math challenge!) to ensure a reasonable printing size. For reference, my example nameplate is 100 mm (w), 35 mm (d), and 30 mm (h), with a volume of about 52 cubic cm. I encourage not limiting student nameplates to a single shape or profile so long as they are within the overall limit for size/volume. If these are the students' first design it is important to allow them to perform a few small practice prints, such as merging two shapes, if time and material allows. Note- With new designers it is important to do a quick check of their work lest you end up printing many piles of plastic "spaghetti"! Once all nameplates are displayed on student's desks make sure to invite your buddy class or an administrator for a visit to see all of the amazing design knowledge your students have gained (and to justify why you have a 3D printer available to elementary students)! Duration of Lesson 5-10 sessions Preparation This lesson is intended to introduce students to 3D modeling, so no experience is necessary. The graphic organizer included with the thing files above will help students brainstorm what to include on their nameplate. Rubric and Assessment See the suggested rubric in the thing files above for some assessment ideas. References If you choose to frame this lesson as a getting to know you activity, here is a list of chapter books on friendship to consider for whole class read-aloud or small reading groups. http://www.scholastic.com/parents/resources/book-list/families-relationships/friendship-chapter-books
With this file you will be able to print Custom Nameplate with your 3D printer. Click on the button and save the file on your computer to work, edit or customize your design. You can also find more 3D designs for printers on Custom Nameplate.