customizable 3d printed rubi´s cube hard to solve easy to customize
myminifactory
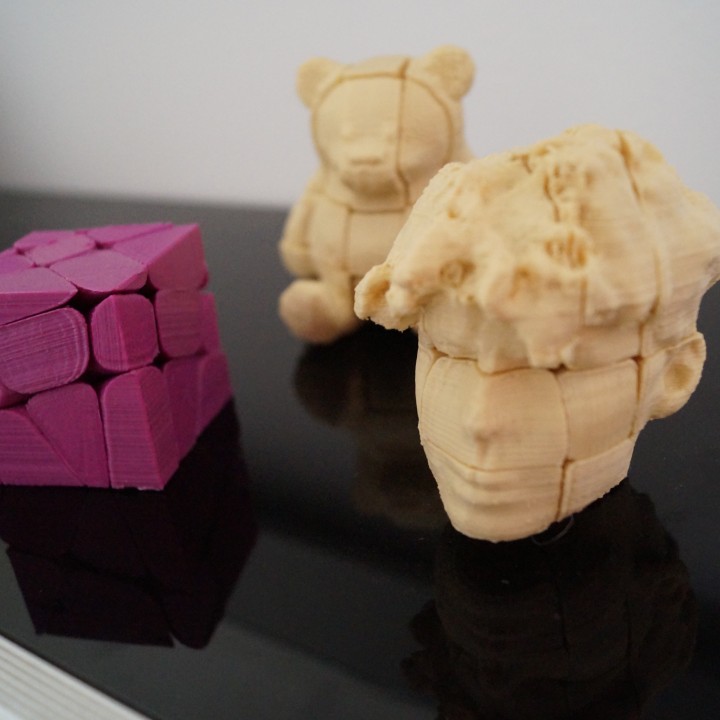
I saw Devin´s make anything puzzle challenge and was excited. Since childhood I loved puzzles. I had hundreds of different wood puzzles. I hoped to find some new puzzles on this challenge entries, but there wasn’t and still isn’t any puzzle I don´t know. I was sad, of course it was amazing to see all my childhood puzzles at one place, but not seeing anything new was sad. So, I decided to make my own Puzzle. Turning out developing a complete new puzzle is hard. Never the less I wanted to enter the challenge. I had no experience in 3d-designing, so I had to tech myself. As help I used Davin’s Puzzle videos and loved the idea from a cookie cutter so everyone can make their own version of your or my design. I decided to make a rubix cube you can only solve by shape, so the 3 dimensionalities of 3d-printing were in focus. It took me 7 versions to get the perfect cookie cutter (additionally my printer decided to make some weird things and didn’t printed well), and now it is working incredible smooth. I’m proud at myself. Even I spend a whole spool filament, my whole holidays and 3 weeks while parallel doing stuff for university in this project. It felt like I didn’t even had time to breath. To cut a long story. Make Anything to a rubik´s cube. To make your own rubik´s cube you need to choose between two cookie cutters. One is rounded so its moving smoother than the other, but the other will look better when using some complex models because it will cut less of your model away. Make Sure the whole cutter center is inside the model and does not lock trough it, otherwise you will get ugly holes, also make sure your model is not bigger than the walls, otherwise the parts won’t get separated. I recommend trying to get your model as small as possible compared to the cutter, if it still doesn’t fit just extrude the walls little bit, but do not change the center. You will need to use the Boolean modifier. If you’re not sure how to use my cutter check out make anything’s puzzle video, he’s explaining the idea behind the cutter principle. The head of my best friend is cutted with the less rounded version, while the cube is cutted with the more rounded cutter. Its your choice, but both will work fine. I added the solid teddy model if you just want to try my cutter or want to cut the Teddy in some weird angles. To print your own rubix. You will need the 26 cutted parts as well as 6 arms, 6 plugs and one center. To as amble make sure you remove all supports. Glue the arms to the center and push them as far in as possible, otherwise you will get a flappy cube. pull the middle parts over the arms make sure you put every piece at the right position, so you will be able to assemble it correctly later, push the plug in, so the arms are fixed, and the surface is smooth to make a smooth moving possible (glue it if you like to). Let dry and start to put things together. Pushing the last in will be little difficult but I did it so you will too. I know it’s difficult to assemble the cube, its like a puzzle itself so you get a 2 in 1 puzzle. I saw a lot of “printable” cubes, but not one was working so to make a stable one I decided to do it my way, even assembling is little bit more difficult. I guess it will live longer. Don´t believe me? Check out my video from finished cube and assemble. thats how it works https://youtu.be/lFKblG4iVYI
With this file you will be able to print customizable 3d printed rubi´s cube hard to solve easy to customize with your 3D printer. Click on the button and save the file on your computer to work, edit or customize your design. You can also find more 3D designs for printers on customizable 3d printed rubi´s cube hard to solve easy to customize.