Customizable Camera Mount for FlexRC Mini Owl Quadcopter
thingiverse
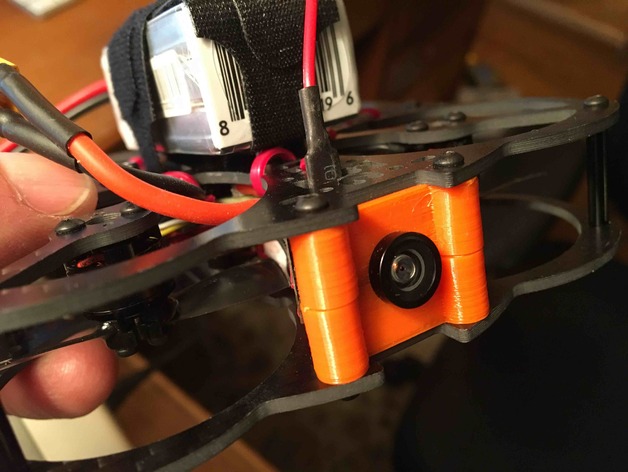
This is a customizable camera mount intended for use on the FlexRC Mini Owl quadcopter. While intended for the Mini Owl, it could probably also be used for the full-sized Owl quadcopters, with appropriate customization via the Customizer. (I do not have a full-size Owl to try it on, but if anyone wants to send me one to test, I'm happy to do so! ;-) It might also be adaptable to other double-plate quads like the Lumenier, etc. The height, width, depth, thickness, hole sizes for camera lens and mounting posts, camera position fore/aft, and camera angle can all be customized. (For instance, my camera has a built-in VTX, so needs to be positioned a little bit forward, so that the props clear the camera body. I also like a little bit of upward angle on my camera - as shown in the photo from the side.) Note that camera angles will affect how thick the mount wall needs to be - a steeper angle will require a thinner wall, while a flatter angle will allow a thicker wall - some measurement and experimentation may be required to find the best fit. The mount will print in an upper half and lower half, for clamping around the camera lens neck. It prints with the lens mounting hole halves facing upward, so no support material is needed. The 'Print Offset' parameter specifies the Y-axis distance on the print bed between the two printed halves of the mount. (Should be fine at its default value, but if you need to change it, you can.) I'm a big fan of printing holes a bit undersized, and drilling/reaming out with a drill bit post-print, as the drill bit tends to provide a much more precise hole size. Print Settings Printer Brand: Printrbot Printer: Simple Black Rafts: No Supports: No Infill: I like to keep it light, so I use 20% Post-Printing After printing, pass the mating surfaces across some fine sandpaper or a fine file, to be sure that the surfaces will mate up snugly and squarely. Drill out the column holes to the needed diameter (I use a #29 drill bit for my Mini Owl support posts.) Place the two halves, with the prepared mating surfaces together and carefully aligned as they will hold the camera, in a vise. Use an appropriately-sized drill bit (I do it by hand, just turning the bit by hand) to open up the lens mounting hole to the smallest size that will clamp fully around the camera lens neck. If you printed the mount to hold the camera at an angle, be sure to preserve that angle while cleaning up the mounting hole with the drill bit. Paying attention to which half should be on the top and bottom (if you printed it an upward or downward angle), slide one half onto the frame posts, position the camera in the mounting hole of that half, then slide the other half over the posts and position the camera as needed (be sure it is not rotated toward one side or the other.) Snug everything down with the frame bolts, and you should be all set. How I Designed This This was designed using the ever-awesome OpenSCAD CSG tool, which is why it is customizable.
With this file you will be able to print Customizable Camera Mount for FlexRC Mini Owl Quadcopter with your 3D printer. Click on the button and save the file on your computer to work, edit or customize your design. You can also find more 3D designs for printers on Customizable Camera Mount for FlexRC Mini Owl Quadcopter.